Choose course language EN
Status: MVP working version
VCA Learning
B-VCA EN — full preparation course
Mock exam pass mark: 65%
Prepare for the VCA/SCC examination with lessons, quizzes and a mock exam. VCA Learning helps you organise your study, track progress and reinforce the knowledge needed for the VCA/SCC examination.
Course categories
The course includes lessons, category quizzes, a mock exam, mistake review, My progress and a safety signs library.
Mock exam
This test helps you assess your preparation for the VCA exam.
My progress
Here you can see your results and basic learning progress.
Safety signs
Browse safety signs and learn what they mean.
B-VCA EN — full preparation course
Safety signs
Browse safety signs and learn what they mean.
Prohibition signs
Mandatory signs
Warning signs
Evacuation signs
Fire safety signs
Prohibition signs
No smoking
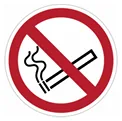
Meaning:
Smoking and the use of smoking products are prohibited in this area.
Prohibition signs
No open flames
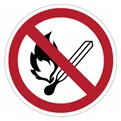
Meaning:
Open flames and activities that could cause ignition are prohibited in this area.
Prohibition signs
No unauthorised entry
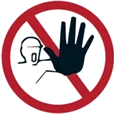
Meaning:
Unauthorised persons must not enter the marked area.
Prohibition signs
No mobile phones
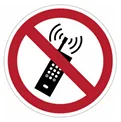
Meaning:
Mobile phones must not be used in the marked area where their use could create a hazard.
Prohibition signs
Do not extinguish with water
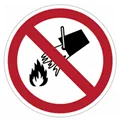
Meaning:
Water must not be used to extinguish a fire or on the marked equipment or substance.
Prohibition signs
No passage
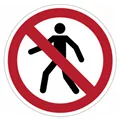
Meaning:
This prohibition sign means: No passage.
Prohibition signs
Do not wear work gloves
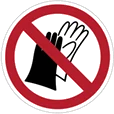
Meaning:
This prohibition sign means: Do not wear work gloves.
Prohibition signs
Do not walk or stand here
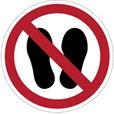
Meaning:
This prohibition sign means: Do not walk or stand here.
Prohibition signs
No photography

Meaning:
This prohibition sign means: No photography.
Prohibition signs
Do not run
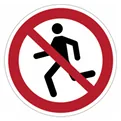
Meaning:
This prohibition sign means: Do not run.
Prohibition signs
Do not use the lift for people
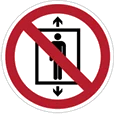
Meaning:
This prohibition sign means: Do not use the lift for people.
Prohibition signs
Not drinking water
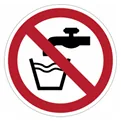
Meaning:
This prohibition sign means: Not drinking water.
Prohibition signs
Do not tie knots in hoses
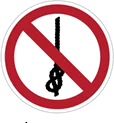
Meaning:
This prohibition sign means: Do not tie knots in hoses.
Prohibition signs
Do not place heavy objects here
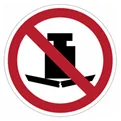
Meaning:
This prohibition sign means: Do not place heavy objects here.
Prohibition signs
Do not use this device in a bath, shower or water-filled container
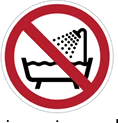
Meaning:
This prohibition sign means: Do not use this device in a bath, shower or water-filled container.
Prohibition signs
Do not use incomplete scaffolding
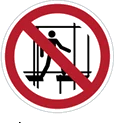
Meaning:
This prohibition sign means: Do not use incomplete scaffolding.
Prohibition signs
No metal objects or watches
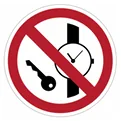
Meaning:
This prohibition sign means: No metal objects or watches.
Prohibition signs
No hot work
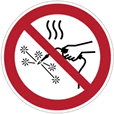
Meaning:
This prohibition sign means: No hot work.
Prohibition signs
Do not switch
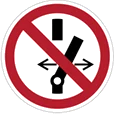
Meaning:
This prohibition sign means: Do not switch.
Prohibition signs
Do not climb
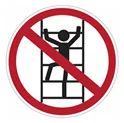
Meaning:
This prohibition sign means: Do not climb.
Prohibition signs
Do not touch
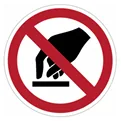
Meaning:
This prohibition sign means: Do not touch.
Prohibition signs
Do not lean
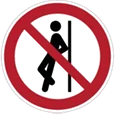
Meaning:
This prohibition sign means: Do not lean.
Prohibition signs
No children
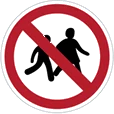
Meaning:
This prohibition sign means: No children.
Prohibition signs
No animals
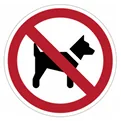
Meaning:
This prohibition sign means: No animals.
Prohibition signs
Do not put hands inside

Meaning:
This prohibition sign means: Do not put hands inside.
Prohibition signs
No entry for people with implants
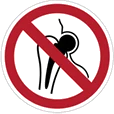
Meaning:
This prohibition sign means: No entry for people with implants.
Prohibition signs
Do not push
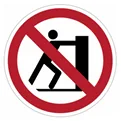
Meaning:
This prohibition sign means: Do not push.
Prohibition signs
No industrial trucks
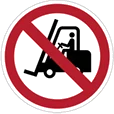
Meaning:
This prohibition sign means: No industrial trucks.
Prohibition signs
Do not sit
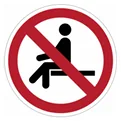
Meaning:
This prohibition sign means: Do not sit.
Prohibition signs
No footwear with metal soles
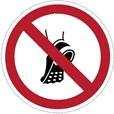
Meaning:
This prohibition sign means: No footwear with metal soles.
Prohibition signs
Do not walk on this surface
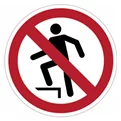
Meaning:
This prohibition sign means: Do not walk on this surface.
Prohibition signs
Do not use the lift in case of fire
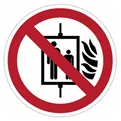
Meaning:
This prohibition sign means: Do not use the lift in case of fire.
Prohibition signs
No food or drink
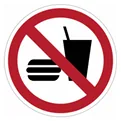
Meaning:
This prohibition sign means: No food or drink.
Prohibition signs
No entry for people with pacemakers
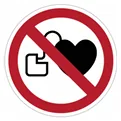
Meaning:
This prohibition sign means: No entry for people with pacemakers.
Prohibition signs
Do not obstruct
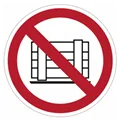
Meaning:
This prohibition sign means: Do not obstruct.
Mandatory signs
Face protection must be worn

Meaning:
Face protection must be worn in this area.
Mandatory signs
Safety helmet must be worn

Meaning:
A safety helmet must be worn in this area.
Mandatory signs
Hearing protection must be worn

Meaning:
Hearing protection must be worn in the marked area.
Mandatory signs
Eye protection must be worn

Meaning:
Safety glasses or other suitable eye protection must be worn in this area.
Mandatory signs
Safety gloves must be worn

Meaning:
Suitable safety gloves must be worn while carrying out the work.
Mandatory signs
Respiratory protection must be worn

Meaning:
This mandatory sign means: Respiratory protection must be worn.
Mandatory signs
Safety footwear must be worn
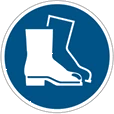
Meaning:
This mandatory sign means: Safety footwear must be worn.
Mandatory signs
Disconnect before maintenance or repair

Meaning:
This mandatory sign means: Disconnect before maintenance or repair.
Mandatory signs
Protective clothing must be worn

Meaning:
This mandatory sign means: Protective clothing must be worn.
Mandatory signs
Face protection must be worn

Meaning:
This mandatory sign means: Face protection must be worn.
Mandatory signs
Safety harness must be worn
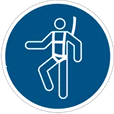
Meaning:
This mandatory sign means: Safety harness must be worn.
Mandatory signs
Smoking permitted here

Meaning:
This mandatory sign means: Smoking permitted here.
Mandatory signs
Disconnect from the mains supply
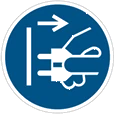
Meaning:
This mandatory sign means: Disconnect from the mains supply.
Mandatory signs
Connect to earth

Meaning:
This mandatory sign means: Connect to earth.
Mandatory signs
Use the marked pedestrian route

Meaning:
This mandatory sign means: Use the marked pedestrian route.
Mandatory signs
Use the walkway
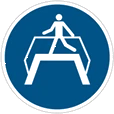
Meaning:
This mandatory sign means: Use the walkway.
Warning signs
Warning: electricity
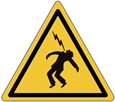
Meaning:
There is a risk of electric shock in this area.
Warning signs
Warning: flammable materials
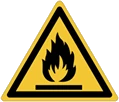
Meaning:
Flammable materials are present; keep ignition sources away and follow fire-safety rules.
Warning signs
Warning: toxic substances
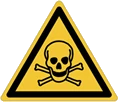
Meaning:
Toxic substances are present; avoid exposure and follow the required protective measures.
Warning signs
Warning: falling loads
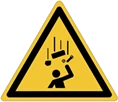
Meaning:
There is a risk from falling or suspended loads; keep clear of the danger zone.
Warning signs
Warning: explosive materials
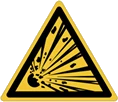
Meaning:
There is a risk of explosion; eliminate ignition sources and follow the required safety procedures.
Warning signs
Warning: moving rollers
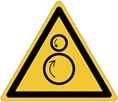
Meaning:
This warning sign indicates: moving rollers.
Warning signs
Warning: risk of falling into water from a moving platform
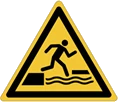
Meaning:
This warning sign indicates: risk of falling into water from a moving platform.
Warning signs
Warning: automatic start-up
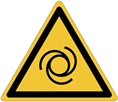
Meaning:
This warning sign indicates: automatic start-up.
Warning signs
Warning: barbed wire
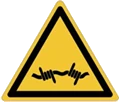
Meaning:
This warning sign indicates: barbed wire.
Warning signs
Warning: oxidising substances
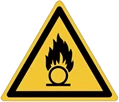
Meaning:
This warning sign indicates: oxidising substances.
Warning signs
Warning: pressurised cylinders
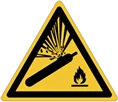
Meaning:
This warning sign indicates: pressurised cylinders.
Warning signs
Warning: tipping hazard
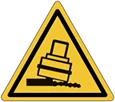
Meaning:
This warning sign indicates: tipping hazard.
Warning signs
General warning
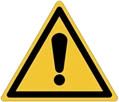
Meaning:
This warning sign indicates: General warning.
Warning signs
Warning: radioactive materials
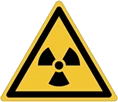
Meaning:
This warning sign indicates: radioactive materials.
Warning signs
Warning: corrosive substances
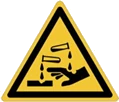
Meaning:
This warning sign indicates: corrosive substances.
Warning signs
Warning: welding work
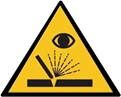
Meaning:
This warning sign indicates: welding work.
Warning signs
Warning: electrostatic hazard
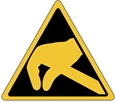
Meaning:
This warning sign indicates: electrostatic hazard.
Warning signs
Warning: corrosive substances
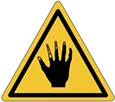
Meaning:
This warning sign indicates: corrosive substances.
Warning signs
Warning: suspended load
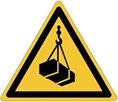
Meaning:
This warning sign indicates: suspended load.
Warning signs
Warning: step
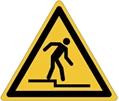
Meaning:
This warning sign indicates: step.
Warning signs
Warning: non-ionising radiation
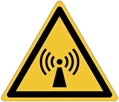
Meaning:
This warning sign indicates: non-ionising radiation.
Warning signs
Warning: side crushing hazard
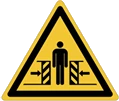
Meaning:
This warning sign indicates: side crushing hazard.
Warning signs
Warning: fragile roof
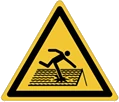
Meaning:
This warning sign indicates: fragile roof.
Warning signs
Warning: sudden loud noise
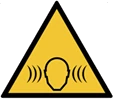
Meaning:
This warning sign indicates: sudden loud noise.
Warning signs
Warning: strong magnetic field
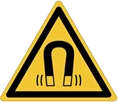
Meaning:
This warning sign indicates: strong magnetic field.
Warning signs
Warning: sharp elements
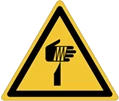
Meaning:
This warning sign indicates: sharp elements.
Warning signs
Warning: fall hazard
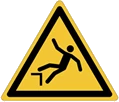
Meaning:
This warning sign indicates: fall hazard.
Warning signs
Warning: live electrical parts
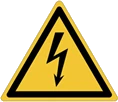
Meaning:
This warning sign indicates: live electrical parts.
Warning signs
Warning: slippery surface
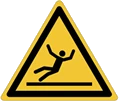
Meaning:
This warning sign indicates: slippery surface.
Warning signs
Warning: head strike hazard
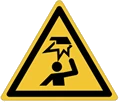
Meaning:
This warning sign indicates: head strike hazard.
Warning signs
Warning: earthing required
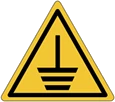
Meaning:
This warning sign indicates: earthing required.
Warning signs
Warning: explosive atmosphere
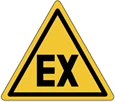
Meaning:
This warning sign indicates: explosive atmosphere.
Warning signs
Warning: unstable cliff edge
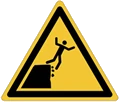
Meaning:
This warning sign indicates: unstable cliff edge.
Warning signs
Warning: laser beam
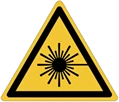
Meaning:
This warning sign indicates: laser beam.
Warning signs
Warning: trip hazard
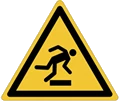
Meaning:
This warning sign indicates: trip hazard.
Warning signs
Warning: arc flash
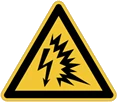
Meaning:
This warning sign indicates: arc flash.
Warning signs
Warning: hazardous to the environment
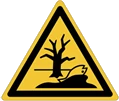
Meaning:
This warning sign indicates: hazardous to the environment.
Warning signs
Warning: hot surface
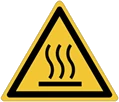
Meaning:
This warning sign indicates: hot surface.
Warning signs
Warning: hand crushing hazard between press and foot
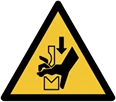
Meaning:
This warning sign indicates: hand crushing hazard between press and foot.
Warning signs
Warning: industrial trucks
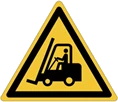
Meaning:
This warning sign indicates: industrial trucks.
Warning signs
Warning: battery charging
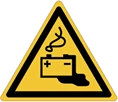
Meaning:
This warning sign indicates: battery charging.
Warning signs
Warning: strong currents
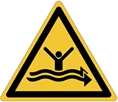
Meaning:
This warning sign indicates: strong currents.
Warning signs
Warning: harmful or irritant substance
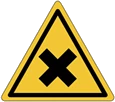
Meaning:
This warning sign indicates: harmful or irritant substance.
Warning signs
Warning: low temperature / freezing conditions
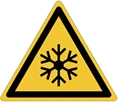
Meaning:
This warning sign indicates: low temperature / freezing conditions.
Warning signs
Warning: deep water at the beach
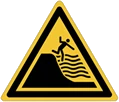
Meaning:
This warning sign indicates: deep water at the beach.
Warning signs
Warning: fast-moving material in bending machine
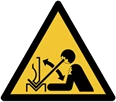
Meaning:
This warning sign indicates: fast-moving material in bending machine.
Warning signs
Warning: hand crushing hazard
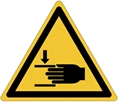
Meaning:
This warning sign indicates: hand crushing hazard.
Warning signs
Warning: biological hazard
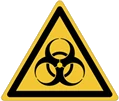
Meaning:
This warning sign indicates: biological hazard.
Warning signs
Warning: critical oxygen level
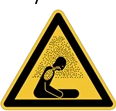
Meaning:
This warning sign indicates: critical oxygen level.
Warning signs
Warning: remotely controlled machine
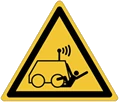
Meaning:
This warning sign indicates: remotely controlled machine.
Warning signs
Warning: serious health hazard
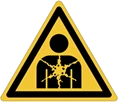
Meaning:
This warning sign indicates: serious health hazard.
Evacuation signs
Emergency escape route

Meaning:
This sign indicates the direction of the emergency escape route.
Evacuation signs
Emergency exit

Meaning:
This sign indicates the direction to an emergency exit.
Evacuation signs
Emergency assembly point

Meaning:
This sign identifies the designated assembly point to use after evacuation.
Evacuation signs
First aid

Meaning:
This sign identifies the location of first-aid equipment or assistance.
Evacuation signs
Emergency shower
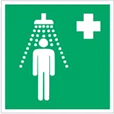
Meaning:
This sign identifies the location of an emergency safety shower.
Evacuation signs
Escape route: down and left

Meaning:
This emergency and evacuation sign indicates: Escape route: down and left.
Evacuation signs
Escape route: right

Meaning:
This emergency and evacuation sign indicates: Escape route: right.
Evacuation signs
Escape route: down

Meaning:
This emergency and evacuation sign indicates: Escape route: down.
Evacuation signs
Escape route: up

Meaning:
This emergency and evacuation sign indicates: Escape route: up.
Evacuation signs
Escape route: left

Meaning:
This emergency and evacuation sign indicates: Escape route: left.
Evacuation signs
Slide door to open
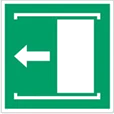
Meaning:
This emergency and evacuation sign indicates: Slide door to open.
Evacuation signs
Pull to open the right-hand door

Meaning:
This emergency and evacuation sign indicates: Pull to open the right-hand door.
Evacuation signs
Emergency eyewash

Meaning:
This emergency and evacuation sign indicates: Emergency eyewash.
Evacuation signs
AED defibrillator
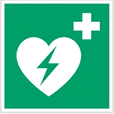
Meaning:
This emergency and evacuation sign indicates: AED defibrillator.
Evacuation signs
Emergency telephone

Meaning:
This emergency and evacuation sign indicates: Emergency telephone.
Evacuation signs
Doctor

Meaning:
This emergency and evacuation sign indicates: Doctor.
Evacuation signs
Life jacket

Meaning:
This emergency and evacuation sign indicates: Life jacket.
Evacuation signs
Lifebuoy

Meaning:
This emergency and evacuation sign indicates: Lifebuoy.
Evacuation signs
Drinking water

Meaning:
This emergency and evacuation sign indicates: Drinking water.
Evacuation signs
Stretcher
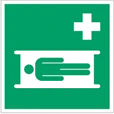
Meaning:
This emergency and evacuation sign indicates: Stretcher.
Evacuation signs
Break to gain access

Meaning:
This emergency and evacuation sign indicates: Break to gain access.
Evacuation signs
Emergency escape ladder

Meaning:
This emergency and evacuation sign indicates: Emergency escape ladder.
Evacuation signs
Liferaft rope knife

Meaning:
This emergency and evacuation sign indicates: Liferaft rope knife.
Evacuation signs
Portable medical kit
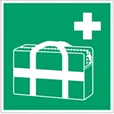
Meaning:
This emergency and evacuation sign indicates: Portable medical kit.
Fire safety signs
Fire extinguisher
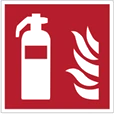
Meaning:
This sign identifies the location of a fire extinguisher.
Fire safety signs
Fire hose
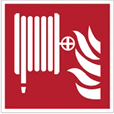
Meaning:
This sign identifies the location of fire-hose equipment.
Fire safety signs
Fire alarm
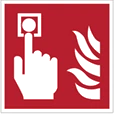
Meaning:
This sign identifies the location of a fire alarm or manual alarm point.
Fire safety signs
Emergency fire telephone

Meaning:
This sign identifies a telephone intended for use in a fire or other emergency.
Fire safety signs
Fire blanket
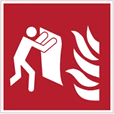
Meaning:
This sign identifies the location of a fire blanket.
Fire safety signs
Fire ladder

Meaning:
This fire safety sign indicates: Fire ladder.
Fire safety signs
Firefighting equipment set

Meaning:
This fire safety sign indicates: Firefighting equipment set.
Fire safety signs
Fire door
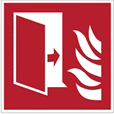
Meaning:
This fire safety sign indicates: Fire door.
Fire safety signs
Fixed fire-extinguishing system

Meaning:
This fire safety sign indicates: Fixed fire-extinguishing system.
Fire safety signs
Portable foam applicator
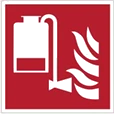
Meaning:
This fire safety sign indicates: Portable foam applicator.
Fire safety signs
Mobile fire extinguisher
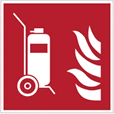
Meaning:
This fire safety sign indicates: Mobile fire extinguisher.
Fire safety signs
Water mist applicator

Meaning:
This fire safety sign indicates: Water mist applicator.
Fire safety signs
Fixed firefighting installation
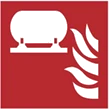
Meaning:
This fire safety sign indicates: Fixed firefighting installation.
Fire safety signs
Fixed extinguishing cylinder

Meaning:
This fire safety sign indicates: Fixed extinguishing cylinder.
Fire safety signs
Remote release station
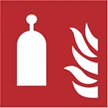
Meaning:
This fire safety sign indicates: Remote release station.
Fire safety signs
Fire monitor

Meaning:
This fire safety sign indicates: Fire monitor.
B-VCA EN — full preparation course
My progress
No saved results.
Complete a category quiz or mock exam to see your progress.
Learning summary
Confirmation of completion of the preparation course will be available in a future version. It is not an official VCA certificate.
Here you can see your results and basic learning progress. The indicators help you understand your progress in preparing for the VCA/SCC exam.
Mock exam history
Category quiz history
Categories to review: 0
Results are stored locally in this browser. Your history may not be available after changing device or clearing browser data.
B-VCA EN — full preparation course
Mock exam
This test helps you assess your preparation for the VCA exam.
- Number of questions: 40
- Pass mark: 65%
- Exam time: 60 minutes
The exam time has expired. Your result has been calculated from the answers submitted so far.
Question 1 of 40
What should an employee do if, after checking the tools, materials and surroundings, they still cannot control the risk safely?
Select an answer or mark the question for review.
Question 2 of 40
Complete the sentence about the employee's responsibilities.
Choose the correct completion of the sentence.
Choose an answer from the list.
Question 3 of 40
Who should carry out work on an electrical installation?
Select an answer or mark the question for review.
Question 4 of 40
What does the displayed emergency-exit sign indicate?
Select an answer or mark the question for review.
Question 5 of 40
How should gas cylinders used for welding or cutting be handled?
Select an answer or mark the question for review.
Question 6 of 40
What does the rule “think first, then act” mean?
Select an answer or mark the question for review.
Question 7 of 40
Scenario
Scenario
There is an unlabeled container with liquid at the workplace. You do not know what the substance is.
What should you do after noticing a hazardous-substance leak?
Choose the best and safest action.
Select an answer or mark the question for review.
Question 8 of 40
Which responsibility belongs to the employee?
Select an answer or mark the question for review.
Question 9 of 40
What role does the client (opdrachtgever) have in preparing work to be carried out safely?
Select an answer or mark the question for review.
Question 10 of 40
How should you respond if damage to an installation or energy safeguard is suspected?
Select an answer or mark the question for review.
Question 11 of 40
How should noise that exceeds permitted workplace limits be handled?
Select an answer or mark the question for review.
Question 12 of 40
Which situations may indicate an electrical hazard?
Select all correct answers. There may be more than one correct answer.
Select an answer or mark the question for review.
Question 13 of 40
How should hazardous substances be stored?
Select an answer or mark the question for review.
Question 14 of 40
What best describes personal protective equipment?
Select an answer or mark the question for review.
Question 15 of 40
Which situations during work in a confined space require the work to be stopped and the conditions to be reassessed?
Select all correct answers. There may be more than one correct answer.
Select an answer or mark the question for review.
Question 16 of 40
Which statement best describes the meaning of red on safety signs?
Select an answer or mark the question for review.
Question 17 of 40
Why do occupational health and safety regulations exist?
Select an answer or mark the question for review.
Question 18 of 40
When should the required personal protective equipment be used?
Select an answer or mark the question for review.
Question 19 of 40
Which actions help prevent fires and explosions?
Select all correct answers. There may be more than one correct answer.
Select an answer or mark the question for review.
Question 20 of 40
Which actions are appropriate if conditions in a confined space become unsafe?
Select all correct answers. There may be more than one correct answer.
Select an answer or mark the question for review.
Question 21 of 40
What does the shown emergency escape sign indicate?
Select an answer or mark the question for review.
Question 22 of 40
What should an employee do if they notice a serious hazard before starting work?
Select an answer or mark the question for review.
Question 23 of 40
There are two people in a work basket together with tools and materials. What determines whether lifting may begin?
Select an answer or mark the question for review.
Question 24 of 40
Assign the items to the groups related to hazardous substances and protection.
Choose the correct group for each item.
Choose a group for each item.
Question 25 of 40
Assign the personal protective equipment to the body part or type of hazard it protects against.
Choose the correct group for each item.
Choose a group for each item.
Question 26 of 40
What should be done after an evacuation alarm is activated?
Select an answer or mark the question for review.
Question 27 of 40
What must be checked before entering a confined space if additional energy sources or inflows may be present?
Select all correct answers. There may be more than one correct answer.
Select an answer or mark the question for review.
Question 28 of 40
Complete the sentence about the purpose of VCA.
Choose the correct completion of the sentence.
Choose an answer from the list.
Question 29 of 40
What should an employee do if they experience work-related symptoms such as back pain, numb hands or severe fatigue?
Select an answer or mark the question for review.
Question 30 of 40
What best describes a fire?
Select an answer or mark the question for review.
Question 31 of 40
While carrying out a task, the temporary lighting goes out and you can no longer see the work area safely. What should you do first?
Select an answer or mark the question for review.
Question 32 of 40
Which actions are part of safely organising access, descent and the area below work at height?
Select all correct answers. There may be more than one correct answer.
Select an answer or mark the question for review.
Question 33 of 40
Which behaviors are safe when working with machines?
Select all correct answers. There may be more than one correct answer.
Select an answer or mark the question for review.
Question 34 of 40
When should personal fall-protection equipment be used?
Select an answer or mark the question for review.
Question 35 of 40
Put the actions for starting work safely in the correct order.
Arrange the steps from first to last.
-
1
Start work only when the conditions are safe.
-
2
Check the workplace and identify possible hazards.
-
3
Assess the risk and consider whether the work can be carried out safely.
-
4
Apply the required protective measures and safeguards.
Put the steps in the correct order.
Question 36 of 40
Assign the situations to the correct groups.
Choose the correct group for each item.
Choose a group for each item.
Question 37 of 40
A pedestrian approaches an intersection of transport routes used by forklifts. How should the pedestrian behave?
Select an answer or mark the question for review.
Question 38 of 40
Which statements are correct for the no-open-flame sign?
Select all correct answers. There may be more than one correct answer.
Select an answer or mark the question for review.
Question 39 of 40
Before starting work, you notice that the workplace is too poorly lit to clearly see obstacles and hazards. What should you do?
Select an answer or mark the question for review.
Question 40 of 40
What should be done with the incident scene after an accident if there is no immediate threat to life?
Select an answer or mark the question for review.
Mock exam summary
All questions have been answered.
Mock exam result
This result is for learning and VCA exam preparation only. It is not an official VCA/SCC exam result.
Incorrect answers from the mock exam
Category 1
VCA basics and responsibility
Lesson 1:
What is VCA?
You will learn what VCA means and the role it plays in preparing for safe work.
Category 2
Health and safety law, rules and procedures
Lesson 1:
Why do occupational safety rules exist?
You will learn that occupational safety rules protect people from accidents and occupational diseases.
Category 3
Hazards and risk assessment
Lesson 1:
Hazards in the workplace
You will learn what a hazard is and why it must be identified before work begins.
Category 4
Safety signs
Lesson 1:
What are safety signs?
You will learn the role of safety signs and why they should be treated as part of work instructions.
Category 5
Personal protective equipment — PPE
Lesson 1:
What is personal protective equipment?
You will learn the role of personal protective equipment as the last protective barrier and see examples of basic personal protection.
Category 6
Workplace and housekeeping
Lesson 1:
A safe and tidy workplace
Good housekeeping, clear walkways and the absence of obstacles as a way to reduce accident risk.
Category 7
Working at height
Lesson 1:
Basic rules for working at height
Risks related to falls, ladders, scaffolds and protective measures.
Category 8
Tools, machines and equipment
Lesson 1:
Safe use of tools and machinery
Tools and machinery may only be used for their intended purpose and in accordance with instructions.
Category 9
Energy, electricity and radiation
Lesson 1:
Hazards related to energy and electricity
Basic risks associated with electricity, mechanical energy, pressure and radiation.
Category 10
Hazardous substances
Lesson 1:
Working with hazardous substances
Labels, safety data sheets and basic protective measures.
Category 11
Fire and explosion
Lesson 1:
What is a fire?
Fire as uncontrolled combustion and a real workplace hazard.
Category 12
Confined spaces
Lesson 1:
Risks of working in confined spaces
Why confined spaces are particularly hazardous and require specific procedures.
Category 13
Ergonomics and health
Lesson 1:
Ergonomics, health and safe physical workload
The importance of correct lifting, working posture, rest and reporting symptoms.
Category 14
Accidents and emergencies
Lesson 1:
What to do in an accident or emergency
Basic responses: raising the alarm, first aid, evacuation and incident reporting.
Category quiz
Category quiz
This quiz helps you check your knowledge of the selected category.
The result is for learning and VCA exam preparation only.
- Number of questions: 10
- Pass mark: 65%
Category quiz: VCA basics and responsibility
Question 1 of 10
Why is occupational safety important?
Select an answer to continue.
Question 2 of 10
Complete the sentence about the purpose of VCA.
Choose the correct completion of the sentence.
Choose an answer from the list.
Question 3 of 10
When should work be stopped?
Select an answer to continue.
Question 4 of 10
What role does the client (opdrachtgever) have in preparing work to be carried out safely?
Select an answer to continue.
Question 5 of 10
Which statement best summarizes responsible work according to VCA principles?
Select an answer to continue.
Question 6 of 10
What is risk?
Select an answer to continue.
Question 7 of 10
Why is reporting hazards important?
Select an answer to continue.
Question 8 of 10
What is the main purpose of VCA?
Select an answer to continue.
Question 9 of 10
What should an employee do when they notice an unsafe situation?
Select an answer to continue.
Question 10 of 10
Which behaviour is an example of safe working?
Select an answer to continue.
Category quiz
Category quiz result
- Category:
- VCA basics and responsibility
This result is for learning and VCA exam preparation only. It is not an official VCA/SCC exam result.
Incorrect answers
Category quiz
Category quiz
This quiz helps you check your knowledge of the selected category.
The result is for learning and VCA exam preparation only.
- Number of questions: 10
- Pass mark: 65%
Category quiz: Health and safety law, rules and procedures
Question 1 of 10
During a toolbox meeting, a new working method is discussed. You do not understand one of the safety requirements. What should you do before starting work?
Select an answer to continue.
Question 2 of 10
Complete the sentence about the employee's responsibilities.
Choose the correct completion of the sentence.
Choose an answer from the list.
Question 3 of 10
For which types of work is a work permit often required?
Select an answer to continue.
Question 4 of 10
What should be checked before welding starts as hot work?
Select an answer to continue.
Question 5 of 10
After a work permit has been issued, the conditions change: other work starts nearby and creates a new hazard. What should the employee do?
Select an answer to continue.
Question 6 of 10
When may a hot-work permit be required before welding?
Select an answer to continue.
Question 7 of 10
What is an LMRA?
Select an answer to continue.
Question 8 of 10
Which behaviour is unsafe?
Select an answer to continue.
Question 9 of 10
What should you do if a work instruction is unclear?
Select an answer to continue.
Question 10 of 10
During a workplace inspection, you notice a damaged machine guard at a workstation where work is about to start. What should you do?
Select an answer to continue.
Category quiz
Category quiz result
- Category:
- Health and safety law, rules and procedures
This result is for learning and VCA exam preparation only. It is not an official VCA/SCC exam result.
Incorrect answers
Category quiz
Category quiz
This quiz helps you check your knowledge of the selected category.
The result is for learning and VCA exam preparation only.
- Number of questions: 10
- Pass mark: 65%
Category quiz: Hazards and risk assessment
Question 1 of 10
Assess which statements about risk assessment are correct.
Select YES or NO for each statement.
Before starting work, check the workplace and possible hazards.
If the work is short, the risk assessment can be skipped.
If the situation is unsafe, the employee should stop work and report the problem.
Answer YES or NO for each statement.
Question 2 of 10
Scenario
Scenario
Before starting work, you notice a new hazard at the workplace that was not covered by the instruction.
What should you do after noticing the new hazard?
Choose the best and safest action.
Select an answer to continue.
Question 3 of 10
What should an employee check before starting a task?
Select an answer to continue.
Question 4 of 10
Assign the items to the groups related to hazards and controls.
Choose the correct group for each item.
Choose a group for each item.
Question 5 of 10
Put the actions for starting work safely in the correct order.
Arrange the steps from first to last.
-
1
Start work only when the conditions are safe.
-
2
Check the workplace and identify possible hazards.
-
3
Assess the risk and consider whether the work can be carried out safely.
-
4
Apply the required protective measures and safeguards.
Put the steps in the correct order.
Question 6 of 10
Which action best reduces risk at the source?
Select an answer to continue.
Question 7 of 10
Complete the sentence about a short risk assessment.
Choose the correct completion of the sentence.
Choose an answer from the list.
Question 8 of 10
Case study: a new hazard before starting work
Case study
A new hazard before starting work
Scenario
An employee is about to begin a short service task. On arrival, they notice spilled oil in a walkway and a missing guard on one of the machines. The task is urgent and the supervisor expects work to start quickly.
Read the scenario and answer the questions.
Question 1
What should the employee do first?
Correct answer: Stop, do not start the work, and report the hazards that were noticed.
Explanation:
The first step is to stop before starting the work and report the hazards. The spilled oil and the missing machine guard must not be ignored.
Question 2
Which items are hazards?
Select all correct answers.
Correct answer: Spilled oil in a walkway., A missing guard on the machine.
Explanation:
Spilled oil increases the risk of slipping, while a missing machine guard can lead to contact with moving parts. Time pressure is not a safety measure.
Question 3
Put the actions before starting work in the correct order.
Arrange the steps from first to last.
-
1
Start work only after the risk has been eliminated or controlled.
-
2
Stop and do not start work in unsafe conditions.
-
3
Warn others and secure the walkway with the spilled oil.
-
4
Report the missing guard and other hazards to the supervisor.
Correct answer: 1. Stop and do not start work in unsafe conditions. 2. Warn others and secure the walkway with the spilled oil. 3. Report the missing guard and other hazards to the supervisor. 4. Start work only after the risk has been eliminated or controlled.
Explanation:
First stop the preparations for work, then reduce the risk to others, report the problem, and return to the task only after safe conditions have been provided.
Answer all questions in the case study.
Question 9 of 10
During work, heavy rain begins and the ground becomes slippery. What should the employee do?
Select an answer to continue.
Question 10 of 10
What is the difference between risk and a hazard?
Select an answer to continue.
Category quiz
Category quiz result
- Category:
- Hazards and risk assessment
This result is for learning and VCA exam preparation only. It is not an official VCA/SCC exam result.
Incorrect answers
Category quiz
Category quiz
This quiz helps you check your knowledge of the selected category.
The result is for learning and VCA exam preparation only.
- Number of questions: 10
- Pass mark: 65%
Category quiz: Safety signs
Question 1 of 10
Which statement best describes the meaning of red on safety signs?
Select an answer to continue.
Question 2 of 10
Assign the sign examples to the correct groups.
Choose the correct group for each item.
Choose a group for each item.
Question 3 of 10
Click the warning sign visible in the image.
Click directly on the warning sign.
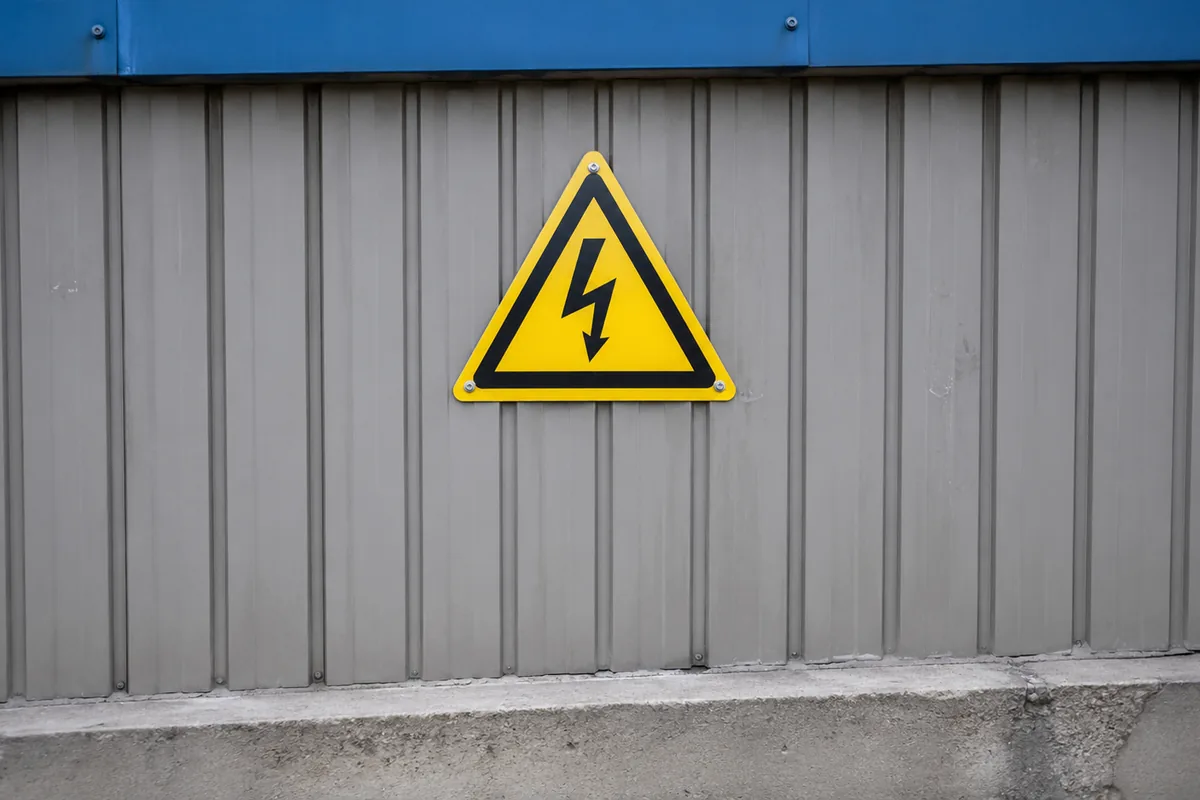 Your click
Correct area
Click a location in the image before checking your answer.
Question 4 of 10
What should an employee do if a safety sign is obscured or illegible?
Select an answer to continue.
Question 5 of 10
What does the displayed warning sign warn against?
Select an answer to continue.
Question 6 of 10
Match each meaning to the correct sign.
Match each answer to one sign. Each answer may be used only once.
Match all items to continue.
Question 7 of 10
What is good practice before starting a task in a new work area?
Select an answer to continue.
Question 8 of 10
What hazard does the shown sign warn against?
Select an answer to continue.
Question 9 of 10
What is the main purpose of safety signs in the workplace?
Select an answer to continue.
Question 10 of 10
What does the shown no-smoking sign mean?
Select an answer to continue.
Category quiz
Category quiz result
- Category:
- Safety signs
This result is for learning and VCA exam preparation only. It is not an official VCA/SCC exam result.
Incorrect answers
Category quiz
Category quiz
This quiz helps you check your knowledge of the selected category.
The result is for learning and VCA exam preparation only.
- Number of questions: 10
- Pass mark: 65%
Category quiz: Personal protective equipment — PPE
Question 1 of 10
Why are welding screens or shields used during welding?
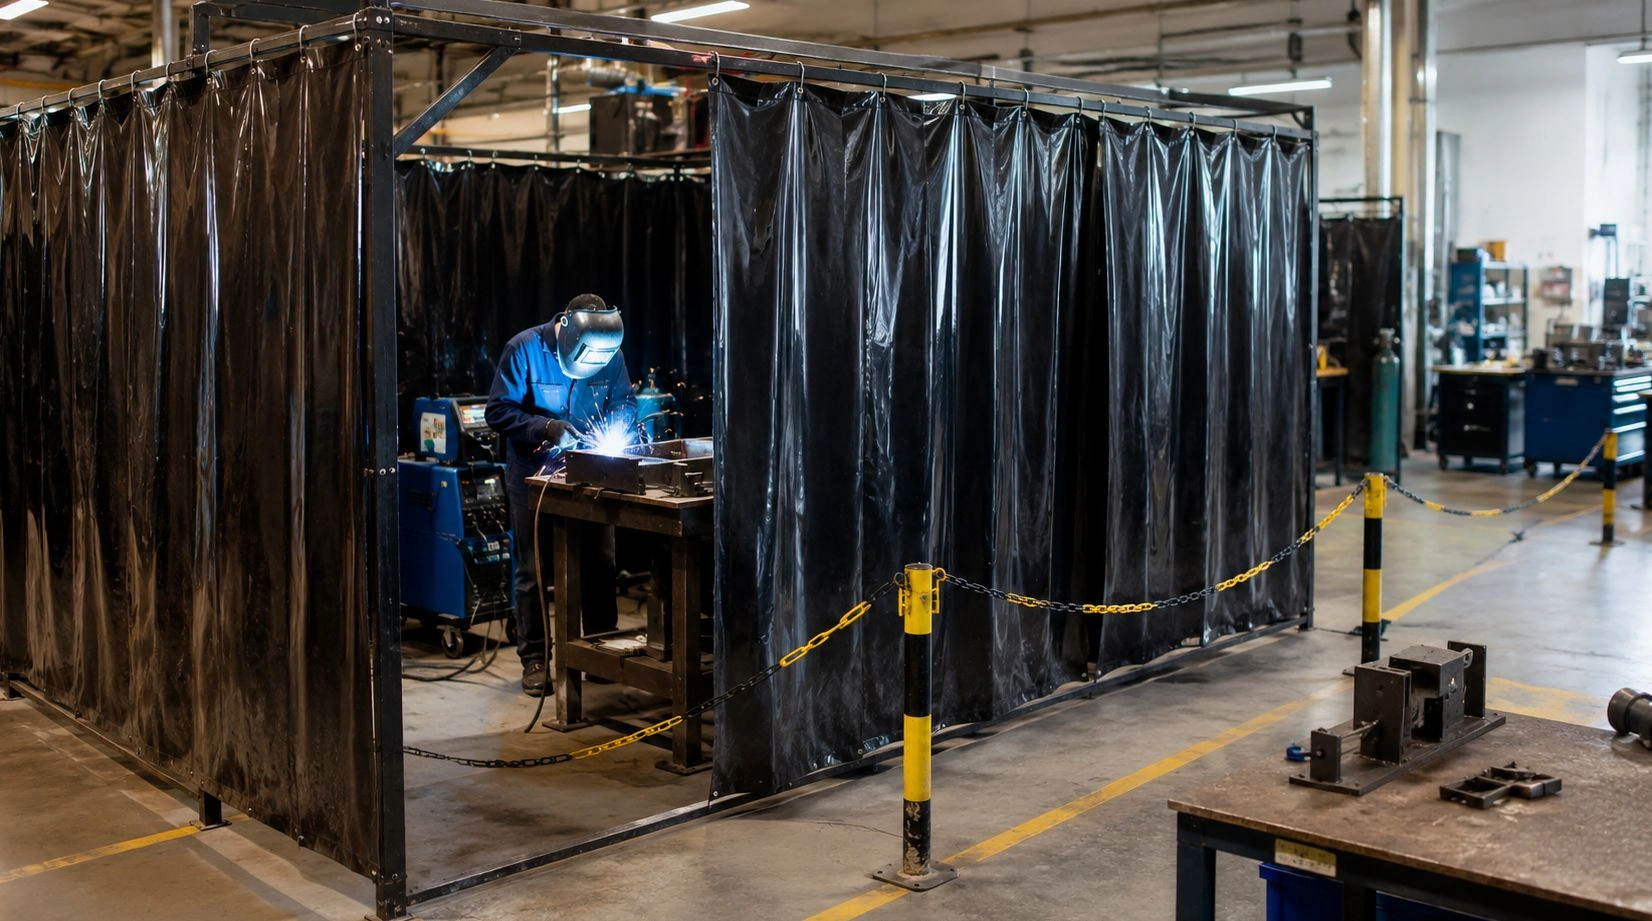
Select an answer to continue.
Question 2 of 10
When should the required personal protective equipment be used?
Select an answer to continue.
Question 3 of 10
Assign the personal protective equipment to the body part or type of hazard it protects against.
Choose the correct group for each item.
Choose a group for each item.
Question 4 of 10
Which statements about protective gloves are correct?
Select all correct answers. There may be more than one correct answer.
Select an answer to continue.
Question 5 of 10
Why is high-visibility clothing or a high-visibility vest used?
Select an answer to continue.
Question 6 of 10
Which protective item is essential for protecting the eyes and face during arc welding?
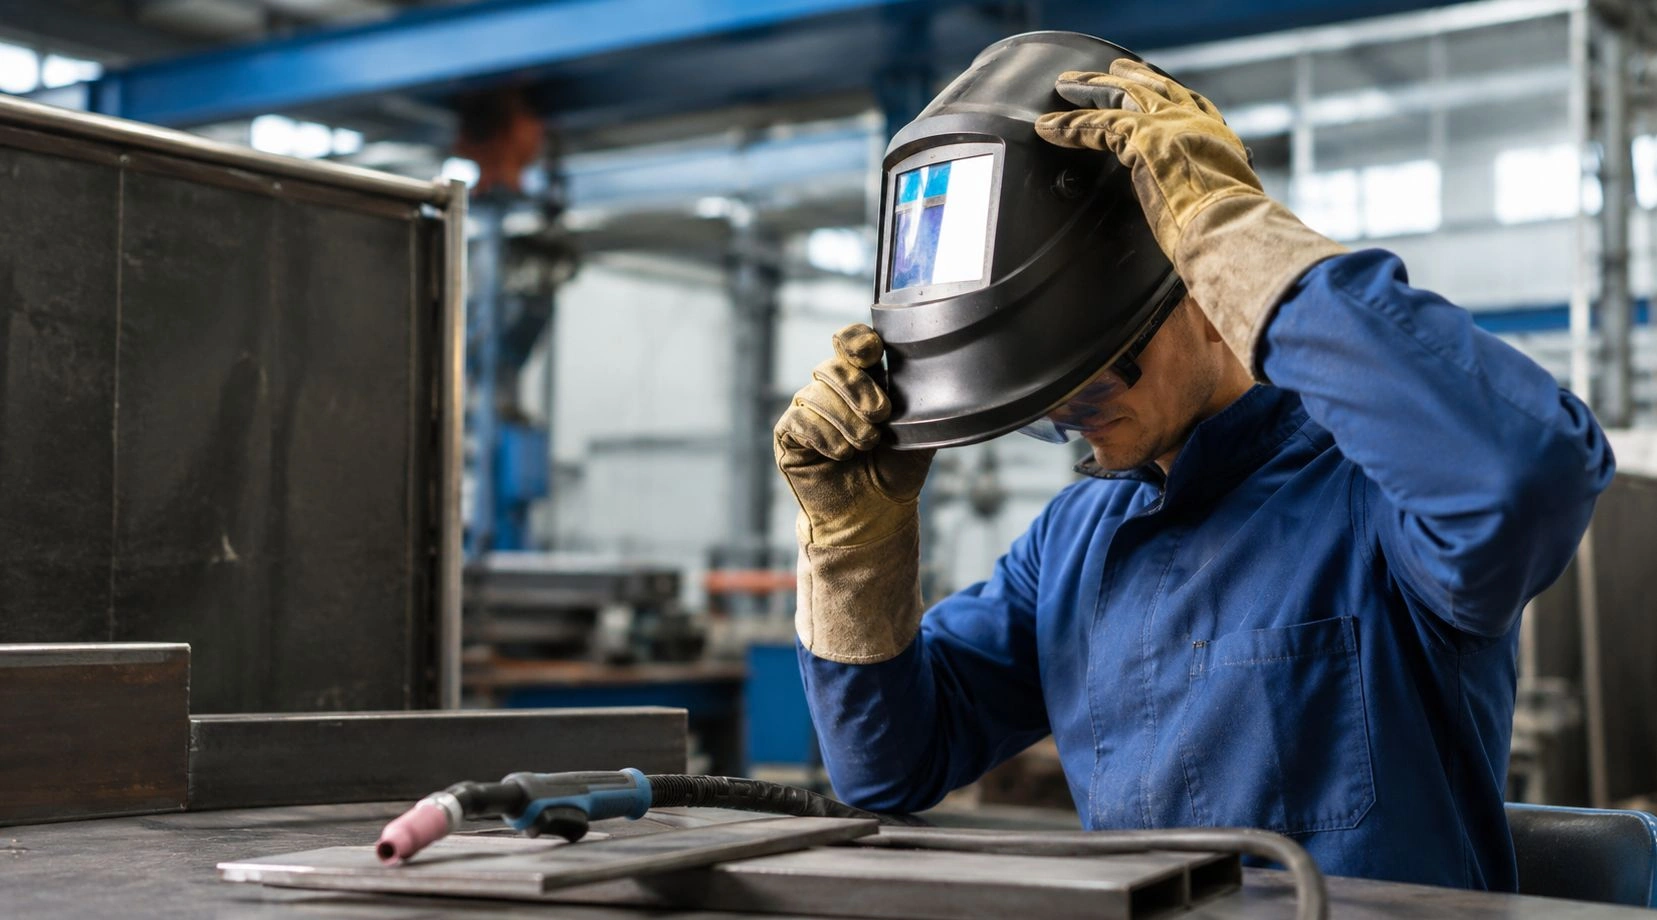
Select an answer to continue.
Question 7 of 10
Which items can protect the eyes or face if required by the work instruction?
Select all correct answers. There may be more than one correct answer.
Select an answer to continue.
Question 8 of 10
Which protective equipment may be required for welding?
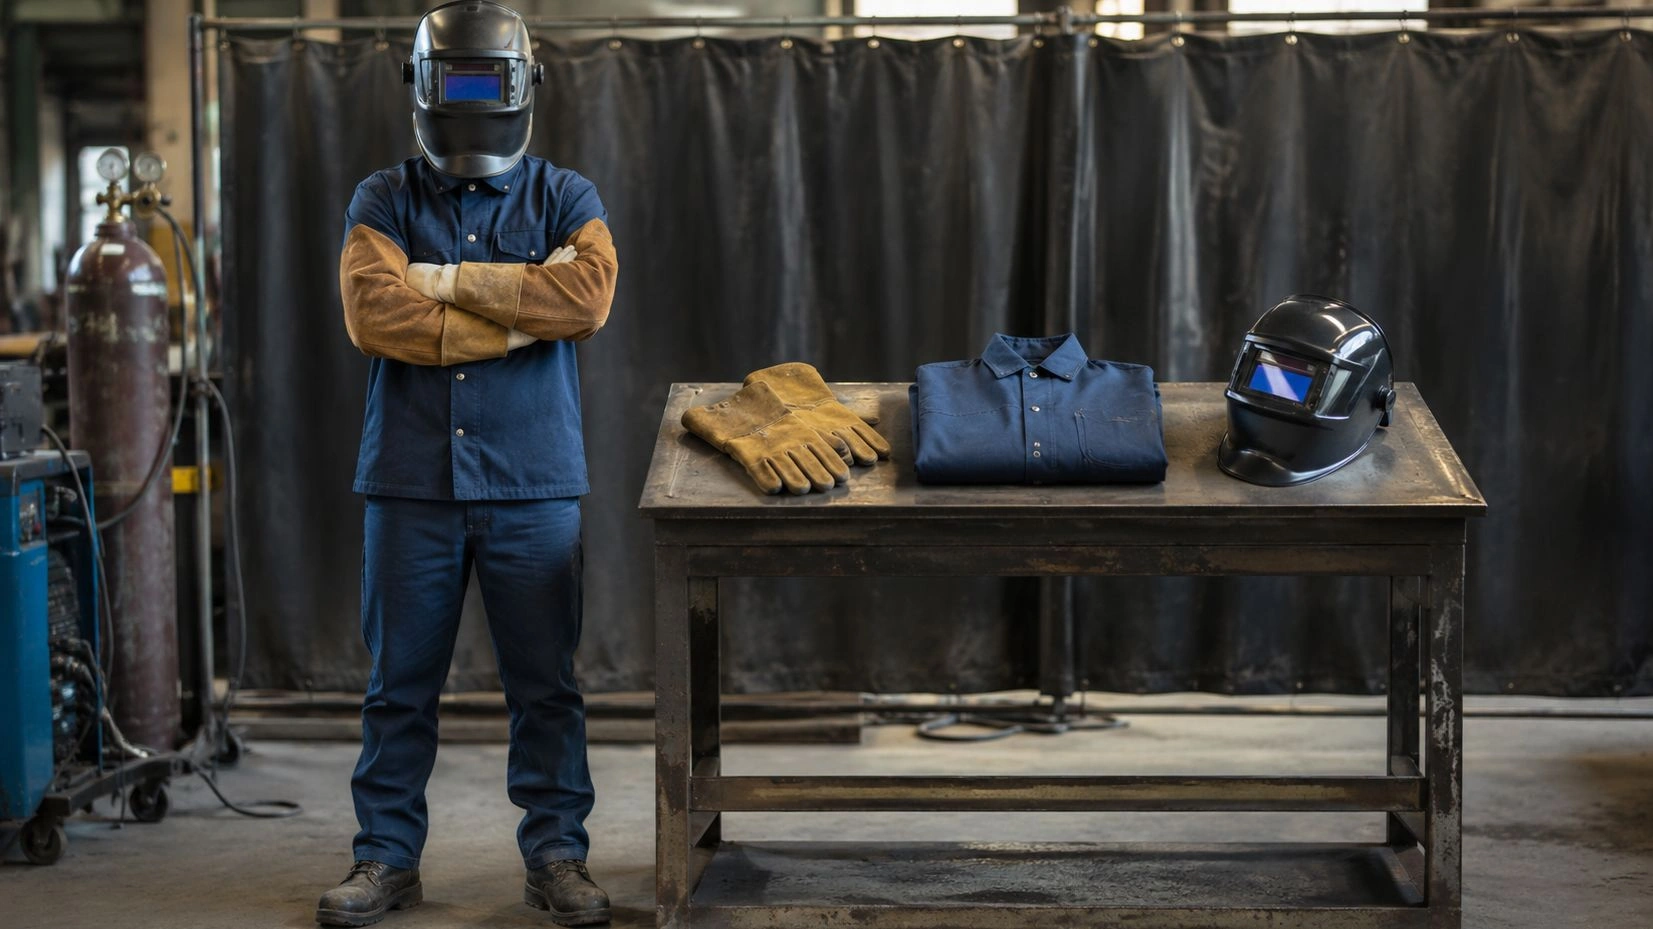
Select all correct answers. There may be more than one correct answer.
Select an answer to continue.
Question 9 of 10
What is important when using respiratory protection?
Select all correct answers. There may be more than one correct answer.
Select an answer to continue.
Question 10 of 10
What should be done if the welding helmet or gloves are damaged?
Select an answer to continue.
Category quiz
Category quiz result
- Category:
- Personal protective equipment — PPE
This result is for learning and VCA exam preparation only. It is not an official VCA/SCC exam result.
Incorrect answers
Category quiz
Category quiz
This quiz helps you check your knowledge of the selected category.
The result is for learning and VCA exam preparation only.
- Number of questions: 10
- Pass mark: 65%
Category quiz: Workplace and housekeeping
Question 1 of 10
Where should tools ideally be placed after use?
Select an answer to continue.
Question 2 of 10
Scenario
Scenario
While working, you notice spilled oil in a walkway used by other employees.
What should you do first when you notice the spilled liquid?
Choose the best and safest action.
Select an answer to continue.
Question 3 of 10
Click the area in the image that shows a slipping hazard.
Click directly on the hazard in the image.
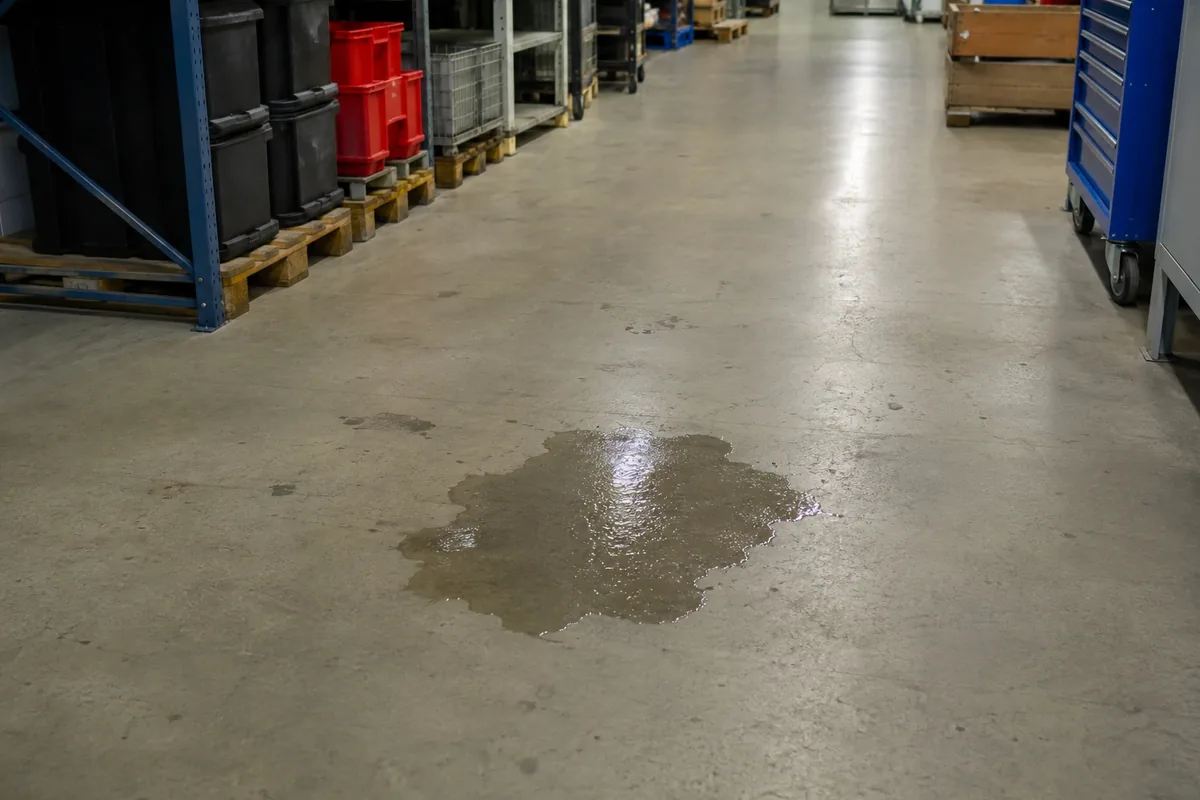 Your click
Correct area
Click a location in the image before checking your answer.
Question 4 of 10
During work, someone runs a new cable across a walkway and the nearby traffic arrangement changes. What should the worker do?
Select an answer to continue.
Question 5 of 10
Which actions help maintain safe housekeeping at the workplace?
Select all correct answers. There may be more than one correct answer.
Select an answer to continue.
Question 6 of 10
Assess which statements about workplace housekeeping are correct.
Select YES or NO for each statement.
Walkways and emergency escape routes should be kept free of obstacles.
Spilled oil may be left if nobody has slipped yet.
Tools should be returned to their designated place.
Answer YES or NO for each statement.
Question 7 of 10
While carrying out a task, the temporary lighting goes out and you can no longer see the work area safely. What should you do first?
Select an answer to continue.
Question 8 of 10
Assign the situations to the correct groups.
Choose the correct group for each item.
Choose a group for each item.
Question 9 of 10
Which areas should remain free of materials and tools?
Select all correct answers. There may be more than one correct answer.
Select an answer to continue.
Question 10 of 10
What should be done when oil is spilled on the floor?
Select an answer to continue.
Category quiz
Category quiz result
- Category:
- Workplace and housekeeping
This result is for learning and VCA exam preparation only. It is not an official VCA/SCC exam result.
Incorrect answers
Category quiz
Category quiz
This quiz helps you check your knowledge of the selected category.
The result is for learning and VCA exam preparation only.
- Number of questions: 10
- Pass mark: 65%
Category quiz: Working at height
Question 1 of 10
What should be checked before using a personnel work basket / man basket to lift people?
Select all correct answers. There may be more than one correct answer.
Select an answer to continue.
Question 2 of 10
Which solution is an example of collective protection when working at height?
Select an answer to continue.
Question 3 of 10
Scenario
Scenario
You are about to climb a ladder but notice that it is standing on uneven ground and is unstable.
What is the safest action?
Choose the best and safest action.
Select an answer to continue.
Question 4 of 10
Case study: working from a ladder on unstable ground
Case study
Working from a ladder on unstable ground
Scenario
An employee has to carry out a short inspection at height. A ladder is available, but the ground is uneven and loose materials are nearby. The employee considers climbing up for only a moment to finish the task quickly.
Read the scenario and answer the questions.
Question 1
What is the safest decision?
Correct answer: Do not climb the ladder until the ground and workplace are safe.
Explanation:
Uneven ground and loose materials increase the risk of falling. The work should not start until the conditions have been prepared safely.
Question 2
Which conditions must be met before working at height?
Select all correct answers.
Correct answer: Stable, level ground for the equipment., A tidy workplace without loose materials., Selection of suitable equipment and fall protection.
Explanation:
Working at height requires stability, good housekeeping and appropriate safeguards. The duration of the task does not remove the fall risk.
Question 3
Put the steps for preparing work at height in the correct order.
Arrange the steps from first to last.
-
1
Start work only after the safety conditions have been met.
-
2
Stop the intention to climb the ladder under the current conditions.
-
3
Assess the risk, ground, surroundings and required scope of work.
-
4
Tidy the area and select stable, suitable equipment.
Correct answer: 1. Stop the intention to climb the ladder under the current conditions. 2. Assess the risk, ground, surroundings and required scope of work. 3. Tidy the area and select stable, suitable equipment. 4. Start work only after the safety conditions have been met.
Explanation:
First stop the unsafe plan, then assess the risk, prepare the area and equipment, and only then begin the work.
Answer all questions in the case study.
Question 5 of 10
What should be checked before starting work on a hangbruginstallatie, a suspended working platform?
Select all correct answers. There may be more than one correct answer.
Select an answer to continue.
Question 6 of 10
Click the area that shows a hazard during work at height.
Click directly on the unsafe ladder setup.
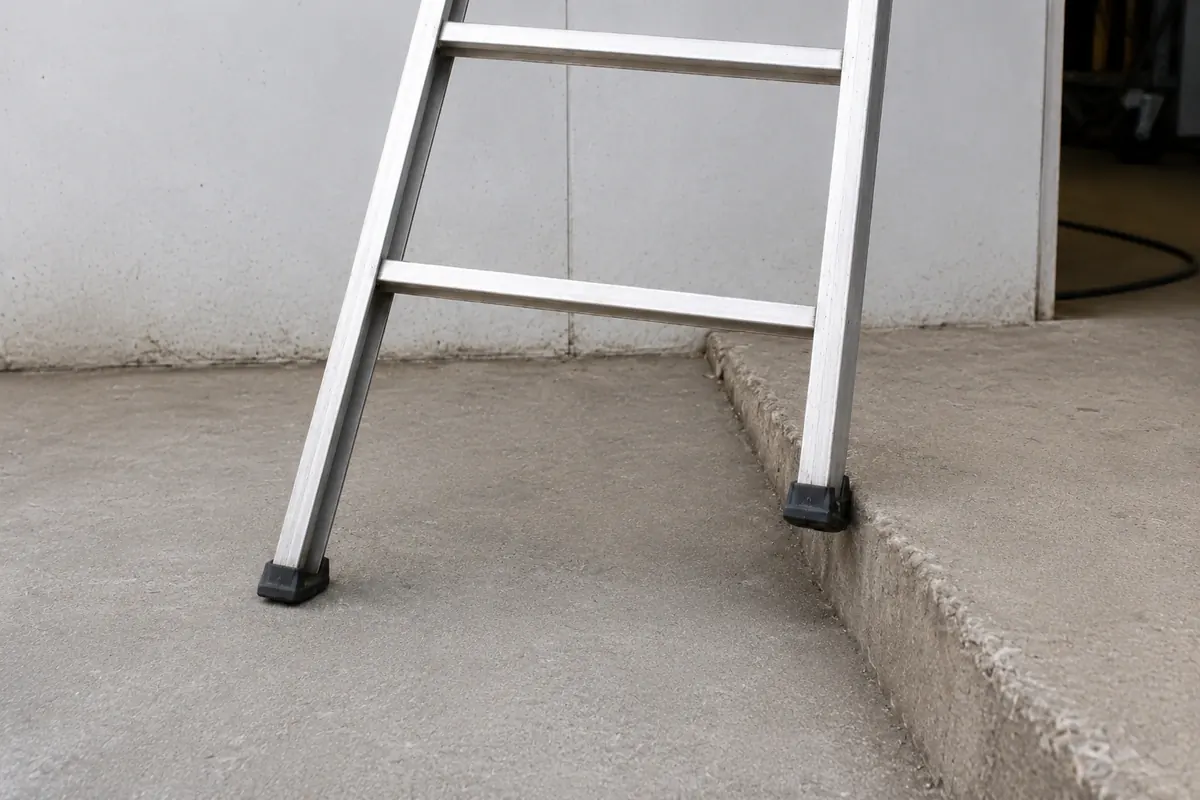 Your click
Correct area
Click a location in the image before checking your answer.
Question 7 of 10
What is the main hazard when working at height?
Select an answer to continue.
Question 8 of 10
Put the steps for preparing safe work at height in the correct order.
Arrange the steps from first to last.
-
1
Start work only after the safeguards have been checked and you are sure the conditions are safe.
-
2
Check whether work at height is necessary and whether the risk can be reduced.
-
3
Assess the workplace, ground, access and possible fall hazards.
-
4
Select the correct safeguards, such as scaffolding, a work platform or fall-protection equipment.
Put the steps in the correct order.
Question 9 of 10
Which rules apply to safe work near edges?
Select all correct answers. There may be more than one correct answer.
Select an answer to continue.
Question 10 of 10
What should be done if strong wind or a storm develops while working at height?
Select an answer to continue.
Category quiz
Category quiz result
- Category:
- Working at height
This result is for learning and VCA exam preparation only. It is not an official VCA/SCC exam result.
Incorrect answers
Category quiz
Category quiz
This quiz helps you check your knowledge of the selected category.
The result is for learning and VCA exam preparation only.
- Number of questions: 10
- Pass mark: 65%
Category quiz: Tools, machines and equipment
Question 1 of 10
Click the area that shows a missing machine safeguard.
Click the area of the machine where the guard is missing.
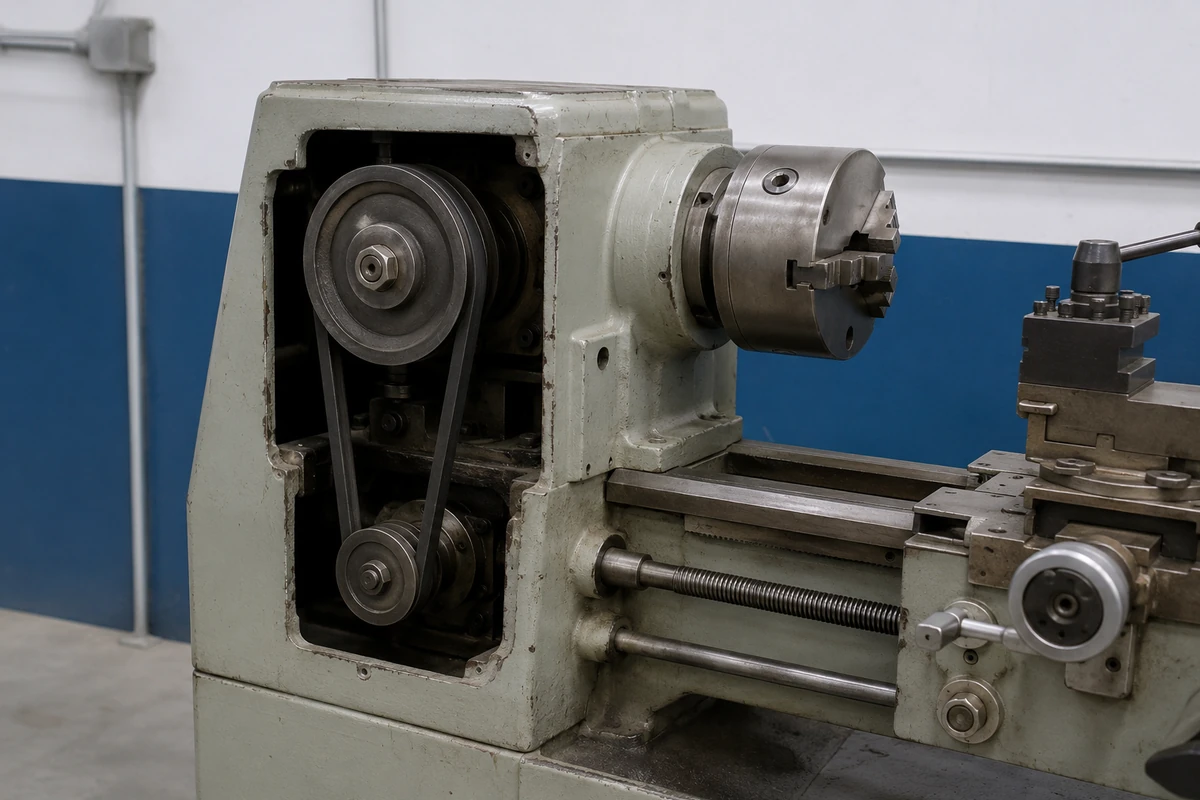 Your click
Correct area
Click a location in the image before checking your answer.
Question 2 of 10
How should tools and equipment be used?
Select an answer to continue.
Question 3 of 10
Which items should be checked before using a power tool?
Select all correct answers. There may be more than one correct answer.
Select an answer to continue.
Question 4 of 10
What should be done before using welding equipment?
Select an answer to continue.
Question 5 of 10
Before lifting begins, you notice visible damage to an item used to lift the load. What do you do?
Select an answer to continue.
Question 6 of 10
Which actions are inappropriate when equipment is damaged?
Select all correct answers. There may be more than one correct answer.
Select an answer to continue.
Question 7 of 10
An internal-combustion forklift is to work inside a poorly ventilated enclosed hall. What hazard must be considered?
Select an answer to continue.
Question 8 of 10
Before moving a pallet truck, you see an uneven floor and very little manoeuvring space. What should you do?
Select an answer to continue.
Question 9 of 10
When may a machine that requires special authorization be operated?
Select an answer to continue.
Question 10 of 10
What should be done before using a hand tool or power tool?
Select an answer to continue.
Category quiz
Category quiz result
- Category:
- Tools, machines and equipment
This result is for learning and VCA exam preparation only. It is not an official VCA/SCC exam result.
Incorrect answers
Category quiz
Category quiz
This quiz helps you check your knowledge of the selected category.
The result is for learning and VCA exam preparation only.
- Number of questions: 10
- Pass mark: 65%
Category quiz: Energy, electricity and radiation
Question 1 of 10
Who should carry out work on an electrical installation?
Select an answer to continue.
Question 2 of 10
Which rules apply when working near radiation or marked areas?
Select all correct answers. There may be more than one correct answer.
Select an answer to continue.
Question 3 of 10
What should be done before entering an area marked with a radiation hazard?
Select an answer to continue.
Question 4 of 10
The installation switch is in the OFF position and the equipment has been locked out. What else is required before work starts when the procedure requires a de-energised state?
Select an answer to continue.
Question 5 of 10
Which actions help work safely with energy sources?
Select all correct answers. There may be more than one correct answer.
Select an answer to continue.
Question 6 of 10
What should be done with an electrical cable that has damaged insulation?
Select an answer to continue.
Question 7 of 10
How should you respond if damage to an installation or energy safeguard is suspected?
Select an answer to continue.
Question 8 of 10
The electrical power supply to a machine has been disconnected, but the hydraulic system is still under pressure. What should be done?
Select an answer to continue.
Question 9 of 10
Why is lockout/tagout used?
Select an answer to continue.
Question 10 of 10
The machine has been switched off, but a raised component may fall and a spring is still under tension. Can work start immediately?
Select an answer to continue.
Category quiz
Category quiz result
- Category:
- Energy, electricity and radiation
This result is for learning and VCA exam preparation only. It is not an official VCA/SCC exam result.
Incorrect answers
Category quiz
Category quiz
This quiz helps you check your knowledge of the selected category.
The result is for learning and VCA exam preparation only.
- Number of questions: 10
- Pass mark: 65%
Category quiz: Hazardous substances
Question 1 of 10
What should be done after a hazardous substance contacts the skin or eyes?
Select an answer to continue.
Question 2 of 10
Put the actions before starting work with a hazardous substance in the correct order.
Arrange the steps from first to last.
-
1
Start work only when the substance can be used according to the instructions.
-
2
Check the substance label and identify the hazard pictograms.
-
3
Read the safety data sheet and required precautions.
-
4
Prepare the appropriate personal protective equipment and ventilation or safeguards.
Put the steps in the correct order.
Question 3 of 10
Case study: unlabeled container with liquid
Case study
Unlabeled container with liquid
Scenario
There is an unlabeled container with liquid at the workplace. One employee wants to use the liquid because it looks similar to a product used before. There is no safety data sheet nearby and no person responsible for substances is available.
Read the scenario and answer the questions.
Question 1
What should be done with the unlabeled container?
Correct answer: Do not use it, secure the container and report the situation.
Explanation:
An unknown substance must not be identified by appearance or smell. The container must be secured and reported.
Question 2
What information helps a substance be used safely?
Select all correct answers.
Correct answer: A label with the substance name and hazard pictograms., A safety data sheet with safe-use instructions., Instructions concerning the required protective equipment.
Explanation:
Safe use requires information from the label, safety data sheet and instructions. The appearance of a liquid is not a reliable source of information.
Question 3
Put the steps for handling an unknown substance in the correct order.
Arrange the steps from first to last.
-
1
Establish information from the label or safety data sheet before taking further action.
-
2
Do not use, smell or transfer the unlabeled liquid.
-
3
Secure the container against accidental use.
-
4
Report the situation to the supervisor or responsible person.
Correct answer: 1. Do not use, smell or transfer the unlabeled liquid. 2. Secure the container against accidental use. 3. Report the situation to the supervisor or responsible person. 4. Establish information from the label or safety data sheet before taking further action.
Explanation:
First stop the intended use, secure the container, report the matter and only after identifying the substance make further decisions.
Answer all questions in the case study.
Question 4 of 10
Complete the sentence about the substance safety data sheet.
Choose the correct completion of the sentence.
Choose an answer from the list.
Question 5 of 10
Assess which statements about hazardous substances are correct.
Select YES or NO for each statement.
Before using a substance, the hazards and protective measures must be known.
The label and safety data sheet help identify the risk.
An unknown substance may be poured into any bottle without a label.
Answer YES or NO for each statement.
Question 6 of 10
Assign the items to the groups related to hazardous substances and protection.
Choose the correct group for each item.
Choose a group for each item.
Question 7 of 10
What should be done before using an unknown substance?
Select an answer to continue.
Question 8 of 10
Click the item that shows unsafe handling of a substance.
Click the unlabeled container.
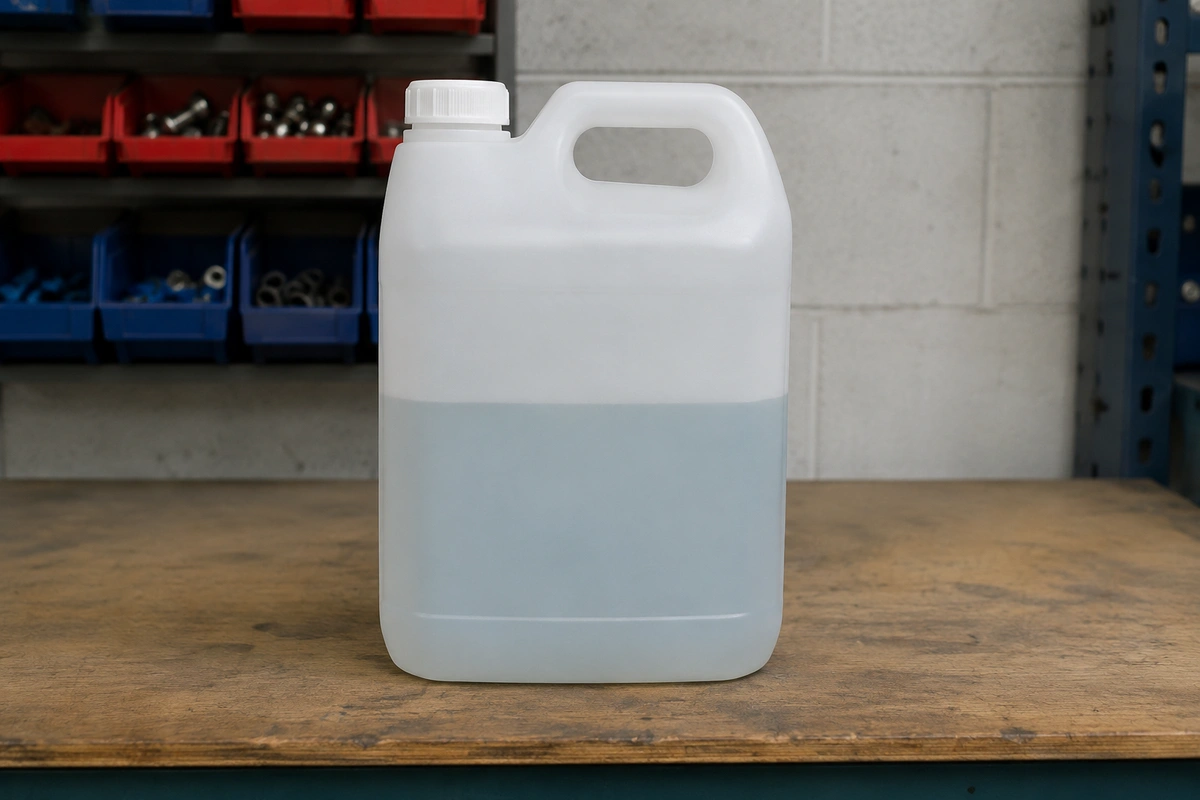 Your click
Correct area
Click a location in the image before checking your answer.
Question 9 of 10
Scenario
Scenario
There is an unlabeled container with liquid at the workplace. You do not know what the substance is.
What should you do after noticing a hazardous-substance leak?
Choose the best and safest action.
Select an answer to continue.
Question 10 of 10
What helps identify the hazards associated with a chemical substance?
Select an answer to continue.
Category quiz
Category quiz result
- Category:
- Hazardous substances
This result is for learning and VCA exam preparation only. It is not an official VCA/SCC exam result.
Incorrect answers
Category quiz
Category quiz
This quiz helps you check your knowledge of the selected category.
The result is for learning and VCA exam preparation only.
- Number of questions: 10
- Pass mark: 65%
Category quiz: Fire and explosion
Question 1 of 10
What does the shown prohibition sign mean in the context of fire risk?
Select an answer to continue.
Question 2 of 10
Who should perform the fire watch (brandwacht / heetwerkwacht) role during hot work?
Select an answer to continue.
Question 3 of 10
Click the area that obstructs access to firefighting equipment.
Click the obstacle blocking access to the fire extinguisher.
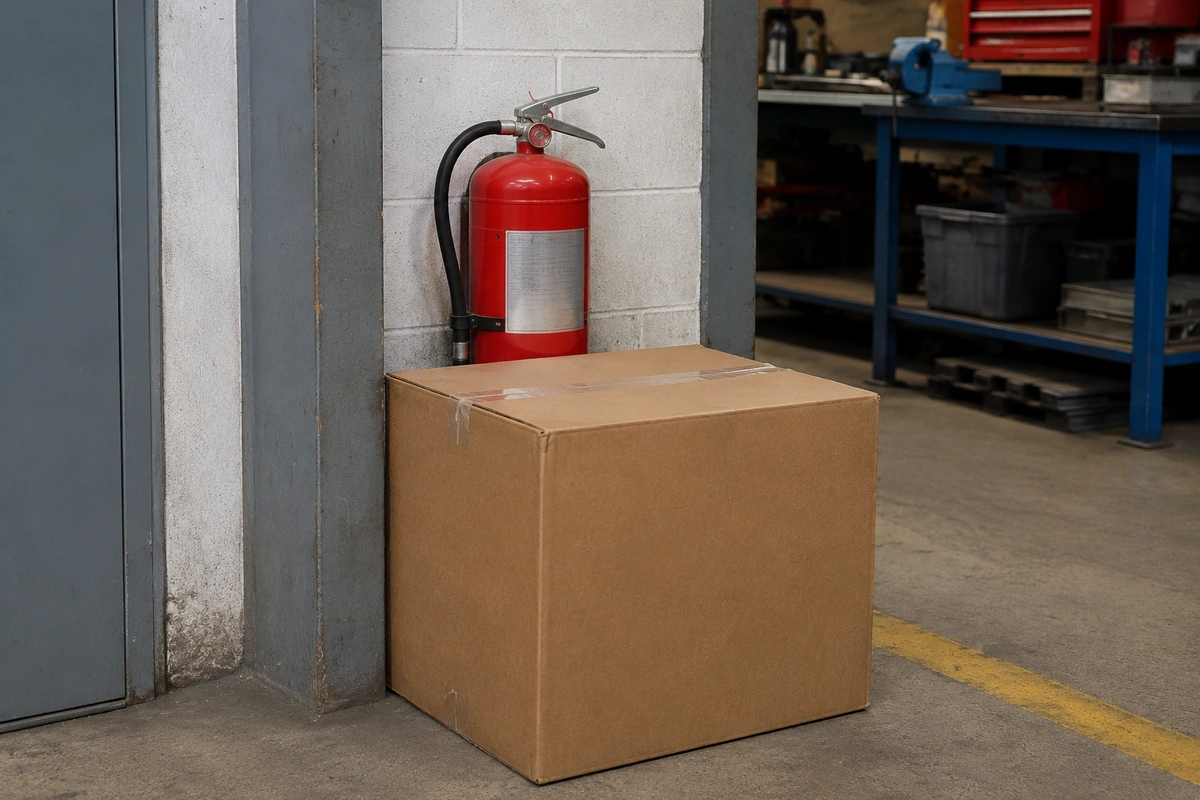 Your click
Correct area
Click a location in the image before checking your answer.
Question 4 of 10
Which items can be an ignition source?
Select all correct answers. There may be more than one correct answer.
Select an answer to continue.
Question 5 of 10
What should be provided when welding in an area with a fire risk?
Select an answer to continue.
Question 6 of 10
Which statements are correct for the no-open-flame sign?
You may select more than one answer.
Select an answer to continue.
Question 7 of 10
What best describes a fire?
Select an answer to continue.
Question 8 of 10
What does the displayed fire safety sign indicate?
Select an answer to continue.
Question 9 of 10
Which set of elements is needed for a fire to start?
Select an answer to continue.
Question 10 of 10
Match the sign to the action or meaning in a fire situation.
Match each answer to one sign. Each answer may be used only once.
Match all items to continue.
Category quiz
Category quiz result
- Category:
- Fire and explosion
This result is for learning and VCA exam preparation only. It is not an official VCA/SCC exam result.
Incorrect answers
Category quiz
Category quiz
This quiz helps you check your knowledge of the selected category.
The result is for learning and VCA exam preparation only.
- Number of questions: 10
- Pass mark: 65%
Category quiz: Confined spaces
Question 1 of 10
Who is the buitenwacht / mangatwacht / veiligheidswacht when work is carried out in a confined space?
Select an answer to continue.
Question 2 of 10
Put the steps before entering a confined space in the correct order.
Arrange the steps from first to last.
-
1
Enter the confined space only after approval and confirmation of safe conditions.
-
2
Check whether entry into the confined space is necessary and permitted.
-
3
Make sure the risk assessment, atmospheric testing and required preparations have been completed.
-
4
Provide supervision, communication, a rescue plan and required protective equipment.
Put the steps in the correct order.
Question 3 of 10
Scenario
Scenario
You are about to enter a confined space. Atmospheric testing has not yet been carried out, but the work is urgent.
What should you do before entering the confined space?
Choose the best and safest action.
Select an answer to continue.
Question 4 of 10
Case study: entering a confined space
Case study
Entering a confined space
Scenario
An employee is to enter a tank to carry out a short inspection. The work is urgent. Atmospheric testing has not yet been completed. A second employee is at the entrance, but rescue equipment and an emergency plan have not been prepared.
Read the scenario and answer the questions.
Question 1
What is the most important problem before entering the tank?
Correct answer: The lack of atmospheric testing before entry.
Explanation:
Atmospheric testing is required before entering a confined space. A short task does not remove the hazard.
Question 2
Which actions are required before safe entry?
Select all correct answers.
Correct answer: Carry out atmospheric testing., Provide a standby person and a means of calling for help., Check that the procedure and work-permit requirements are met.
Explanation:
Before entry, testing, procedures, standby arrangements and emergency preparation are required. The urgency of the work does not remove these requirements.
Question 3
Put the actions in the correct order.
Arrange the steps from first to last.
-
1
Enter only when all safety conditions have been met.
-
2
Stop preparations for entry and do not enter the tank.
-
3
Carry out the required atmospheric test and check the procedures.
-
4
Provide a standby person, communication and emergency-response readiness.
Correct answer: 1. Stop preparations for entry and do not enter the tank. 2. Carry out the required atmospheric test and check the procedures. 3. Provide a standby person, communication and emergency-response readiness. 4. Enter only when all safety conditions have been met.
Explanation:
First, do not enter an unprepared confined space. Work may begin only after testing, procedures and emergency safeguards are in place.
Answer all questions in the case study.
Question 5 of 10
What is especially important before welding in a confined space?
Select an answer to continue.
Question 6 of 10
Which actions are appropriate if conditions in a confined space become unsafe?
Select all correct answers. There may be more than one correct answer.
Select an answer to continue.
Question 7 of 10
Complete the sentence about entering a confined space.
Choose the correct completion of the sentence.
Choose an answer from the list.
Question 8 of 10
Assess which statements about work in confined spaces are correct.
Select YES or NO for each statement.
The atmosphere must be tested before entering a confined space.
If the atmosphere was tested in the morning, it always remains safe throughout the day.
A standby person should be provided for confined-space work.
Answer YES or NO for each statement.
Question 9 of 10
What best describes a confined space?
Select an answer to continue.
Question 10 of 10
What should be done if dizziness or shortness of breath occurs while working in a confined space?
Select an answer to continue.
Category quiz
Category quiz result
- Category:
- Confined spaces
This result is for learning and VCA exam preparation only. It is not an official VCA/SCC exam result.
Incorrect answers
Category quiz
Category quiz
This quiz helps you check your knowledge of the selected category.
The result is for learning and VCA exam preparation only.
- Number of questions: 10
- Pass mark: 65%
Category quiz: Ergonomics and health
Question 1 of 10
Why are short breaks or changes of position used during physically demanding work?
Select an answer to continue.
Question 2 of 10
Which behaviors help when stress and fatigue affect work safety?
Select all correct answers. There may be more than one correct answer.
Select an answer to continue.
Question 3 of 10
Which conditions are part of the workplace microclimate and can affect worker safety and physical strain?
Select all correct answers. There may be more than one correct answer.
Select an answer to continue.
Question 4 of 10
What should an employee do if they experience work-related symptoms such as back pain, numb hands or severe fatigue?
Select an answer to continue.
Question 5 of 10
Which factors can negatively affect an employee's health?
Select all correct answers. There may be more than one correct answer.
Select an answer to continue.
Question 6 of 10
Which actions help reduce physical strain during manual work?
Select all correct answers. There may be more than one correct answer.
Select an answer to continue.
Question 7 of 10
Outdoor work becomes much colder, the conditions are damp and there is a strong wind. What is the correct response?
Select an answer to continue.
Question 8 of 10
What is important when manually handling a load?
Select an answer to continue.
Question 9 of 10
What can result from prolonged repetitive movements without breaks?
Select an answer to continue.
Question 10 of 10
A worker holds a light tool with raised arms for a long time. Does the low weight mean there is no risk?
Select an answer to continue.
Category quiz
Category quiz result
- Category:
- Ergonomics and health
This result is for learning and VCA exam preparation only. It is not an official VCA/SCC exam result.
Incorrect answers
Category quiz
Category quiz
This quiz helps you check your knowledge of the selected category.
The result is for learning and VCA exam preparation only.
- Number of questions: 10
- Pass mark: 65%
Category quiz: Accidents and emergencies
Question 1 of 10
Assess which statements about responding to an accident are correct.
Select YES or NO for each statement.
First, protect your own safety and do not expose yourself to another hazard.
An accident must be reported according to procedure.
An injured person must always be moved immediately, regardless of the situation.
Answer YES or NO for each statement.
Question 2 of 10
What is a near miss?
Select an answer to continue.
Question 3 of 10
Complete the sentence about the first action after an accident.
Choose the correct completion of the sentence.
Choose an answer from the list.
Question 4 of 10
Case study: response to an accident with an active hazard
Case study
Response to an accident with an active hazard
Scenario
An employee notices a person injured after a fall. An active hazard is still present nearby: a spilled substance and moving transport vehicles. Several people want to approach the injured person immediately.
Read the scenario and answer the questions.
Question 1
What should be done first?
Correct answer: Warn others and protect the safety of the incident scene.
Explanation:
The first step is to protect your own safety and that of others. Entering an active hazard can cause another accident.
Question 2
Which actions are correct in this situation?
Select all correct answers.
Correct answer: Warn people nearby not to enter the hazard area., Secure the incident scene according to procedure., Call for help and provide information about the active hazard.
Explanation:
Correct actions reduce the number of people exposed to the hazard, initiate assistance and communicate information about the situation.
Question 3
Put the response actions in the correct order.
Arrange the steps from first to last.
-
1
Provide assistance according to procedure when it can be done safely.
-
2
Assess the situation from a safe distance and warn others.
-
3
Secure or cordon off the active hazard area.
-
4
Call for help and provide information about the injured person and the hazards.
Correct answer: 1. Assess the situation from a safe distance and warn others. 2. Secure or cordon off the active hazard area. 3. Call for help and provide information about the injured person and the hazards. 4. Provide assistance according to procedure when it can be done safely.
Explanation:
First assess the situation and warn others, then secure the area, call for help and only then provide assistance safely.
Answer all questions in the case study.
Question 5 of 10
Scenario
Scenario
You see an injured person after a fall. An active hazard is still present nearby.
What should you do first after noticing the accident?
Choose the best and safest action.
Select an answer to continue.
Question 6 of 10
What is the first step when you notice an accident?
Select an answer to continue.
Question 7 of 10
Click the item that helps secure the incident scene.
Click the barrier or cordon securing the incident scene.
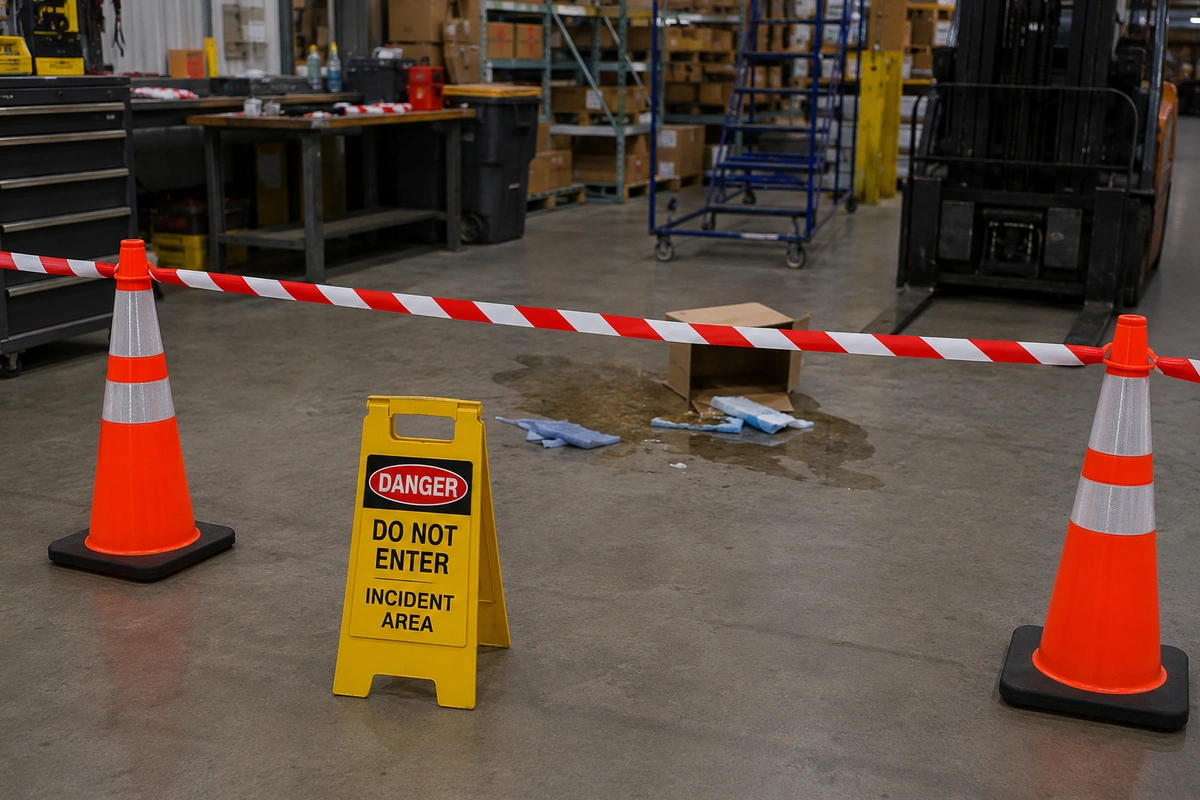 Your click
Correct area
Click a location in the image before checking your answer.
Question 8 of 10
Put the basic actions after noticing an accident or emergency in the correct order.
Arrange the steps from first to last.
-
1
Help the injured person only to the extent that it is safe and within your skills.
-
2
First protect your own safety and do not expose yourself to additional danger.
-
3
Warn people nearby and, if it can be done safely, secure the incident scene.
-
4
Call for help according to the procedure in force at the workplace.
Put the steps in the correct order.
Question 9 of 10
What should be done after an evacuation alarm is activated?
Select an answer to continue.
Question 10 of 10
What should be done with the incident scene after an accident if there is no immediate threat to life?
Select an answer to continue.
Category quiz
Category quiz result
- Category:
- Accidents and emergencies
This result is for learning and VCA exam preparation only. It is not an official VCA/SCC exam result.
Incorrect answers
Category 1 / Lesson 1
What is VCA?
You will learn what VCA means and the role it plays in preparing for safe work.
Introduction
VCA is a system of knowledge and rules that helps people work safely in technical, industrial, construction, installation and service environments. The course focuses on understanding hazards and choosing safe ways to work.
What B-VCA covers
B-VCA is the basic level. It is intended for employees carrying out tasks at the workplace who need to know the basic safety rules, protective measures, signs, procedures and ways to respond to hazards.
The course and the official exam
This course helps you learn and revise the material. The official VCA exam is taken separately at an approved examination centre, in accordance with that centre's rules.
Workplace example
Before entering a construction site, an employee checks the required protective equipment, reads the work instructions and makes sure they know where the escape routes are. This is a practical example of the VCA approach.
Remember
VCA is not just theory for an exam. It is a way of thinking about work: identify the hazard, apply the correct control measure and act when something is unsafe.
Practice questions
What is the main purpose of VCA?
Select an answer to continue.
Correct answer Preventing accidents and reducing risks during work.
Explanation
VCA focuses on safe working, recognising hazards and reducing risks in order to prevent accidents and dangerous situations.
This is the last available lesson in this category in the current MVP version. Return to the category list to choose another section of the course.
Category 1 / Lesson 2
Why is workplace safety important?
You will understand that safety protects the employee's health, other people, the company and the work environment.
Introduction
Workplace safety is intended to protect people from accidents, injuries and occupational diseases. Every decision an employee makes can reduce or increase risk.
Responsibility for yourself and others
At work, we rarely operate completely alone. Unsafe behaviour by one person can create risks for colleagues, supervisors, customers or bystanders.
Consequences of ignoring the rules
Skipping instructions, rushing, failing to use protection or working with a damaged tool can lead to an accident, downtime, property damage and personal liability.
Workplace example
Someone leaves a cable across a walkway because they want to finish the job quickly. Another person trips over it and falls. A simple lack of housekeeping can cause a serious incident.
Remember
Safety starts with small everyday decisions: keep the workplace tidy, use protection, do not ignore signs and report hazards.
Practice questions
Why is occupational safety important?
Select an answer to continue.
Correct answer It protects people's health and helps prevent accidents
Explanation
Occupational safety protects employees, co-workers, the company and the working environment.
This is the last available lesson in this category in the current MVP version. Return to the category list to choose another section of the course.
Category 1 / Lesson 3
The employee's role in safe work
You will learn that employees have an active role in noticing hazards and responding to them.
Introduction
An employee does more than simply follow orders. Employees must work according to instructions, use the required protective measures and respond when they see a hazard.
Following instructions and using protection
Work instructions and personal protective equipment are there to reduce risk. They should not be skipped just because a task seems quick or familiar.
Reporting hazards
If you notice a damaged tool, a missing guard, a slippery surface, an unclear instruction or unsafe behaviour, report it to the appropriate person.
Workplace example
An employee notices a cracked plug on an extension lead. They do not use it, set the equipment aside in a safe place and report the problem to their supervisor.
Remember
You have both the right and the duty to stop, ask questions and report a problem if you cannot perform the work safely.
Practice questions
What should an employee do when they notice an unsafe situation?
Select an answer to continue.
Correct answer Report the hazard and do not carry out unsafe work
Explanation
An employee should respond to hazards, report them and not work in unsafe conditions.
This is the last available lesson in this category in the current MVP version. Return to the category list to choose another section of the course.
Category 1 / Lesson 4
The role of the employer and supervisor
You will learn the importance of work organisation, instructions, training and supervision.
Introduction
Safe work requires good organisation. Employers and supervisors should provide conditions in which tasks can be carried out without unnecessary risk.
Safe working conditions
Work organisation includes risk assessment, instructions, serviceable tools, suitable protective equipment, signage and task planning.
Training and supervision
Employees should know what to do, which rules to follow and whom to contact when there is a problem. Supervision helps ensure that procedures are followed in practice.
Workplace example
Before work at height begins, the supervisor checks that the scaffold is approved for use, that employees know the instructions and that they have the required protective equipment.
Remember
The employer organises safe working conditions, but employees must follow the rules and report missing safeguards or irregularities.
Practice questions
What role does the client (opdrachtgever) have in preparing work to be carried out safely?
Select an answer to continue.
Correct answer The client should provide relevant information about hazards, rules and workplace requirements so that the work can be properly coordinated and prepared.
Explanation
The client provides the contractor with relevant information about hazards, safety rules and workplace requirements. This does not release the employer, supervisors or employee from their own responsibilities.
This is the last available lesson in this category in the current MVP version. Return to the category list to choose another section of the course.
Category 1 / Lesson 5
Safe behaviour in the workplace
You will learn about everyday behaviours that reduce the risk of an accident.
Introduction
Safe behaviour is not a one-off action; it is a way of working throughout the day. It requires attention, good housekeeping and respect for the rules that apply at the workplace.
Concentration and housekeeping
Rushing, distraction and clutter increase the risk of trips, impacts, mistakes and contact with hazardous parts or materials.
Signs, instructions and irregularities
Follow safety signs, listen to instructions from responsible persons and report any irregularities you notice. Do not assume that someone else will deal with them.
Workplace example
While moving materials, an employee notices a wet patch on a walkway. They mark the area, inform the supervisor and only then continue working.
Remember
Safe behaviour means staying alert, keeping things tidy, avoiding unnecessary rushing and responding quickly to unsafe situations.
Practice questions
Which behaviour is an example of safe working?
Select an answer to continue.
Correct answer Using protective equipment and reporting irregularities
Explanation
Safe working means using protection, following rules and responding to irregularities.
This is the last available lesson in this category in the current MVP version. Return to the category list to choose another section of the course.
Category 1 / Lesson 6
Hazard, risk and control measure
You will learn three basic concepts that will appear throughout the course.
Introduction
VCA often uses three concepts: hazard, risk and control measure. Understanding them helps you make safe decisions.
Hazard and risk
A hazard is something that can cause harm, such as electricity, moving machinery or working at height. Risk refers to the likelihood of that harm occurring and the possible consequences.
Control measure
A control measure is an action or safeguard that reduces risk. It may be a guard, procedure, energy isolation, sign, training or personal protective equipment.
Workplace example
An opening in a floor is the hazard. A worker falling through it is the risk. Control measures may include a barrier, a cover, signage and preventing access to the area.
Remember
First identify the hazard, then assess the risk, and finally apply the correct control measure.
Practice questions
What is risk?
Select an answer to continue.
Correct answer The possibility that a hazard will cause harm
Explanation
Risk means the likelihood and consequences of a hazard causing harm, such as injury or an accident.
This is the last available lesson in this category in the current MVP version. Return to the category list to choose another section of the course.
Category 1 / Lesson 7
The rule: think first, then act
You will see why you should stop and assess the situation before starting work.
Introduction
Many accidents begin with automatic behaviour. An employee knows the task, is in a hurry or assumes everything is as usual. That can be dangerous.
Pause before you start
Before starting, check the surroundings, tools, instructions, protective equipment and any changes in the workplace.
Ask questions and do not improvise
If you do not understand something or the conditions are different from what was expected, ask your supervisor. Do not invent your own way of working if it does not follow the instructions.
Workplace example
An employee is about to carry out a familiar task but notices a new installation next to the work area. They stop and ask whether this changes how the work must be made safe.
Remember
A short moment of thought before starting work can prevent a mistake, an injury and disruption to the whole task.
Practice questions
What does the rule “think first, then act” mean?
Select an answer to continue.
Correct answer Before starting work, assess the situation and possible hazards
Explanation
Before starting work, check the surroundings, conditions and hazards instead of acting automatically.
This is the last available lesson in this category in the current MVP version. Return to the category list to choose another section of the course.
Category 1 / Lesson 8
When should you stop work?
You will learn when work should be stopped because conditions are unsafe.
Introduction
Work should be stopped if it cannot be carried out safely. Stopping work is not a problem when it protects people from an accident.
Situations that require work to stop
Stop work when protective equipment is missing, a tool is damaged, instructions are unclear, safeguards have been removed or other people are behaving unsafely.
Changes in conditions
A sudden change in weather, a leak, noise, vehicle movement, the arrival of bystanders or a new obstruction may mean that the previous risk assessment is no longer sufficient.
Workplace example
While cutting, an employee notices that the tool guard is damaged. They switch off the equipment, set it aside and report the problem instead of trying to finish the job at any cost.
Remember
If conditions are unsafe, stop work, secure the area and report the situation to the appropriate person.
Practice questions
When should work be stopped?
Select an answer to continue.
Correct answer When protective equipment is missing or conditions are unsafe
Explanation
Work should be stopped when protection is missing, the instruction is unclear, a tool is damaged or conditions are unsafe.
This is the last available lesson in this category in the current MVP version. Return to the category list to choose another section of the course.
Category 1 / Lesson 9
Communication and reporting hazards
You will learn why it is important to inform supervisors and colleagues about risks.
Introduction
Good communication helps prevent accidents. A hazard that no one knows about can quickly lead to an incident.
What to report
Report defects, missing safeguards, unclear instructions, accidents, near misses and situations that could lead to injury.
How to communicate within the team
Clearly explain where the problem is, what you noticed and what the possible risk is. Make sure the information reaches the supervisor or other responsible person.
Workplace example
An employee notices that a pallet is partly blocking an escape route. They inform the team, report the problem and help move the obstruction to a safe location.
Remember
Reporting hazards is not informing on someone. It is an action that protects people and helps improve the way work is organised.
Practice questions
Why is reporting hazards important?
Select an answer to continue.
Correct answer It helps prevent accidents and warn others
Explanation
Reporting a hazard allows a quick response, helps secure the workplace and can prevent similar situations in the future.
This is the last available lesson in this category in the current MVP version. Return to the category list to choose another section of the course.
Category 1 / Lesson 10
Category 1 summary
You will reinforce the basic principles of responsible and safe work.
Introduction
The first category shows that VCA is practical preparation for safe work. The key is to identify hazards and act responsibly.
Employee responsibility
Employees follow instructions, use protective equipment, keep the workplace tidy, communicate hazards and do not carry out work that cannot be done safely.
The importance of procedures and response
Procedures, signs, training and control measures help reduce risk. When conditions are unsafe, work must be stopped and the problem reported.
Workplace example
Before starting a task, an employee checks the instructions, tools and protective equipment. When they notice that a safeguard is missing, they do not start work and report the situation to the supervisor.
Remember
Safe work combines knowledge, attention and responsibility. First identify the hazard, then act according to the rules.
Practice questions
Which statement best summarizes responsible work according to VCA principles?
Select an answer to continue.
Correct answer Follow the rules, assess risks and respond to hazards
Explanation
Responsible work means following rules, assessing risks, using protection and responding to hazards.
This is the last available lesson in this category in the current MVP version. Return to the category list to choose another section of the course.
Category 1 / Lesson 11
Complete the sentence from a list — the purpose of VCA
This lesson prepares you for a dropdown-gap question about the basic purpose of VCA.
Lesson objective
This lesson reinforces that VCA focuses on safe work and reducing the risk of accidents.
The question you will practise
You will complete one sentence by selecting the correct word from a dropdown list.
What to pay attention to
VCA is not intended to assess working speed or administrative matters. Safety, health and the work environment are what matter most.
Remember
VCA helps people work safely and reduce the risk of accidents and hazardous situations.
Dropdown gap-fill question
Complete the sentence about the purpose of VCA.
Choose the correct completion of the sentence.
Choose an answer from the list.
Correct answer accidents
Explanation
VCA focuses on safety, health and the working environment. Its purpose is to reduce the risk of accidents and dangerous situations.
This is the last available lesson in this category in the current MVP version. Return to the category list to choose another section of the course.
This is the last available lesson in this category in the current MVP version. Return to the category list to choose another section of the course.
Category 2 / Lesson 1
Why do occupational safety rules exist?
You will learn that occupational safety rules protect people from accidents and occupational diseases.
Introduction
Occupational safety rules exist so that work is organised safely. They protect employees' lives and health and help prevent accidents.
Clear rules
Regulations, instructions and procedures explain what may be done, what is prohibited and which safeguards must be used for specific types of work.
Responsibilities of both parties
Safety requires action by both employer and employee. The employer organises the working conditions, while the employee follows the rules and reports problems.
Workplace example
The rule requiring a safety helmet in a construction area is not a formality. It protects the head from impacts, falling objects or contact with structural elements.
Remember
Occupational safety is not an optional extra. It is a set of rules intended to prevent injuries, occupational diseases and hazardous situations.
Practice questions
Why do occupational health and safety regulations exist?
Select an answer to continue.
Correct answer To protect the health and lives of employees
Explanation
Occupational health and safety regulations are intended to prevent accidents, protect health and life, and establish rules for safe working.
This is the last available lesson in this category in the current MVP version. Return to the category list to choose another section of the course.
Category 2 / Lesson 2
Employee responsibilities
You will learn the basic responsibilities of an employee with regard to safe work.
Introduction
Employees have a duty to work safely. This means following instructions, using protective measures and making sure they do not create hazards.
Everyday responsibilities
Basic responsibilities include following procedures, maintaining good housekeeping, using protective equipment, checking tools and reporting hazards.
Sobriety and fitness for work
You must not work under the influence of alcohol, drugs or substances that impair attention and reaction time. Such a condition can create a serious risk for many people.
Workplace example
An employee is instructed to wear safety glasses while drilling. They put them on before starting and keep them on as long as there is a risk from flying particles.
Remember
An employee's responsibilities concern not only completing the task, but also the way in which the task is carried out.
Practice questions
Which responsibility belongs to the employee?
Select an answer to continue.
Correct answer Following instructions and using protective equipment
Explanation
An employee is required to follow instructions, use protective equipment and report hazards.
This is the last available lesson in this category in the current MVP version. Return to the category list to choose another section of the course.
Category 2 / Lesson 3
Employer responsibilities
You will understand that the employer must organise work safely.
Introduction
The employer is responsible for organising work so that risks are identified and reduced. It is not enough simply to expect employees to be careful.
Risk assessment and instructions
The employer should assess hazards, prepare instructions, provide information about risks and define the control measures needed for safe work.
Training, tools and supervision
The employer must provide training, serviceable tools, required protective equipment and supervision for particularly hazardous work.
Workplace example
A company plans work on an installation. Before work begins, it provides instructions, energy isolation, signage, tools and a person responsible for supervision.
Remember
Safe work results from good organisation, training, clear procedures and cooperation between the employer and employees.
Practice questions
Which responsibility belongs to the employer?
Select an answer to continue.
Correct answer Organising work safely
Explanation
The employer should provide safe working conditions, risk assessment, instructions, training and appropriate protective equipment.
This is the last available lesson in this category in the current MVP version. Return to the category list to choose another section of the course.
Category 2 / Lesson 4
Work instructions
You will learn why instructions must not be treated as a formality.
Introduction
A work instruction describes how to perform a task safely. It helps prevent mistakes, especially when working with tools, energy sources, chemicals or at height.
What an instruction contains
An instruction may specify the sequence of steps, required protective equipment, hazards, prohibitions, required authorisations and what to do in an emergency.
When to read the instruction
You should know the instruction before starting work, after a task changes, after conditions change or whenever you are unsure of the correct way to proceed.
Workplace example
An employee has to use a new chemical product. Before starting, they check the instructions and safety information to find out which gloves and eye protection are required.
Remember
Do not work your own way if the instruction says otherwise. If the instruction is unclear, ask before starting work.
Practice questions
What should you do if a work instruction is unclear?
Select an answer to continue.
Correct answer Ask the supervisor or responsible person
Explanation
If an instruction is unclear, do not improvise. Ask the supervisor or responsible person.
This is the last available lesson in this category in the current MVP version. Return to the category list to choose another section of the course.
Category 2 / Lesson 5
Procedures and work permits
You will learn the importance of procedures and permits for higher-risk work.
Introduction
Some tasks are more hazardous than others. They therefore require additional procedures, supervisor approval or a written work permit.
Higher-risk work
Permits may be required for hot work, confined-space work, work at height, energy isolation or work with hazardous substances, among other activities.
What a permit confirms
A permit helps confirm that the risk has been assessed, safeguards are in place, everyone knows what to do and the work can start in a controlled manner.
Workplace example
Before welding in a facility, an employee checks that a hot-work permit is in place, combustible materials have been removed and fire-fighting equipment is available.
Remember
If a task requires a permit, do not start without authorisation and without checking the required safeguards.
Practice questions
For which types of work is a work permit often required?
Select an answer to continue.
Correct answer For higher-risk work, such as hot work or work in a confined space
Explanation
Work permits are used for higher-risk tasks, such as hot work, work in confined spaces or energy isolation.
This is the last available lesson in this category in the current MVP version. Return to the category list to choose another section of the course.
Category 2 / Lesson 6
LMRA — the last-minute risk assessment before work
You will learn a simple method for checking risks immediately before starting a task.
Introduction
An LMRA is a short final risk assessment carried out immediately before work begins. It helps confirm that conditions are still safe.
When to carry out an LMRA
Carry out an LMRA before starting a task, after a break, when conditions change, after changing equipment or whenever you have doubts about safety.
What to check
Check the task, surroundings, tools, protective equipment, instructions, other people nearby and possible sources of energy or hazardous substances.
Workplace example
Before starting installation work, an employee notices forklift traffic nearby. They delay the start and arrange for the work area to be safely separated.
Remember
If the LMRA identifies unsafe conditions, do not start work. Stop, report the problem and wait until suitable safeguards are in place.
Practice questions
What is an LMRA?
Select an answer to continue.
Correct answer A last-minute risk assessment carried out before starting work
Explanation
An LMRA is a short risk assessment carried out immediately before work. It helps check whether the task can be started safely.
This is the last available lesson in this category in the current MVP version. Return to the category list to choose another section of the course.
Category 2 / Lesson 7
Unsafe behaviour and its consequences
You will see that breaking safety rules can lead to accidents and personal responsibility.
Introduction
Unsafe behaviour is any action that increases the risk of an accident. It often results from rushing, routine, ignoring rules or time pressure.
Typical examples
Unsafe behaviour includes ignoring signs, failing to use protective equipment, bypassing safeguards, working without a permit and using equipment contrary to instructions.
Possible consequences
The result may be an accident, equipment damage, a work stoppage, loss of access to the site, disciplinary action or personal liability.
Workplace example
An employee removes a machine guard to clear a blockage more quickly. This exposes them to moving parts and violates a basic safety rule.
Remember
Never take shortcuts at the expense of safety. Safeguards and procedures exist because the risks are real.
Practice questions
Which behaviour is unsafe?
Select an answer to continue.
Correct answer Bypassing machine safeguards
Explanation
Bypassing safeguards can lead to a serious accident and is an example of unsafe behaviour.
This is the last available lesson in this category in the current MVP version. Return to the category list to choose another section of the course.
Category 2 / Lesson 8
Reporting accidents and near misses
You will learn why reporting incidents helps prevent future accidents.
Introduction
Every accident, near miss and hazardous situation should be reported. This makes it possible to identify the cause and prevent the event from happening again.
Accident and near miss
An accident is an event that causes injury or damage. A near miss is a situation in which harm could have occurred but did not on that occasion.
Who to report to
Incidents should be reported to the supervisor, the person responsible for occupational safety, or in accordance with the procedure used at the workplace.
Workplace example
A spanner falls from a platform and lands next to an employee without injuring anyone. This is a near miss and must be reported because the consequences could be serious next time.
Remember
Reporting an incident is not about finding someone to blame. It is about improving safety and removing the causes of hazards.
Practice questions
Why must near misses be reported?
Select an answer to continue.
Correct answer So that actual accidents can be prevented in the future
Explanation
A near miss shows that a real hazard existed. Reporting it helps remove the cause and prevent an accident.
This is the last available lesson in this category in the current MVP version. Return to the category list to choose another section of the course.
Category 2 / Lesson 9
Work only with the required authorisation
You will understand that some work may only be carried out by trained or authorised people.
Introduction
Not every employee may perform every task. Some tasks require training, experience, formal authorisation or explicit approval from a supervisor.
Examples of specialist work
Authorisation may be required for operating machinery, forklifts, lifting platforms, scaffolds and electrical installations, as well as for welding and other specialist tasks.
Why this matters
An untrained person may not understand the hazards, equipment limitations, emergency procedures or rules for securing the work area.
Workplace example
An employee sees an available lifting platform and wants to use it for a quick task. They have not been trained, so they do not operate it and instead ask an authorised person for help.
Remember
Only carry out work for which you have the necessary preparation, approval and authorisation. If in doubt, ask your supervisor.
Practice questions
Why may some work be carried out only by authorized persons?
Select an answer to continue.
Correct answer Because it requires knowledge, training or special qualifications
Explanation
Work involving machinery, electricity, scaffolding or lifting equipment can be hazardous and requires the appropriate authorization or qualifications.
This is the last available lesson in this category in the current MVP version. Return to the category list to choose another section of the course.
Category 2 / Lesson 10
Category 2 summary
You will reinforce the basic responsibilities, procedures and importance of occupational safety rules.
Introduction
The second category shows that safe work is based on regulations, procedures, instructions and a clear division of responsibilities.
Responsibilities and procedures
Employees follow instructions, use protective equipment and report hazards. Employers organise safe conditions, assess risks, provide training, tools and supervision.
LMRA and incident reporting
An LMRA helps check the risk immediately before work. Accidents, near misses and hazardous situations must be reported to prevent further incidents.
Workplace example
Before starting work that requires a permit, an employee checks the instructions, authorisations, protective equipment and supervisor approval. If anything is missing, the task does not begin.
Remember
Occupational safety protects life and health. Instructions, procedures, authorisations and hazard reporting are mandatory parts of safe work.
Practice questions
Which statement best describes occupational health and safety rules?
Select an answer to continue.
Correct answer Health and safety rules protect people and help them work safely
Explanation
Health and safety rules are part of everyday work. They protect health and life and help prevent accidents.
This is the last available lesson in this category in the current MVP version. Return to the category list to choose another section of the course.
Category 2 / Lesson 11
Complete the sentence from a list — work procedures
This lesson prepares you for a dropdown-gap question about working in accordance with procedures.
Lesson objective
This lesson reinforces the principle that work should be carried out in accordance with the applicable procedures.
The question you will practise
You will complete a sentence by selecting the correct term from a dropdown list.
What to pay attention to
Procedures describe the safe way to perform a task. Rumours, shortcuts and personal assumptions are not substitutes for them.
Remember
Employees should perform work in accordance with the applicable procedures and instructions.
Dropdown gap-fill question
Complete the sentence about the employee's responsibilities.
Choose the correct completion of the sentence.
Choose an answer from the list.
Correct answer procedures
Explanation
Procedures define a safe way to perform work. Following them helps prevent accidents and dangerous situations.
This is the last available lesson in this category in the current MVP version. Return to the category list to choose another section of the course.
Category 2 / Lesson 12
Hot-work permit for welding
You will learn when welding requires formal authorisation and verification of safeguards.
Why this matters
Welding is classed as hot work because it produces sparks, hot particles, high temperatures and sometimes an open flame. Where combustible materials or an explosion risk are present, welding cannot be treated as an ordinary technical task.
Hot-work permit
A permit confirms that the fire risk, ventilation, combustible materials, protective measures, fire-fighting equipment and responsible supervisor have been checked before work starts. The point is not the document itself, but conscious confirmation that the work can be performed safely.
Workplace example
A welder has to repair a metal component in a warehouse. Cardboard boxes, packaging and chemical containers are nearby. In such a situation, a hot-work permit may be required before work begins, together with removal or shielding of combustible materials.
Remember
If welding may produce sparks, flames or high temperatures in an area with a fire risk, first check the procedure and required permit. Working without the required authorisation breaches occupational safety rules.
Practice questions
When may a hot-work permit be required before welding?
Select an answer to continue.
Correct answer When the work may produce sparks, flames or high temperatures in an area where there is a fire risk.
Explanation
Welding is hot work. A permit helps confirm the risk assessment, fire precautions and approval by the responsible person.
This is the last available lesson in this category in the current MVP version. Return to the category list to choose another section of the course.
Category 2 / Lesson 13
No permit before welding
You will learn what to do when welding requires authorisation but no permit is available.
Unsafe situation
Time pressure can tempt someone to start welding 'just for a moment'. Short hot-work jobs can be especially dangerous because sparks may reach combustible materials, gaps, spaces under floors or areas behind screens.
Correct response
If the procedure requires a hot-work permit and no permit is available, the employee must not start work. Preparations should stop and the matter should be reported to the supervisor, responsible person or work coordinator.
What not to do
Do not start welding with the intention of completing the paperwork later. Do not hand the task to a colleague simply to bypass the procedure. The issue is not who performs the work, but the absence of confirmed safeguards.
Remember
No required permit means: do not start, report the issue, and wait for a decision and the necessary safeguards. In an exam, the correct response is to stop the work rather than improvise.
Practice questions
What should an employee do if a permit is required before welding but is not available?
Select an answer to continue.
Correct answer Do not start work and report it to the supervisor or responsible person.
Explanation
If the procedure requires a permit, the work must not start without approval and confirmed safeguards.
This is the last available lesson in this category in the current MVP version. Return to the category list to choose another section of the course.
Category 2 / Lesson 14
Checks before starting hot work
You will learn the key checks to make before welding begins.
Checklist
Before welding, more than the equipment itself must be checked. Important points include the work area, combustible materials, ventilation, fumes, PPE, fire-fighting equipment, escape routes and whether anyone nearby could be exposed to sparks or arc radiation.
Fire and explosion
Sparks and hot particles can ignite paper, wood, dust, insulation, plastic sheeting, packaging or residues of flammable substances. Gaps, ducts, waste beneath the work area and chemical containers are particularly hazardous.
Employee health
Welding can produce fumes and gases. Check that suitable ventilation, local exhaust extraction or other controls are in place to reduce inhalation. PPE must be appropriate for the process and in good condition.
Remember
Before welding as hot work, check the fire risk, combustible materials, ventilation, protective measures and fire-fighting equipment. Being able to weld is not, by itself, enough to start the work safely.
Practice questions
What should be checked before welding starts as hot work?
Select an answer to continue.
Correct answer Fire risk, combustible materials, ventilation, protective equipment and firefighting equipment.
Explanation
Before welding, the working conditions and safeguards must be checked: the surroundings, ignition sources, fumes, protective equipment and readiness to respond to a fire.
This is the last available lesson in this category in the current MVP version. Return to the category list to choose another section of the course.
Category 2 / Lesson 15
Toolbox meeting — discussing safety before work
You will learn how a toolbox meeting helps discuss hazards, rules and the safe way to carry out a task.
What is a toolbox meeting?
A toolbox meeting is a short, practical meeting about workplace safety. It may focus on a specific task, new hazards, changes in working methods, accidents, near misses or rules that apply at a particular site.
Why it is held
The aim is to make sure employees understand the hazards, protective measures and the safe way to perform the work. It is not merely a formality or an attendance list.
The employee's role
Employees should listen, ask questions and raise concerns. If an instruction or agreement is unclear, ask for an explanation before starting work.
Example
During a toolbox meeting, a new sequence for isolating equipment is discussed. An employee does not understand one step, so they ask the person leading the meeting and only start the task after it has been clarified.
Remember
If you do not understand a safety agreement, ask and clarify it. Do not start work based on an assumption.
Practice questions
During a toolbox meeting, a new working method is discussed. You do not understand one of the safety requirements. What should you do before starting work?
Select an answer to continue.
Correct answer Ask for clarification and make sure you understand the requirements before starting work.
Explanation
A toolbox meeting is used to discuss hazards and the safe way to work in practical terms. If you do not understand something, it must be clarified before the task starts.
This is the last available lesson in this category in the current MVP version. Return to the category list to choose another section of the course.
Category 2 / Lesson 16
Workplace inspection — checking the work area
You will learn the purpose of a workplace inspection and the correct response to hazards that are found.
Purpose of the inspection
A workplace inspection, or werkplekinspectie, is used to identify unsafe situations, unsafe behaviour and missing or defective safeguards.
What may be found
An inspection may reveal damaged equipment, a missing guard, a blocked emergency escape route, a leak, improper storage or work being carried out contrary to instructions.
What to do when a problem is found
Simply noticing a hazard is not enough. It must be reported, and if the situation requires immediate action, the work must be stopped or the area secured until the problem has been corrected.
Example
During an inspection, a damaged machine guard is found. Work does not begin until the equipment has been properly safeguarded and approved for use.
Remember
A workplace inspection must lead to action: identify, report, secure and do not continue unsafe work.
Practice questions
During a workplace inspection, you notice a damaged machine guard at a workstation where work is about to start. What should you do?
Select an answer to continue.
Correct answer Stop the work from starting, make the situation safe and report the defect according to the procedure.
Explanation
A workplace inspection must lead to real action. A hazard that is found must be reported and removed or secured before work starts.
This is the last available lesson in this category in the current MVP version. Return to the category list to choose another section of the course.
Category 2 / Lesson 17
Specific safety arrangements
You will understand that local instructions and additional rules may apply even when no formal work permit is required.
Not only a work permit
Safe work organisation does not rely only on a formal work permit. A site may have additional instructions, local rules, task-specific arrangements or extra protective measures.
When additional arrangements apply
They may result from site conditions, the presence of other contractors, the type of installation, vehicle movements, the process being carried out or a particular risk associated with the task.
No permit does not mean no rules
If a formal permit is not required, all applicable instructions and agreed safeguards must still be followed. You must not decide on your own that they are unnecessary.
Example
A simple maintenance task does not require a work permit, but the site requires use of a designated entrance, notification to the control room and barriers around the work zone. These rules still apply.
Remember
The absence of a formal work permit does not mean that there are no additional safety rules.
Practice questions
A formal work permit is not required for a task, but an additional local safety instruction applies at the site. What should the employee do?
Select an answer to continue.
Correct answer Follow the local instruction and the additional safety arrangements.
Explanation
The absence of a formal work permit does not mean that there are no additional rules. Local instructions, task-specific arrangements and required safeguards still apply.
This is the last available lesson in this category in the current MVP version. Return to the category list to choose another section of the course.
Category 2 / Lesson 18
Changes in conditions after a permit is issued
You will learn what to do when working conditions change after a task has been approved or a permit has been issued.
A permit applies to specific conditions
A work permit describes the scope of the task and the required safeguards for specific conditions. It does not give unconditional permission to continue regardless of changes in the surroundings.
What counts as a change in conditions
A change may include a new hazard, different work starting nearby, a change in the installation, worsening weather, failure of a safeguard, a change in the scope of the task or other people entering the work area.
The correct response
When conditions no longer match the agreed arrangements, stop work and report the change. The risk and required safeguards must be reassessed, and the permit or instruction must be reconfirmed or updated if necessary.
Example
A permit was issued for work in a segregated area. Later, forklift traffic starts nearby. The employee stops the task and reports the change instead of continuing under the old arrangement.
Remember
If conditions change: stop, report, reassess and only then continue the work.
Practice questions
After a work permit has been issued, the conditions change: other work starts nearby and creates a new hazard. What should the employee do?
Select an answer to continue.
Correct answer Stop work, report the change and reconfirm the conditions and required safeguards.
Explanation
A permit applies to specific working conditions and a defined scope. When conditions change, work must stop, the new risk must be assessed and it must be confirmed that the work can continue safely.
This is the last available lesson in this category in the current MVP version. Return to the category list to choose another section of the course.
This is the last available lesson in this category in the current MVP version. Return to the category list to choose another section of the course.
Category 3 / Lesson 1
Hazards in the workplace
You will learn what a hazard is and why it must be identified before work begins.
What can be a hazard
A hazard is anything that can cause an accident, injury, occupational disease, fire, equipment damage or another dangerous situation.
Workplace example
A hazard may be a slippery floor, a moving machine part, noise, a chemical substance, electricity or poor housekeeping at the workplace.
Remember
An accident does not have to happen for a situation to be hazardous. It is enough that the situation could cause harm.
Practice questions
What best describes a hazard in the workplace?
Select an answer to continue.
Correct answer Anything that can cause harm or an accident.
Explanation
A hazard is anything that can cause harm, injury, an accident, illness, fire or another dangerous situation. An accident does not need to have happened yet for something to be a hazard.
This is the last available lesson in this category in the current MVP version. Return to the category list to choose another section of the course.
Category 3 / Lesson 2
Risk versus hazard
You will understand how risk differs from the hazard itself.
Risk
Risk is the likelihood that a hazard will actually cause harm and how serious the consequences of that harm may be.
The difference
A hazard answers the question: 'What can cause harm?' Risk answers: 'How likely is the harm and how serious could the consequences be?'
Example
A knife is a hazard, but the level of risk depends on how it is used, the employee's experience, the way work is organised and the control measures in place.
Practice questions
What is the difference between risk and a hazard?
Select an answer to continue.
Correct answer Risk describes the likelihood of harm and the possible consequences of a hazard.
Explanation
A hazard is a source of possible harm. Risk describes how likely harm is to occur and how serious its consequences may be.
This is the last available lesson in this category in the current MVP version. Return to the category list to choose another section of the course.
Category 3 / Lesson 3
LMRA before starting work
You will learn about the short risk assessment carried out immediately before a task.
What LMRA means
LMRA stands for Last Minute Risk Analysis. It is a short risk assessment carried out immediately before work starts.
Questions before starting
Before work, stop and check: do I know what I have to do, do I know the hazards, do I have the right tools and protective equipment, and is the work area tidy?
Purpose of LMRA
The purpose of an LMRA is to make sure the task can be carried out safely under the current conditions.
Practice questions
When is the best time to carry out a short LMRA risk assessment?
Select an answer to continue.
Correct answer Immediately before starting the task.
Explanation
An LMRA, or Last Minute Risk Analysis, is carried out immediately before starting work. Its purpose is to quickly check whether the task, workplace, equipment and protective measures are safe.
This is the last available lesson in this category in the current MVP version. Return to the category list to choose another section of the course.
Category 3 / Lesson 4
Responding to a serious hazard
You will learn what to do when you notice a dangerous situation before work begins.
Do not start hazardous work
If the situation is dangerous or unclear, do not start work until the problem has been clarified.
Warn others and secure the area
Depending on the situation, the employee should stop, secure the area, warn others and report the problem to the supervisor.
Safety before speed
Finishing a task quickly must never be more important than people's safety.
Practice questions
What should an employee do if they notice a serious hazard before starting work?
Select an answer to continue.
Correct answer Stop, make the situation safe, warn others and report the problem.
Explanation
If an employee notices a serious hazard, they should not start work until the situation has been clarified. Others should be warned, the area should be secured, work should be stopped if necessary, and the problem should be reported to the supervisor.
This is the last available lesson in this category in the current MVP version. Return to the category list to choose another section of the course.
Category 3 / Lesson 5
Controlling risk at the source
You will learn the principle of removing hazards or reducing them at the source.
Start with the source of the hazard
Preventive action should first remove the hazard or reduce the risk at its source.
Examples of safeguards
You can change the work method, install guards, mark off an area, improve housekeeping or use serviceable equipment.
Protective equipment
Personal protective equipment is important, but it should usually be an additional layer of protection rather than the only barrier.
Practice questions
Which action best reduces risk at the source?
Select an answer to continue.
Correct answer Eliminating the hazard or applying an engineering control.
Explanation
Risk should preferably be reduced at the source by eliminating the hazard or using engineering and organizational controls. Personal protective equipment is important, but it should usually be an additional layer of protection.
This is the last available lesson in this category in the current MVP version. Return to the category list to choose another section of the course.
Category 3 / Lesson 6
Examples of hazards
You will practise identifying situations that may lead to harm.
Typical hazards
Examples of hazards include a wet or slippery floor, a damaged electrical cable, a missing machine guard, noise, dust and hazardous substances.
Not everything is a hazard
A clear work instruction or a correctly marked escape route usually helps reduce risk.
Consider the consequences
A hazard is a situation that can lead to injury, an accident, fire or other harm.
Practice questions
Which situations can be hazards in the workplace?
You can select more than one answer.
You can select more than one answer.
Correct answer A wet and slippery floor., A damaged electrical cable., A missing guard on a moving machine part.
Explanation
Hazards are situations that can lead to harm or an accident. A wet floor, a damaged cable and a missing machine guard can cause injury. Clear instructions and correct signage usually help reduce risk.
This is the last available lesson in this category in the current MVP version. Return to the category list to choose another section of the course.
Category 3 / Lesson 7
A quick check before a task
You will learn what is worth checking before work begins.
Check the task
The employee should make sure they understand the task and know which activities they are expected to perform.
Check the area and protective equipment
Before starting, check that the work area is safe, the equipment is serviceable and the protective equipment is suitable.
Report doubts
If the situation is unclear or unsafe, report it instead of skipping the check because you are in a hurry.
Practice questions
Which actions belong in a short risk assessment before starting work?
You can select more than one answer.
You can select more than one answer.
Correct answer Checking that I understand the task., Checking that the workplace is safe., Checking that I have the correct protective equipment., Reporting an unclear or unsafe situation.
Explanation
Before starting work, check the task, workplace, equipment and protective measures. If the situation is unclear or unsafe, report it. Urgency is not a reason to skip safety checks.
This is the last available lesson in this category in the current MVP version. Return to the category list to choose another section of the course.
Category 3 / Lesson 8
What to check before starting a task
You will reinforce a practical pre-work checklist.
Understanding the task
Before starting, check that you understand the objective, the sequence of actions and the applicable instructions.
Safe conditions
The work area should be tidy, secured and free from obvious hazards.
Equipment and protection
The equipment used must be serviceable, and personal protective equipment must be selected for the hazards present.
Practice questions
What should an employee check before starting a task?
Select an answer to continue.
Correct answer Whether they understand the task, the workplace is safe, and the equipment and protective measures are appropriate.
Explanation
Before starting work, check the task, workplace, equipment, safeguards and required personal protective equipment.
This is the last available lesson in this category in the current MVP version. Return to the category list to choose another section of the course.
Category 3 / Lesson 9
LMRA in practice
You will reinforce that LMRA is a quick safety check before work.
When to use LMRA
An LMRA is carried out immediately before starting a task, especially when conditions may change.
A short analysis
It is not about producing a long document, but consciously checking hazards, safeguards, tools and protective equipment.
Decision
After the LMRA, the employee should know whether work can proceed safely or whether they must stop and clarify a problem.
Practice questions
What does LMRA mean in practice?
Select an answer to continue.
Correct answer A short risk assessment carried out immediately before starting work.
Explanation
LMRA stands for Last Minute Risk Analysis, a quick risk assessment just before work starts. It helps determine whether the task can be performed safely.
This is the last available lesson in this category in the current MVP version. Return to the category list to choose another section of the course.
Category 3 / Lesson 10
Safety when the situation is unclear
You will review the principle that safety takes priority over speed.
Uncertainty is a warning sign
If an employee does not understand the task, does not know the hazards or sees unsafe conditions, they should stop before continuing.
Reporting the problem
The problem should be reported to the supervisor or responsible person so that a safe way of working can be agreed.
The key principle
Safety and clarification of the problem take priority over finishing the task quickly.
Practice questions
What takes priority when a situation during work is unsafe or unclear?
Select an answer to continue.
Correct answer Safety and resolving the problem before continuing the work.
Explanation
If a situation is unsafe or unclear, do not continue work until the problem has been resolved. Safety takes priority over speed.
This is the last available lesson in this category in the current MVP version. Return to the category list to choose another section of the course.
Category 3 / Lesson 11
Scenario question — a new hazard before work
A short scenario testing how to respond to a new hazard and the need to reassess risk.
How to approach the situation
If a new hazard appears before a task starts, do not ignore it or begin work simply because the task will be short.
The safest decision
First stop the preparations, assess the risk and report the hazard to the supervisor or responsible person.
Practice questions
Assess which statements about risk assessment are correct.
Select YES or NO for each statement.
Before starting work, check the workplace and possible hazards.
If the work is short, the risk assessment can be skipped.
If the situation is unsafe, the employee should stop work and report the problem.
Answer YES or NO for each statement.
Correct answer Before starting work, check the workplace and possible hazards. — YES; If the work is short, the risk assessment can be skipped. — NO; If the situation is unsafe, the employee should stop work and report the problem. — YES
Explanation
Risk assessment helps identify hazards before work starts. A short task does not remove the need to think about safety. If the situation is unsafe, stop work and report the problem.
This is the last available lesson in this category in the current MVP version. Return to the category list to choose another section of the course.
Category 3 / Lesson 12
Ordering question — put the steps for starting work safely in the correct order
This lesson prepares you for an ordering question about the correct sequence for starting work safely.
Lesson objective
This lesson prepares you for a practice question from the Hazards and Risk Assessment section.
The question you will practise
Put the steps involved in starting work safely in the correct order.
What to pay attention to
Arrange the steps from first to last.
Remember
Before starting work, first identify the hazards, assess the risks, apply the required control measures and only then begin the task. If conditions are unsafe, do not start work.
Practice questions
Put the actions for starting work safely in the correct order.
Arrange the steps from first to last.
-
1
Start work only when the conditions are safe.
-
2
Check the workplace and identify possible hazards.
-
3
Assess the risk and consider whether the work can be carried out safely.
-
4
Apply the required protective measures and safeguards.
Put the steps in the correct order.
Correct order 1. Check the workplace and identify possible hazards. 2. Assess the risk and consider whether the work can be carried out safely. 3. Apply the required protective measures and safeguards. 4. Start work only when the conditions are safe.
Explanation
Before starting work, first identify hazards, assess the risk, apply protective measures and only then begin the task. If conditions are unsafe, the work must not be started.
This is the last available lesson in this category in the current MVP version. Return to the category list to choose another section of the course.
Category 3 / Lesson 13
Scenario question — What should you do?
This lesson prepares you for a scenario question: What should you do?
Lesson objective
This lesson prepares you for a practice question from the Hazards and Risk Assessment section.
The question you will practise
What should you do?
What to pay attention to
Choose the best and safest course of action.
Remember
A new hazard requires the risk to be reassessed. Do not start work until you know it can be done safely.
Scenario question
Scenario
Before starting work, you notice a new hazard at the workplace that was not covered by the instruction.
What should you do after noticing the new hazard?
Choose the best and safest action.
Select an answer to continue.
Correct answer Stop the preparations, assess the risk and report the hazard to the supervisor.
Explanation
A new hazard requires a new risk assessment. Do not start work until it is clear that the task can be carried out safely.
This is the last available lesson in this category in the current MVP version. Return to the category list to choose another section of the course.
Category 3 / Lesson 14
Classification question — assign the items to the correct groups
This lesson prepares you for a classification question: assign the items to the correct groups.
Lesson objective
This lesson prepares you for a practice question from the Hazards and Risk Assessment section.
The question you will practise
Assign the items to the correct groups.
What to pay attention to
Choose the correct group for each item.
Remember
A hazard is something that can cause an accident or other harm. A control measure reduces risk or protects the employee from the consequences of a hazard.
Classification question
Assign the items to the groups related to hazards and controls.
Choose the correct group for each item.
Choose a group for each item.
Correct answer Spilled oil in a walkway — Hazard; Missing machine guard — Hazard; Barricading a hazardous area — Control measure; Using appropriate protective equipment — Control measure
Explanation
A hazard is something that can cause an accident or harm. A control measure reduces risk or protects the employee from the effects of a hazard.
This is the last available lesson in this category in the current MVP version. Return to the category list to choose another section of the course.
Category 3 / Lesson 15
Complete the sentence from a list — LMRA
This lesson prepares you for a dropdown-gap question about the short LMRA risk assessment.
Lesson objective
This lesson reminds you that immediately before starting work it is worth checking the task and surroundings once again.
The question you will practise
You will select from a list the name of the short risk assessment carried out before work.
What to pay attention to
LMRA helps detect changes in working conditions and stop the task if a hazard appears.
Remember
The short risk assessment carried out immediately before work starts is called LMRA.
Dropdown gap-fill question
Complete the sentence about a short risk assessment.
Choose the correct completion of the sentence.
Choose an answer from the list.
Correct answer LMRA
Explanation
LMRA helps check immediately before work starts whether the task and workplace are safe. If a hazard appears, work should be stopped and the problem reported.
This is the last available lesson in this category in the current MVP version. Return to the category list to choose another section of the course.
Category 3 / Lesson 16
Case study — a new hazard before starting work
Practise responding to new hazards noticed immediately before work starts.
Lesson objective
The objective is to recognise that a newly identified hazard requires you to stop, assess the risk and report the problem before starting the task.
The key principle
Urgency does not justify failing to secure the area or operating a machine without a required guard.
Practical decision
First secure the walkway, do not start a machine with a missing guard, inform the supervisor and begin work only after the risk has been removed.
Case study
A new hazard before starting work
Scenario
An employee is about to begin a short service task. On arrival, they notice spilled oil in a walkway and a missing guard on one of the machines. The task is urgent and the supervisor expects work to start quickly.
Read the scenario and answer the questions.
Question 1
What should the employee do first?
Correct answer Stop, do not start the work, and report the hazards that were noticed.
Explanation
The first step is to stop before starting the work and report the hazards. The spilled oil and the missing machine guard must not be ignored.
Question 2
Which items are hazards?
Select all correct answers.
Correct answer Spilled oil in a walkway., A missing guard on the machine.
Explanation
Spilled oil increases the risk of slipping, while a missing machine guard can lead to contact with moving parts. Time pressure is not a safety measure.
Question 3
Put the actions before starting work in the correct order.
Arrange the steps from first to last.
-
1
Start work only after the risk has been eliminated or controlled.
-
2
Stop and do not start work in unsafe conditions.
-
3
Warn others and secure the walkway with the spilled oil.
-
4
Report the missing guard and other hazards to the supervisor.
Correct answer 1. Stop and do not start work in unsafe conditions. 2. Warn others and secure the walkway with the spilled oil. 3. Report the missing guard and other hazards to the supervisor. 4. Start work only after the risk has been eliminated or controlled.
Explanation
First stop the preparations for work, then reduce the risk to others, report the problem, and return to the task only after safe conditions have been provided.
Answer all questions in the case study.
Case study result
Explanation
New or newly noticed hazards require a risk assessment before work starts. The urgency of the task does not remove the obligation to secure the area, report the problem and work according to safety rules.
This is the last available lesson in this category in the current MVP version. Return to the category list to choose another section of the course.
Category 3 / Lesson 17
Hazards associated with welding
You will learn the main hazards associated with welding and hot work.
More than one hazard
Welding combines several types of hazards at the same time. These include sparks, molten-metal spatter, high temperatures, arc radiation, welding fumes and gases, noise, electric shock, and the risk of fire or explosion.
Hazards to the welder
The welder must protect the eyes, face, hands, body and respiratory system. The welding arc can damage eyesight, hot metal can cause burns and fumes can harm the respiratory system.
Hazards to people nearby
People nearby are also at risk. Someone passing the work area may be exposed to arc radiation, sparks or fumes. Screens, barriers and marked work zones are therefore used.
Remember
In an exam question about welding hazards, do not select only one item. Typical correct answers include sparks and spatter, fumes and gases, arc radiation, and the risk of fire or explosion.
Practice questions
What hazards can occur during welding?
You can select more than one answer.
You can select more than one answer.
Correct answer Sparks and splashes of hot metal., Welding fumes and gases., Radiation from the welding arc., Risk of fire or explosion.
Explanation
Welding can produce sparks, radiation, fumes, high temperatures and a risk of fire or explosion.
This is the last available lesson in this category in the current MVP version. Return to the category list to choose another section of the course.
Category 3 / Lesson 18
Combustible materials near welding
You will learn how to deal with combustible materials in a hot-work area.
Why combustible materials are a problem
During welding, sparks and hot particles can travel farther than expected. They can also fall into gaps, under pallets, behind screens or into waste. A fire may begin with only a small smouldering area.
What to do before work
Remove combustible materials from the hazard zone. If they cannot be removed, shield them effectively with non-combustible material and use additional safeguards in accordance with the procedure.
Unsafe behaviour
Do not leave cardboard, plastic sheeting, waste, sawdust, dust or containers that held flammable substances nearby simply because the welding job will be short. A short duration does not remove the ignition risk.
Remember
If combustible materials are near welding, remove them or shield them effectively from sparks and heat. Ordinary paper, plastic sheeting or a random cloth is not suitable protection.
Practice questions
What should be done if combustible materials are located near the welding area?
Select an answer to continue.
Correct answer Remove them or effectively shield them from sparks and heat.
Explanation
Combustible materials must be removed from the hazard area or protected with a non-combustible cover. A short duration does not eliminate the fire risk.
This is the last available lesson in this category in the current MVP version. Return to the category list to choose another section of the course.
Category 3 / Lesson 19
LMRA before welding
You will reinforce the final risk assessment before hot work starts.
What LMRA means
LMRA is the last risk assessment carried out immediately before work starts. It is especially important for welding because workplace conditions can change quickly: someone may bring combustible materials into the area, block access to a fire extinguisher or start another task nearby.
What to check
Before welding, check that the area is tidy, combustible materials are removed or shielded, ventilation is working, PPE is in good condition, the welding equipment is not damaged and fire-fighting equipment is available.
When to stop work
If anything is wrong, stop before work begins and report the problem. Examples include missing extraction, a damaged welding helmet, wet or damaged cables, cardboard near the work area or a missing required permit.
Remember
A good LMRA before welding checks the current conditions. Do not assume that because the area was safe yesterday, it is safe today.
Practice questions
What is an example of a good LMRA before welding?
Select an answer to continue.
Correct answer Checking the surroundings, ventilation, protective equipment and readiness of firefighting equipment.
Explanation
An LMRA before welding means checking the current conditions and making sure the safeguards are still adequate.
This is the last available lesson in this category in the current MVP version. Return to the category list to choose another section of the course.
Category 3 / Lesson 20
Changes in conditions during work
You will learn why work must be stopped and the risk reassessed when conditions change.
LMRA also applies after work has started
An LMRA is not a one-time formality carried out only before starting. If conditions change during the work, the previous assessment may no longer be valid.
What counts as a change in conditions
Changes may include the weather, another machine or forklift entering the area, new workers nearby, a leak, poorer lighting, a change of material or the removal of a safeguard.
The correct response
When a new hazard appears: stop work, reassess the situation, apply the necessary protective measures and only then continue.
Remember
A change in conditions means a new assessment. Do not continue automatically just because everything was safe before work started.
Practice questions
During work, heavy rain begins and the ground becomes slippery. What should the employee do?
Select an answer to continue.
Correct answer Stop work, reassess the risk and continue only after safe conditions have been ensured.
Explanation
An LMRA is not a one-time formality. When conditions change during work, stop the task, reassess the hazards and continue only after appropriate controls have been applied.
This is the last available lesson in this category in the current MVP version. Return to the category list to choose another section of the course.
Category 3 / Lesson 21
Hierarchy of control measures
You will learn the correct order for reducing risk and the role of PPE as the last line of protection.
Eliminate the hazard first
The most effective measure is to eliminate the hazard at its source. If a hazardous activity or substance can be avoided altogether, this should be considered before other measures.
Order of measures
The order is: eliminate the hazard, substitute it with a safer solution, apply engineering controls, then organisational controls, and use personal protective equipment last.
Why PPE comes last
A helmet, safety glasses, gloves or hearing protection are important, but they do not remove the source of the hazard. They protect the employee when some risk remains after earlier control measures have been applied.
Remember
PPE is not the first choice when the hazard can be eliminated or reduced more effectively earlier in the hierarchy.
Practice questions
Which action has the highest priority in the hierarchy of control measures?
Select an answer to continue.
Correct answer Eliminate the hazard at its source, if possible.
Explanation
First try to eliminate the hazard, then substitute it with a safer solution, apply engineering and organisational controls, and treat personal protective equipment as the last line of protection.
This is the last available lesson in this category in the current MVP version. Return to the category list to choose another section of the course.
Category 3 / Lesson 22
Engineering and organisational controls
You will learn to distinguish engineering safeguards from organisational work measures.
Engineering controls
Engineering controls include machine guards, barriers, ventilation, local exhaust extraction, isolation and protective screens. They reduce risk through physical or technical protection.
Organisational controls
Organisational controls include instructions, procedures, access restrictions, designated zones, work sequencing, supervision and shift organisation.
What to choose
If risk can be reduced effectively by an engineering solution, it should not be replaced by an instruction or warning alone. Work organisation supplements engineering safeguards.
Remember
A guard or local exhaust system is an engineering control. An instruction, procedure or designated zone is an organisational control.
Practice questions
Which examples are engineering controls that reduce risk?
You can select more than one answer.
You can select more than one answer.
Correct answer A guard on a moving machine part., Local exhaust extraction or ventilation., A guardrail that prevents a fall.
Explanation
Guards, extraction systems, ventilation and guardrails are engineering controls. Instructions, procedures and access arrangements are organisational controls.
This is the last available lesson in this category in the current MVP version. Return to the category list to choose another section of the course.
Category 3 / Lesson 23
Surroundings, other workers and the emergency escape route
You will learn how to assess the surroundings, the safety of other people and the possibility of evacuation during an LMRA.
Look beyond your own task
Risk assessment also covers the surroundings: other people, vehicle movements, machines, nearby work, noise, substances, weather, lighting and access to the workplace.
Risk to others
Your work may expose other people to danger. Sparks, noise, chemicals, a moving load or a machine may affect areas beyond your own workstation. This must be considered before and during the work.
Emergency escape route
Check that the emergency escape route and exit are accessible and unobstructed. A blocked exit is a new hazard and requires action before the task continues.
Remember
A good LMRA covers the task, the workplace and the immediate surroundings, including the safety of third parties and the ability to leave the workplace safely.
Practice questions
What should be considered during an LMRA when assessing the surroundings of the workplace?
You can select more than one answer.
You can select more than one answer.
Correct answer Whether the emergency escape route and exit are accessible., Whether my work could endanger people working nearby., Whether vehicles are moving or other machines are operating nearby.
Explanation
Risk assessment covers not only your own task but also the surroundings: emergency escape routes, other people, vehicle movements, machines and nearby work.
This is the last available lesson in this category in the current MVP version. Return to the category list to choose another section of the course.
Category 3 / Lesson 24
Tools, materials and risk that cannot be controlled
You will reinforce the checks for tools and materials and the rule to stop work when risk cannot be controlled safely.
Check the tools
Before work, check that the tool is suitable for the task, in good condition and used according to the instructions. A damaged or unsuitable tool can create a new hazard.
Check the materials
Assess whether the material being used can create a hazard and whether additional safeguards, ventilation or protective equipment are needed.
When risk remains uncontrolled
If, after assessing the situation, you cannot control the risk safely, do not start the work or stop it. Report the problem and agree on a safe solution with the responsible person.
Remember
An urgent task or having PPE alone is not a reason to work when the risk remains uncontrolled.
Practice questions
What should an employee do if, after checking the tools, materials and surroundings, they still cannot control the risk safely?
Select an answer to continue.
Correct answer Do not start or stop the work, report the problem and agree on a safe solution.
Explanation
If the risk cannot be controlled safely, the work should not be started or continued. The problem must be reported and a safe way of performing the task must be agreed.
This is the last available lesson in this category in the current MVP version. Return to the category list to choose another section of the course.
This is the last available lesson in this category in the current MVP version. Return to the category list to choose another section of the course.
Category 4 / Lesson 1
What are safety signs?
You will learn the role of safety signs and why they should be treated as part of work instructions.
Signs help you work safely
Safety signs provide brief information about prohibitions, mandatory actions, hazards, escape routes or fire-fighting equipment. They are designed to support quick decisions, especially when there is no time to read lengthy instructions.
They do not replace thinking
A sign does not remove a hazard by itself. Employees must still assess the situation, follow procedures and respond when conditions are unsafe.
Employee response
When you see a sign, follow its meaning. If the sign conflicts with the situation or is unclear, stop and ask your supervisor.
Practice questions
What is the main purpose of safety signs in the workplace?
Select an answer to continue.
Correct answer They help people quickly identify prohibitions, mandatory actions, hazards, escape routes and safety equipment.
Explanation
Safety signs communicate brief information needed for safe action. They do not replace training, procedures or the employee's own assessment of the situation.
This is the last available lesson in this category in the current MVP version. Return to the category list to choose another section of the course.
Category 4 / Lesson 2
Prohibition signs
You will learn how to understand prohibition signs and why they must not be ignored.
What prohibition signs cover
Prohibition signs show what must not be done in a particular area. They may prohibit smoking, open flames, entry into an area, pedestrian access or mobile-phone use.
Why they matter
A prohibition usually protects against a specific risk, such as fire, explosion, being struck by a vehicle, contact with dangerous machinery or unauthorised entry into an area.
What to do
Do not bypass a prohibition for convenience. If a task requires access to a prohibited area, the necessary authorisation, instructions and safeguards must be in place.
Practice questions
What does the shown prohibition sign mean?
Select an answer to continue.
Correct answer No smoking.
Explanation
This sign means no smoking. Smoking is not permitted in the marked area because it may increase the risk of fire or violate safety rules.
This is the last available lesson in this category in the current MVP version. Return to the category list to choose another section of the course.
Category 4 / Lesson 3
Mandatory signs
You will learn about signs that show the action required before entering an area or starting work.
What a mandatory sign means
A mandatory sign tells you what you must do. It often relates to personal protective equipment such as a safety helmet, eye protection, gloves, hearing protection, safety footwear or respiratory protection.
Requirement before work starts
The required protection must be used before entering the area or starting the task, not only after a problem occurs.
Missing protective equipment
If a sign requires protection that the employee does not have, they should not start work. Report the problem and obtain the correct equipment.
Practice questions
What requirement is shown by the mandatory eye-protection sign?
Select an answer to continue.
Correct answer Wear eye protection.
Explanation
This sign requires eye protection, such as safety glasses or goggles.
This is the last available lesson in this category in the current MVP version. Return to the category list to choose another section of the course.
Category 4 / Lesson 4
Warning signs
You will learn to recognise warning signs and respond to a hazard before taking action.
Warning of a risk
Warning signs indicate that a hazard is present. This may be electricity, a slippery surface, forklift traffic, corrosive substances, flammable materials or falling objects.
A warning requires caution
A warning sign does not automatically mean entry is prohibited. It does mean that extra care is required, conditions must be checked and the required safeguards must be used.
When to stop work
If you do not understand the warning or do not know how to perform the task safely in that area, stop and ask your supervisor.
Practice questions
What hazard does the shown sign warn against?
Select an answer to continue.
Correct answer Toxic substances.
Explanation
This sign warns about toxic substances. The employee should take particular care and use the required protective equipment.
This is the last available lesson in this category in the current MVP version. Return to the category list to choose another section of the course.
Category 4 / Lesson 5
Emergency escape and first-aid signs
You will learn how emergency escape and rescue signs help in an emergency.
The route to a safe place
Emergency escape signs show the direction of escape, emergency exits and assembly points. During an alarm they help people leave the hazardous area quickly.
Aid and rescue
First-aid and rescue signs may indicate a first-aid kit, first-aid point, safety shower, eyewash station, stretcher or AED defibrillator.
Know them in advance
It is worth learning the escape signs before work begins. During an alarm there is no time to search for the route or start reading instructions from the beginning.
Practice questions
What does the shown emergency escape sign indicate?
Select an answer to continue.
Correct answer Emergency exit.
Explanation
This sign indicates an emergency exit. In an emergency it helps people quickly find a safe route out of the area.
This is the last available lesson in this category in the current MVP version. Return to the category list to choose another section of the course.
Category 4 / Lesson 6
Fire safety signs
You will learn about signs that indicate fire-fighting equipment and devices.
What fire signs indicate
Fire safety signs show the location of fire extinguishers, fire hose reels, fire blankets, manual fire alarms, emergency telephones or other fire-fighting equipment.
Access must remain clear
Fire-fighting equipment must remain visible and accessible. Do not block it with materials, tools or vehicles.
Red does not always mean prohibition
Red can indicate either a prohibition or fire-fighting equipment. The meaning depends on the shape, symbol and context of the sign.
Practice questions
What do fire safety signs indicate?
Select an answer to continue.
Correct answer The location of firefighting equipment or devices.
Explanation
Fire safety signs may indicate fire extinguishers, hydrants, fire blankets, manual fire alarm call points or an emergency telephone.
This is the last available lesson in this category in the current MVP version. Return to the category list to choose another section of the course.
Category 4 / Lesson 7
Colours and shapes of signs
You will understand why a sign's meaning comes from the combination of colour, shape, symbol and context.
Look at the whole sign
Do not interpret a sign by colour alone. Its meaning depends on the combination of colour, shape, symbol and the location where it is displayed.
Examples of groups
Prohibition signs usually show a crossed-out symbol. Mandatory signs show a required action. Warning signs warn of hazards. Emergency signs indicate safe routes or aid. Fire signs identify fire-fighting equipment.
When a sign is unclear
If you do not understand the symbol, do not guess. Check the work instructions or ask the person responsible for safety.
Practice questions
Which statement best describes the meaning of red on safety signs?
Select an answer to continue.
Correct answer Red may indicate a prohibition or firefighting equipment, depending on the shape, symbol and context.
Explanation
The meaning must not be simplified to the colour alone. Red can indicate prohibition or firefighting equipment; the meaning comes from the complete sign.
This is the last available lesson in this category in the current MVP version. Return to the category list to choose another section of the course.
Category 4 / Lesson 8
Safety signs and employee responsibilities
You will learn what responsibilities employees have in relation to safety signs.
Following signs
Employees must follow safety signs just as they follow occupational safety instructions and directions. Ignoring a sign can cause an accident or breach workplace rules.
Reporting problems
If a sign is obscured, damaged, unreadable or does not match the situation, report it. Missing or unclear signage can increase risk for the whole team.
Do not alter signs without authorisation
Do not remove, move or cover signs without authorisation. Signage is part of the workplace safety system.
Practice questions
What should an employee do if a safety sign is obscured or illegible?
Select an answer to continue.
Correct answer Report the problem and do not remove the sign without authorization.
Explanation
Damaged, obscured or illegible signage should be reported. Unauthorized removal or alteration of signs can increase risk.
This is the last available lesson in this category in the current MVP version. Return to the category list to choose another section of the course.
Category 4 / Lesson 9
Damaged or unreadable signs
You will learn how to respond when a sign no longer performs its function.
When a sign becomes a problem
A sign may be ineffective if it is dirty, damaged, obscured, turned away, too far from the hazard or inconsistent with the current work organisation.
Risk of a wrong decision
An unreadable sign may cause an employee to miss a prohibition, mandatory action, hazard, escape route or rescue equipment.
Safe response
Report the problem to your supervisor or the person responsible for occupational safety. If the unreadable sign concerns an immediate hazard, stop and clarify the situation before continuing work.
Practice questions
Why is a damaged safety sign a problem?
Select an answer to continue.
Correct answer It can lead to a wrong decision and hide information about a prohibition, requirement, hazard or escape route.
Explanation
An illegible sign may cause an employee to miss important information and take unsafe action.
This is the last available lesson in this category in the current MVP version. Return to the category list to choose another section of the course.
Category 4 / Lesson 10
Safety signs in practice
You will review the key rules for using safety signs in real work situations.
Before starting a task
Look around the work area and check for prohibition, mandatory, warning, emergency escape and fire safety signs.
During work
Follow the signage at all times. Do not assume a sign is irrelevant simply because the task is short or routine.
If in doubt
If a sign is unclear, damaged or conflicts with an instruction, do not take a risk. Stop work, ask and report the problem.
Practice questions
What is good practice before starting a task in a new work area?
Select an answer to continue.
Correct answer Look around and check prohibition, mandatory, warning, emergency escape and fire safety signs.
Explanation
Before starting work, identify the signage in the immediate area because it relates to the actual rules and hazards in that location.
This is the last available lesson in this category in the current MVP version. Return to the category list to choose another section of the course.
Category 4 / Lesson 11
Image question — What does this sign mean?
This lesson prepares you for an image-based single-choice question: What does this sign mean?
Lesson objective
This lesson prepares you for a practice question from the Safety Signs section.
The question you will practise
What does this sign mean?
What to pay attention to
Read the question, consider all the answers and check which decision is the safest.
Remember
This sign prohibits smoking or the use of smoking products in the marked area.
Practice questions
What does the shown no-smoking sign mean?
Select an answer to continue.
Correct answer No smoking.
Explanation
This sign prohibits smoking or the use of smoking products in the marked area.
This is the last available lesson in this category in the current MVP version. Return to the category list to choose another section of the course.
Category 4 / Lesson 12
Image question — What requirement does this sign show?
This lesson prepares you for an image-based single-choice question: What requirement does this sign show?
Lesson objective
This lesson prepares you for a practice question from the Safety Signs section.
The question you will practise
What requirement does this sign show?
What to pay attention to
Read the question, consider all the answers and check which decision is the safest.
Remember
This sign requires safety glasses or other eye protection to be worn.
Practice questions
What requirement is shown by the displayed mandatory sign?
Select an answer to continue.
Correct answer Eye protection must be worn.
Explanation
This sign requires safety glasses or other eye protection.
This is the last available lesson in this category in the current MVP version. Return to the category list to choose another section of the course.
Category 4 / Lesson 13
Image question — What does this sign warn about?
This lesson prepares you for an image-based single-choice question: What does this sign warn about?
Lesson objective
This lesson prepares you for a practice question from the Safety Signs section.
The question you will practise
What does this sign warn about?
What to pay attention to
Read the question, consider all the answers and check which decision is the safest.
Remember
This sign warns that toxic substances may be present in the marked area.
Practice questions
What does the displayed warning sign warn against?
Select an answer to continue.
Correct answer Toxic substances.
Explanation
This sign warns that toxic substances may be present in the marked area.
This is the last available lesson in this category in the current MVP version. Return to the category list to choose another section of the course.
Category 4 / Lesson 14
Image question — What does this sign indicate?
This lesson prepares you for an image-based single-choice question: What does this sign indicate?
Lesson objective
This lesson prepares you for a practice question from the Safety Signs section.
The question you will practise
What does this sign indicate?
What to pay attention to
Read the question, consider all the answers and check which decision is the safest.
Remember
This sign indicates an emergency exit and helps people leave a hazardous area quickly.
Practice questions
What does the displayed emergency-exit sign indicate?
Select an answer to continue.
Correct answer Emergency exit.
Explanation
This sign indicates an emergency exit and helps people leave a hazardous area quickly.
This is the last available lesson in this category in the current MVP version. Return to the category list to choose another section of the course.
Category 4 / Lesson 15
Multiple-choice image question — Which statements are correct for this sign?
This lesson prepares you for an image-based multiple-choice question: Which statements are correct for this sign?
Lesson objective
This lesson prepares you for a practice question from the Safety Signs section.
The question you will practise
Which statements are correct for this sign?
What to pay attention to
You may select more than one answer.
Remember
This sign means no smoking. It is a prohibition sign and may be used where smoking or another ignition source increases the risk of fire or explosion.
Practice questions
Which statements are correct for the no-smoking sign?
You may select more than one answer.
You can select more than one answer.
Correct answer Smoking is not allowed in this area., The sign is a prohibition sign., The prohibition can reduce the risk of fire or explosion.
Explanation
This sign means no smoking. It is a prohibition sign and may be used where smoking or another ignition source increases the risk of fire or explosion.
This is the last available lesson in this category in the current MVP version. Return to the category list to choose another section of the course.
Category 4 / Lesson 16
Multiple-choice image question — Which statements apply to this sign?
This lesson prepares you for an image-based multiple-choice question: Which statements apply to this sign?
Lesson objective
This lesson prepares you for a practice question from the Safety Signs section.
The question you will practise
Which statements apply to this sign?
What to pay attention to
You may select more than one answer.
Remember
This sign requires eye protection. Blue mandatory signs show required behaviour or required protective equipment.
Practice questions
Which statements apply to this sign?
You may select more than one answer.
You can select more than one answer.
Correct answer Eye protection must be worn., The sign is a mandatory sign., The sign may be used for work involving flying particles or dust.
Explanation
This sign requires eye protection. Blue mandatory signs show a required action or required protective measure.
This is the last available lesson in this category in the current MVP version. Return to the category list to choose another section of the course.
Category 4 / Lesson 17
Matching question — Match the meaning to the correct sign
This lesson prepares you for a matching question: Match the meaning to the correct sign.
Lesson objective
This lesson prepares you for a practice question from the Safety Signs section.
The question you will practise
Match the meaning to the correct sign.
What to pay attention to
Match each answer to one sign. Each answer may be used only once.
Remember
Each safety sign has a specific function. Prohibition signs show what must not be done, mandatory signs show required behaviour, fire signs identify equipment, and emergency signs help you find an exit route.
Practice questions
Match each meaning to the correct sign.
Match each answer to one sign. Each answer may be used only once.
Match all items before checking.
Correct answer No smoking; Eye protection must be worn; Fire extinguisher location; Emergency exit
Explanation
Each safety sign has a specific function. Prohibition signs indicate what is not allowed, mandatory signs show required behaviour, fire safety signs identify equipment, and emergency escape signs help people find a way out.
This is the last available lesson in this category in the current MVP version. Return to the category list to choose another section of the course.
Category 4 / Lesson 18
Matching question — Match the sign group to its function
This lesson prepares you for a matching question: Match the sign group to its function.
Lesson objective
This lesson prepares you for a practice question from the Safety Signs section.
The question you will practise
Match the sign group to its function.
What to pay attention to
Match each answer to one sign. Each answer may be used only once.
Remember
The colour and shape of a sign help identify its function, but the most important point is to understand the specific meaning of the sign at the workplace.
Practice questions
Match the sign group to its function.
Match each answer to one sign. Each answer may be used only once.
Match all items before checking.
Correct answer Warning about a toxic substance; No entry to the area; Protective gloves must be worn; Fire alarm activation point
Explanation
The colour and shape of a sign help identify its function, but the most important thing is correctly understanding the specific meaning of the sign in the workplace.
This is the last available lesson in this category in the current MVP version. Return to the category list to choose another section of the course.
Category 4 / Lesson 19
Classification question — assign examples of signs to the correct groups
This lesson prepares you for a classification question: assign examples of signs to the correct groups.
Lesson objective
This lesson prepares you for a practice question from the Safety Signs section.
The question you will practise
Assign examples of signs to the correct groups.
What to pay attention to
Choose the correct group for each item.
Remember
Safety signs have different functions. Prohibition signs show what must not be done. Mandatory signs show required actions. Warning signs indicate hazards, while emergency signs show safe escape routes.
Classification question
Assign the sign examples to the correct groups.
Choose the correct group for each item.
Choose a group for each item.
Correct answer No smoking — Prohibition sign; Eye protection must be worn — Mandatory sign; Warning about a corrosive substance — Warning sign; Emergency exit — Emergency escape sign
Explanation
Safety signs have different functions. Prohibition signs indicate what is not allowed. Mandatory signs indicate required action. Warning signs indicate a hazard, and emergency escape signs show the route for safely leaving an area.
This is the last available lesson in this category in the current MVP version. Return to the category list to choose another section of the course.
Category 4 / Lesson 20
Click the warning sign in the image
This lesson prepares you for a hotspot-image question about identifying a warning sign.
Lesson objective
This lesson prepares you to identify a warning sign in the workplace.
The question you will practise
Click the warning sign visible in the image.
What to pay attention to
Look for the yellow triangular sign warning of a hazard. Click directly on the sign area, not the background.
Remember
Warning signs indicate a possible hazard. Before starting work, notice them and follow the required safety rules.
Image hotspot question
Click the warning sign visible in the image.
Click directly on the warning sign.
Your click
Correct area
Click a location in the image before checking your answer.
Correct area: Warning sign
Explanation
Warning signs provide information about a possible hazard. They should be noticed before work begins and the required safety rules should be followed.
This is the last available lesson in this category in the current MVP version. Return to the category list to choose another section of the course.
This is the last available lesson in this category in the current MVP version. Return to the category list to choose another section of the course.
Category 5 / Lesson 1
What is personal protective equipment?
You will learn the role of personal protective equipment as the last protective barrier and see examples of basic personal protection.
The last protective barrier
Personal protective equipment (PPE) protects employees from the effects of hazards that could not be completely eliminated or sufficiently reduced by other methods.
Examples of PPE
PPE includes safety helmets, safety glasses, face shields, hearing protection, gloves, safety footwear, respirators, protective clothing, high-visibility clothing and safety harnesses.
It does not replace safe working practices
PPE does not eliminate the hazard at its source. You must still follow instructions, use serviceable equipment and respond to changes in the situation.
Practice questions
What best describes personal protective equipment?
Select an answer to continue.
Correct answer Equipment worn or used by an employee to protect against a specific hazard.
Explanation
Personal protective equipment (PPE) is equipment worn or used by an employee for protection against a specific hazard. It does not replace procedures or eliminating risk at the source.
This is the last available lesson in this category in the current MVP version. Return to the category list to choose another section of the course.
Category 5 / Lesson 2
When is PPE used?
You will learn when protective equipment is required and why this must follow from the risk, instructions or signage.
Requirement from the risk assessment
PPE is used when a risk assessment, work instruction, work permit or signage shows that without protection the employee would be exposed to injury or illness.
Mandatory signs
Mandatory signs often indicate required PPE, such as a safety helmet, eye protection, hearing protection or respiratory protection. The requirement applies before entering the area.
Throughout the exposure period
Protective equipment must be used for the entire period of exposure to the hazard. Removing it 'for a moment' may be enough for an injury to occur.
Practice questions
When should the required personal protective equipment be used?
Select an answer to continue.
Correct answer Before entering the area or starting work when required by the risk, instruction or mandatory sign.
Explanation
Required PPE must be put on before exposure to the hazard and used throughout the time spent working in that area.
This is the last available lesson in this category in the current MVP version. Return to the category list to choose another section of the course.
Category 5 / Lesson 3
Head protection
You will learn the basic rules for using a safety helmet and responding to damage.
When a safety helmet is needed
A safety helmet is used where there is a risk of head impact, falling objects, work near structures or entry into a designated area.
Fit and condition
The helmet must fit correctly, with the chin strap fastened if required. It should not be cracked, deformed or modified by drilling or applying stickers without approval.
After an impact
A helmet that has received a strong impact must be reported and replaced in accordance with workplace rules, even if the damage is not immediately visible.
Practice questions
What should be done with a helmet that has sustained a strong impact?
Select an answer to continue.
Correct answer Report it and replace the helmet according to site rules.
Explanation
A strong impact may weaken a helmet even without visible cracks. Such protective equipment should be reported and replaced.
This is the last available lesson in this category in the current MVP version. Return to the category list to choose another section of the course.
Category 5 / Lesson 4
Eye and face protection
You will learn when to use safety glasses, goggles or a face shield.
Risks to the eyes
The eyes and face may be exposed to flying particles, dust, sparks, splashes, chemicals or radiation during certain tasks.
Choosing the right protection
Safety glasses, goggles and face shields are not the same. They are selected for the hazard, for example sealed goggles for splashes or a face shield where there is a greater impact risk.
Visibility and cleanliness
Scratched, dirty or fogged eye protection can reduce visibility. Clean or replace it, or report the problem.
Practice questions
Which items can protect the eyes or face if required by the work instruction?
You can select more than one answer.
You can select more than one answer.
Correct answer Safety glasses., A face shield., Sealed safety goggles.
Explanation
Eye and face protection is selected according to the hazard. It may include safety glasses, goggles or a face shield. An ordinary cap and music headphones do not protect the eyes or face.
This is the last available lesson in this category in the current MVP version. Return to the category list to choose another section of the course.
Category 5 / Lesson 5
Hearing protection
You will learn the rules for using hearing protection in noisy areas.
Noise damage can develop gradually
Hearing damage can develop over time and is not always immediately noticeable. Hearing protection must therefore not be ignored in noisy areas.
Types of protection
Hearing can be protected with earmuffs or earplugs. They must be suitable for the noise level, fitted correctly and used according to instructions.
Do not remove it in the noise zone
Hearing protection should be worn for the entire time spent in a noisy area. Even short periods without protection significantly reduce its effectiveness.
Practice questions
Why should hearing protectors not be removed in a noisy area?
Select an answer to continue.
Correct answer Because even short breaks in protection reduce effectiveness and can increase noise exposure.
Explanation
Hearing protection works only when it is worn correctly and used throughout the entire time spent in noise.
This is the last available lesson in this category in the current MVP version. Return to the category list to choose another section of the course.
Category 5 / Lesson 6
Hand protection
You will learn how to select gloves for the hazard and when gloves should not be used.
Different hazards to the hands
Gloves can protect against cuts, abrasions, heat, chemicals or contamination. No single glove protects against every hazard.
Select gloves for the task
Gloves must be selected for the substance, tool and task. A mechanically resistant glove may not protect against chemicals, while a chemical-resistant glove may not protect against cuts.
Caution near moving parts
With some rotating parts, gloves can increase the risk of entanglement. In such situations, follow the specific work instruction.
Practice questions
Which statements about protective gloves are correct?
You can select more than one answer.
You can select more than one answer.
Correct answer Gloves must be selected for the specific hazard, such as cuts, chemicals or temperature., Damaged gloves should be reported and replaced., Near some moving machine parts, gloves can increase the risk of entanglement.
Explanation
Gloves have different protective properties and must match the hazard. Damaged gloves must be replaced, and with some machines the risk of entanglement must be considered.
This is the last available lesson in this category in the current MVP version. Return to the category list to choose another section of the course.
Category 5 / Lesson 7
Foot protection
You will learn the role of safety footwear and the importance of the sole, toe protection and technical condition.
What safety footwear protects against
Safety footwear can protect against impacts, crushing, slipping, sole punctures, contact with substances or moisture.
Suitable for the workplace
The type of footwear is selected for the workplace and its risks. Requirements may differ on a construction site, in a workshop, warehouse or chemical area.
Check before use
A damaged sole, damaged toe cap, cracks or heavy contamination can reduce protection. Report the problem and replace the footwear according to workplace rules.
Practice questions
What can indicate that safety footwear is no longer suitable for use?
Select an answer to continue.
Correct answer A cracked sole, damaged toe cap or other visible damage.
Explanation
Damaged footwear may no longer protect against slipping, puncture, impact or crushing. The problem should be reported.
This is the last available lesson in this category in the current MVP version. Return to the category list to choose another section of the course.
Category 5 / Lesson 8
Respiratory protection
You will learn when a half mask or respirator is needed and why correct fit is essential.
Airborne hazards
Respiratory protection may be required for dust, smoke, aerosols, vapours, gases or poor air quality.
Selecting the filter and mask
The mask or respirator must be suitable for the specific hazard. The wrong filter or an unsuitable mask can create a false sense of safety.
Seal and limitations
Protection only works with the correct fit and seal. If the employee notices an odour or taste, has difficulty breathing, or the mask is damaged, they should stop work and report the problem.
Practice questions
What is important when using respiratory protection?
You can select more than one answer.
You can select more than one answer.
Correct answer Selecting the mask or filter for the type of hazard., Correct fit and seal., Checking the condition of the protective equipment before use.
Explanation
Respiratory protection must be suitable for the hazard, provide a good seal and be in good condition. An arbitrary mask or incorrectly selected filter may fail to protect the employee.
This is the last available lesson in this category in the current MVP version. Return to the category list to choose another section of the course.
Category 5 / Lesson 9
Protective clothing and visibility
You will learn the role of protective clothing and high-visibility garments in workplace traffic and risk areas.
Clothing as protection
Depending on its purpose, protective clothing can protect against contamination, chemicals, heat, sparks, cuts or other contact with hazards.
Employee visibility
High-visibility clothing increases an employee's visibility, especially around vehicle or machinery traffic, on construction sites or in poor lighting.
Do not modify it without approval
Do not shorten protective clothing, remove reflective elements or replace it with ordinary clothing if the instructions require protection.
Practice questions
Why is high-visibility clothing or a high-visibility vest used?
Select an answer to continue.
Correct answer To increase the employee's visibility, especially around moving vehicles, machinery or in poor lighting.
Explanation
High-visibility clothing improves visibility but does not replace other required safeguards or traffic rules at the workplace.
This is the last available lesson in this category in the current MVP version. Return to the category list to choose another section of the course.
Category 5 / Lesson 10
Checking, using and reporting damaged PPE
You will reinforce the rule of checking PPE before work, using it correctly and reporting missing or damaged equipment.
Check before work
Before use, check that PPE is suitable for the task, clean, complete, correctly fitted, undamaged and within its service life.
Reporting problems
Missing equipment, damage, poor fit or doubts about protection must be reported to the supervisor. Do not work without required PPE.
Responsible use
Put PPE on before entering the risk area, use it throughout the period of exposure and store it so that it retains its protective properties.
Practice questions
What should an employee do if required PPE is damaged, does not fit or is unavailable?
You can select more than one answer.
You can select more than one answer.
Correct answer Report the problem to the supervisor or responsible person., Do not start, or stop, work involving exposure until the situation has been resolved., Use serviceable and correctly selected protective equipment before entering the exposure area.
Explanation
Work involving exposure should not be started or continued without the required, serviceable and properly fitting PPE. The problem must be reported and suitable equipment used.
This is the last available lesson in this category in the current MVP version. Return to the category list to choose another section of the course.
Category 5 / Lesson 11
Classification question — selecting protective equipment
You will reinforce how basic personal protective equipment relates to the area of the body it protects.
Match PPE to the hazard
Personal protective equipment must suit the hazard and the part of the body it is intended to protect. Different equipment protects the head, eyes, hands or hearing.
Examples of matching
A safety helmet protects the head, safety glasses protect the eyes, protective gloves protect the hands and hearing protectors reduce exposure to noise.
Work rule
Before starting a task, check which PPE is required by the instructions, risk assessment or workplace signage.
Classification question
Assign the personal protective equipment to the body part or type of hazard it protects against.
Choose the correct group for each item.
Choose a group for each item.
Correct answer Safety helmet — Head protection; Safety glasses — Eye protection; Protective gloves — Hand protection; Hearing protectors — Hearing protection
Explanation
Personal protective equipment is selected according to the hazard and the body part it is intended to protect. A helmet protects the head, glasses protect the eyes, gloves protect the hands, and hearing protectors reduce exposure to noise.
This is the last available lesson in this category in the current MVP version. Return to the category list to choose another section of the course.
Category 5 / Lesson 12
Eye and face protection during welding
You will learn the role of a welding helmet and the correct filter.
Main hazard
Arc welding produces intense radiation and extremely bright light that can damage the eyes. The face is also exposed to sparks, spatter and hot metal particles.
Correct protective equipment
The primary protection for the eyes and face is a welding helmet with a filter suitable for the process. Ordinary safety glasses do not replace a welding helmet during arc welding.
Selection and condition
The welding helmet must be serviceable, clean and suitable for the type of work. A cracked lens, damaged filter or incorrect shade means effective protection is not available.
Remember
During arc welding, the main eye and face protection is a welding helmet with the correct filter. It protects against arc radiation, sparks and spatter.
Practice questions
Which protective item is essential for protecting the eyes and face during arc welding?
Select an answer to continue.
Correct answer A welding helmet with the correct filter.
Explanation
A welding helmet with the appropriate filter protects the eyes and face from arc radiation, sparks and spatter.
This is the last available lesson in this category in the current MVP version. Return to the category list to choose another section of the course.
Category 5 / Lesson 13
PPE for welding work
You will learn which protective equipment may be required for welding.
Whole-body protection
Welding does not only endanger the eyes. Sparks, spatter and hot objects can burn the hands, arms, torso and feet. PPE is therefore selected for the specific process, location and material.
Typical protective equipment
Welding may require a welding helmet or other eye and face protection, gloves resistant to heat and spatter, flame-resistant or spark-resistant clothing, safety footwear and sometimes respiratory protection.
Respiratory protection
If welding fumes cannot be sufficiently controlled by ventilation or extraction, additional respiratory protection may be required. It must be selected according to the risk assessment rather than chosen at random.
Remember
PPE for welding must match the hazards. Thin clothing, ordinary gloves or no face protection are not suitable safeguards.
Practice questions
Which protective equipment may be required for welding?
You can select more than one answer.
You can select more than one answer.
Correct answer A welding helmet or eye and face protection suitable for the process., Gloves resistant to heat and spatter., Flame-resistant or spark-resistant protective clothing., Respiratory protection if ventilation is insufficient.
Explanation
For welding, protection is selected for the eyes and face, hands, body and feet, and for the respiratory system when necessary. PPE must match the hazards.
This is the last available lesson in this category in the current MVP version. Return to the category list to choose another section of the course.
Category 5 / Lesson 14
Protecting bystanders during welding
You will learn how welding screens and barriers are used.
Who may be exposed
Welding can harm people other than the welder. People passing nearby may be exposed to arc radiation, sparks, spatter and fumes. Even looking at the arc briefly can be dangerous.
Screens and barriers
Welding screens or barriers separate the work area from its surroundings. Their purpose is to reduce exposure for bystanders and prevent accidental entry into the area.
What screens do not replace
A screen does not replace ventilation, a welding helmet, gloves or a hot-work permit. It is one risk-control measure used together with other safeguards.
Remember
Welding screens are used to protect people nearby from the arc, sparks and spatter. They are not decoration and do not replace other occupational safety measures.
Practice questions
Why are welding screens or shields used during welding?
Select an answer to continue.
Correct answer To protect nearby people from the arc, sparks and spatter.
Explanation
Screens and shields reduce bystander exposure to arc radiation, sparks and spatter, but they do not replace ventilation.
This is the last available lesson in this category in the current MVP version. Return to the category list to choose another section of the course.
Category 5 / Lesson 15
Damaged welding PPE
You will learn how to respond to a damaged welding helmet, gloves or other PPE.
Damage means loss of protection
Protective equipment only works when it is serviceable and used correctly. A cracked helmet, damaged filter, burnt-through gloves or torn protective clothing may fail to stop sparks, radiation or hot spatter.
Correct decision
If the welding helmet, gloves or other PPE are damaged, the employee should not start welding. Report the problem and use serviceable protective equipment.
Why improvisation is unsafe
Replacing a welding helmet with ordinary safety glasses or using burnt gloves increases the risk of injury. Welding requires equipment designed for radiation, heat and spatter.
Remember
Damaged welding PPE means: stop, report, replace or repair. Do not continue 'more carefully', because caution does not replace protection.
Practice questions
What should be done if the welding helmet or gloves are damaged?
Select an answer to continue.
Correct answer Do not start work, report the problem and use serviceable protective equipment.
Explanation
Damaged PPE does not provide the required protection. Work must be stopped until the protective equipment is replaced or repaired.
This is the last available lesson in this category in the current MVP version. Return to the category list to choose another section of the course.
This is the last available lesson in this category in the current MVP version. Return to the category list to choose another section of the course.
Category 6 / Lesson 1
A safe and tidy workplace
Good housekeeping, clear walkways and the absence of obstacles as a way to reduce accident risk.
Lesson objective
You will understand why good housekeeping is one of the basic conditions for workplace safety.
Housekeeping and access
Walkways, emergency exits and access to rescue equipment must remain free of obstacles. Materials and tools should have designated storage locations.
Typical risks
Poor housekeeping increases the risk of trips, slips, falling objects, mistakes and delayed response in an emergency.
Practice questions
What best reduces the risk of tripping at the workplace?
Select an answer to continue.
Correct answer Keeping walkways free of obstacles and putting items back in their proper place.
Explanation
Good housekeeping and clear walkways reduce the risk of tripping, slipping and obstructed evacuation.
This is the last available lesson in this category in the current MVP version. Return to the category list to choose another section of the course.
Category 6 / Lesson 2
Housekeeping, walkways and safe work organisation
How to keep the workplace in a condition that reduces the risk of trips and collisions.
Clear and accessible walkways
Walkways, escape routes and access to emergency equipment must be free of obstacles, cables and materials.
Storing tools and materials
Tools, waste and materials should have designated places. Do not leave them where they can cause trips or falls.
Responding to poor housekeeping
Spilled liquids, loose cables, sharp items and waste should be removed or secured, and reported if help from others is required.
Practice questions
What should be done when oil is spilled on the floor?
Select an answer to continue.
Correct answer Secure the area, warn others and report or clean up the spill according to procedure.
Explanation
A spill can quickly cause a slip. The area must be secured and the hazard removed according to site rules.
This is the last available lesson in this category in the current MVP version. Return to the category list to choose another section of the course.
Category 6 / Lesson 3
Maintaining good housekeeping during work
How workplace order affects safety and smooth working.
Clear walkways
Walkways, escape routes and access to emergency equipment should remain accessible and unobstructed.
Materials in the correct place
Tools, cables, waste and materials should be stored so that they do not create trip or collision hazards.
Clean up as you work
Good housekeeping should be maintained throughout the task, not only after work has finished.
Practice questions
Why must emergency escape routes be kept free of obstacles?
Select an answer to continue.
Correct answer So that people can leave the workplace quickly and safely in an emergency.
Explanation
Emergency escape routes are used to leave the workplace safely. Blocking them can delay evacuation and increase the consequences of an incident.
This is the last available lesson in this category in the current MVP version. Return to the category list to choose another section of the course.
Category 6 / Lesson 4
Identifying unsafe situations — workplace and housekeeping
How to notice risks in this topic and respond before an incident occurs.
Observe working conditions
Before starting a task, pay attention to the surroundings, equipment, signage and the behaviour of other people.
Do not ignore changes
A change in working conditions, a new obstacle, damaged equipment or missing information may indicate a new hazard.
Respond early
The safest approach is to stop and report the problem before the situation becomes urgent or difficult to control.
Practice questions
Where should tools ideally be placed after use?
Select an answer to continue.
Correct answer In the designated place so they do not create a hazard.
Explanation
Tools left at random can cause trips, damage or cuts. They should be returned to the designated place.
This is the last available lesson in this category in the current MVP version. Return to the category list to choose another section of the course.
Category 6 / Lesson 5
Making a safe decision before work — workplace and housekeeping
How to make a safe decision before starting work or changing how a task is performed.
Pause before starting
A short check before work begins helps identify missing instructions, safeguards or problems with the work area.
Use the correct protective measures
Protective measures should match the task, the hazard and the rules that apply at the workplace.
Do not start if you are unsure
If you do not know how to perform the work safely, ask the responsible person before starting the task.
Practice questions
What does a barrier or marking around a work area mean?
Select an answer to continue.
Correct answer It indicates that a hazard may be present in the area and that access rules must be followed.
Explanation
Markings and barriers warn about hazards and help control access to the work area.
This is the last available lesson in this category in the current MVP version. Return to the category list to choose another section of the course.
Category 6 / Lesson 6
Communication and hazard reporting — workplace and housekeeping
When to stop work, ask a supervisor or report a hazard.
Report clearly
A report should explain what happened, where the problem is and what risk may result.
Inform the right person
Hazards, damage and unclear instructions should be reported to the supervisor or person responsible for safety.
Do not assume someone already knows
If you see an unsafe situation, make sure it has been noticed and communicated to the appropriate person.
Practice questions
What should an employee do if they notice dangerous clutter at the workplace?
Select an answer to continue.
Correct answer Report the situation and remove the hazard if this can be done safely.
Explanation
An unsafe situation should be reported and, if safe to do so, removed. Waiting or ignoring it increases the risk of an accident.
This is the last available lesson in this category in the current MVP version. Return to the category list to choose another section of the course.
Category 6 / Lesson 7
Pre-task check — workplace and housekeeping
What to check before performing a task to reduce the risk of mistakes or accidents.
Check the task
Make sure you understand the scope of work, sequence of actions and required safeguards.
Check the workplace
The work area should be accessible, tidy and free of obvious obstacles or uncontrolled hazards.
Check the equipment
Tools, protective equipment and materials should be complete, serviceable and used as intended.
Practice questions
Which situations increase the risk of tripping or slipping?
You can select more than one answer.
You can select more than one answer.
Correct answer A cable lying across a walkway., A wet or oily floor., Scattered tools., Waste left next to the workplace.
Explanation
Trips and slips are common around obstacles, slippery surfaces, tools and waste left outside designated places.
This is the last available lesson in this category in the current MVP version. Return to the category list to choose another section of the course.
Category 6 / Lesson 8
Common mistakes and how to avoid them — workplace and housekeeping
Common unsafe shortcuts and behaviours that should be avoided.
Do not take shortcuts
Skipping procedures, guards or checks may appear to save time, but it increases the risk of an accident.
Do not work on autopilot
Even routine tasks require attention, especially when conditions, equipment or surroundings have changed.
Do not hide problems
Defects, mistakes and unsafe situations should be reported so that the hazard does not recur.
Practice questions
Which actions help maintain safe housekeeping at the workplace?
You can select more than one answer.
You can select more than one answer.
Correct answer Putting materials in designated places., Removing waste according to site rules., Reporting spills and damage.
Explanation
Safe housekeeping requires proper storage, waste removal and reporting of hazards. Exits, stairs and walkways must not be blocked.
This is the last available lesson in this category in the current MVP version. Return to the category list to choose another section of the course.
Category 6 / Lesson 9
Review of the key rules — workplace and housekeeping
A review of the rules to remember before moving on.
The key rule
Safe work begins with identifying the hazard and choosing the correct way to act.
Employee role
Employees should follow instructions, use protective measures and report situations that may lead to an accident.
Role of the organisation
Employers and supervisors should provide the instructions, protective measures and conditions needed for safe work.
Practice questions
Which areas should remain free of materials and tools?
You can select more than one answer.
You can select more than one answer.
Correct answer Emergency escape routes., Traffic routes., Access to fire extinguishers and emergency equipment., The area in front of an emergency exit.
Explanation
Walkways, emergency escape routes, exits and access to emergency equipment must remain clear. Materials may be stored in designated places.
This is the last available lesson in this category in the current MVP version. Return to the category list to choose another section of the course.
Category 6 / Lesson 10
Section summary and preparation for questions — workplace and housekeeping
A short summary of the section and preparation for later test questions.
What you should remember
From this section, remember above all how to identify risks, follow instructions and report problems.
Before the next section
The same principles will return in questions, examples and exercises later in the course.
MVP status
This is a working structural lesson. Detailed examples and test questions will be developed in later stages.
Scenario question
Scenario
While working, you notice spilled oil in a walkway used by other employees.
What should you do first when you notice the spilled liquid?
Choose the best and safest action.
Select an answer to continue.
Correct answer Secure the area, warn others and report the hazard according to procedure.
Explanation
Spilled oil in a walkway creates a risk of slipping and falling. Protect yourself and others, warn people nearby, secure the area and report the hazard according to procedure.
This is the last available lesson in this category in the current MVP version. Return to the category list to choose another section of the course.
Category 6 / Lesson 11
Scenario question — spilled oil on a walkway
A short scenario testing the safest course of action.
How a scenario question works
A scenario question is based on a short description of a real situation rather than an image, and asks you to choose the safest response.
What to pay attention to
Choose the answer that first reduces the risk to people, warns others and starts the correct reporting or area-securing procedure.
MVP status
This is a pilot question type. More scenarios or image-based variants can be added in later stages if needed.
Practice questions
Assess which statements about workplace housekeeping are correct.
Select YES or NO for each statement.
Walkways and emergency escape routes should be kept free of obstacles.
Spilled oil may be left if nobody has slipped yet.
Tools should be returned to their designated place.
Answer YES or NO for each statement.
Correct answer Walkways and emergency escape routes should be kept free of obstacles. — YES; Spilled oil may be left if nobody has slipped yet. — NO; Tools should be returned to their designated place. — YES
Explanation
Workplace housekeeping directly affects safety. Blocked walkways, spills and scattered tools increase the risk of an accident.
This is the last available lesson in this category in the current MVP version. Return to the category list to choose another section of the course.
Category 6 / Lesson 12
Classification question — assign the situations to the correct groups
This lesson prepares you for a classification question: assign the situations to the correct groups.
Lesson objective
This lesson prepares you for a practice question from the Workplace and Housekeeping section.
The question you will practise
Assign the situations to the correct groups.
What to pay attention to
Choose the correct group for each item.
Remember
Good housekeeping reduces the risk of trips, slips and obstructed evacuation. Unsafe situations should be removed or secured and reported.
Classification question
Assign the situations to the correct groups.
Choose the correct group for each item.
Choose a group for each item.
Correct answer Blocked emergency escape route — Unsafe situation; Cable lying loose across a walkway — Unsafe situation; Returning tools to their designated place — Correct behaviour; Immediately cleaning up a spill or securing the area — Correct behaviour
Explanation
Good housekeeping reduces the risk of trips, slips and obstructed evacuation. Unsafe situations should be removed or secured and reported.
This is the last available lesson in this category in the current MVP version. Return to the category list to choose another section of the course.
Category 6 / Lesson 13
Click the location in the image — slip hazard
This lesson prepares you for a question in which you click the hazard location in an image.
Lesson objective
This lesson prepares you to identify a simple slip hazard in the workplace.
The question you will practise
Click the location in the image that shows a slip hazard.
What to pay attention to
Look for spilled liquid, a wet patch or another area that could cause someone to slip.
Remember
Spilled liquid on a walkway should be secured, others warned and the spill removed according to procedure. Good housekeeping reduces slips and falls.
Image hotspot question
Click the area in the image that shows a slipping hazard.
Click directly on the hazard in the image.
Your click
Correct area
Click a location in the image before checking your answer.
Correct area: Spilled liquid
Explanation
Spilled liquid in a walkway increases the risk of slipping and falling. The area should be secured, others warned and the hazard removed according to procedure.
This is the last available lesson in this category in the current MVP version. Return to the category list to choose another section of the course.
Category 6 / Lesson 14
Preparing a welding work area
You will learn how to organise the work area before hot work.
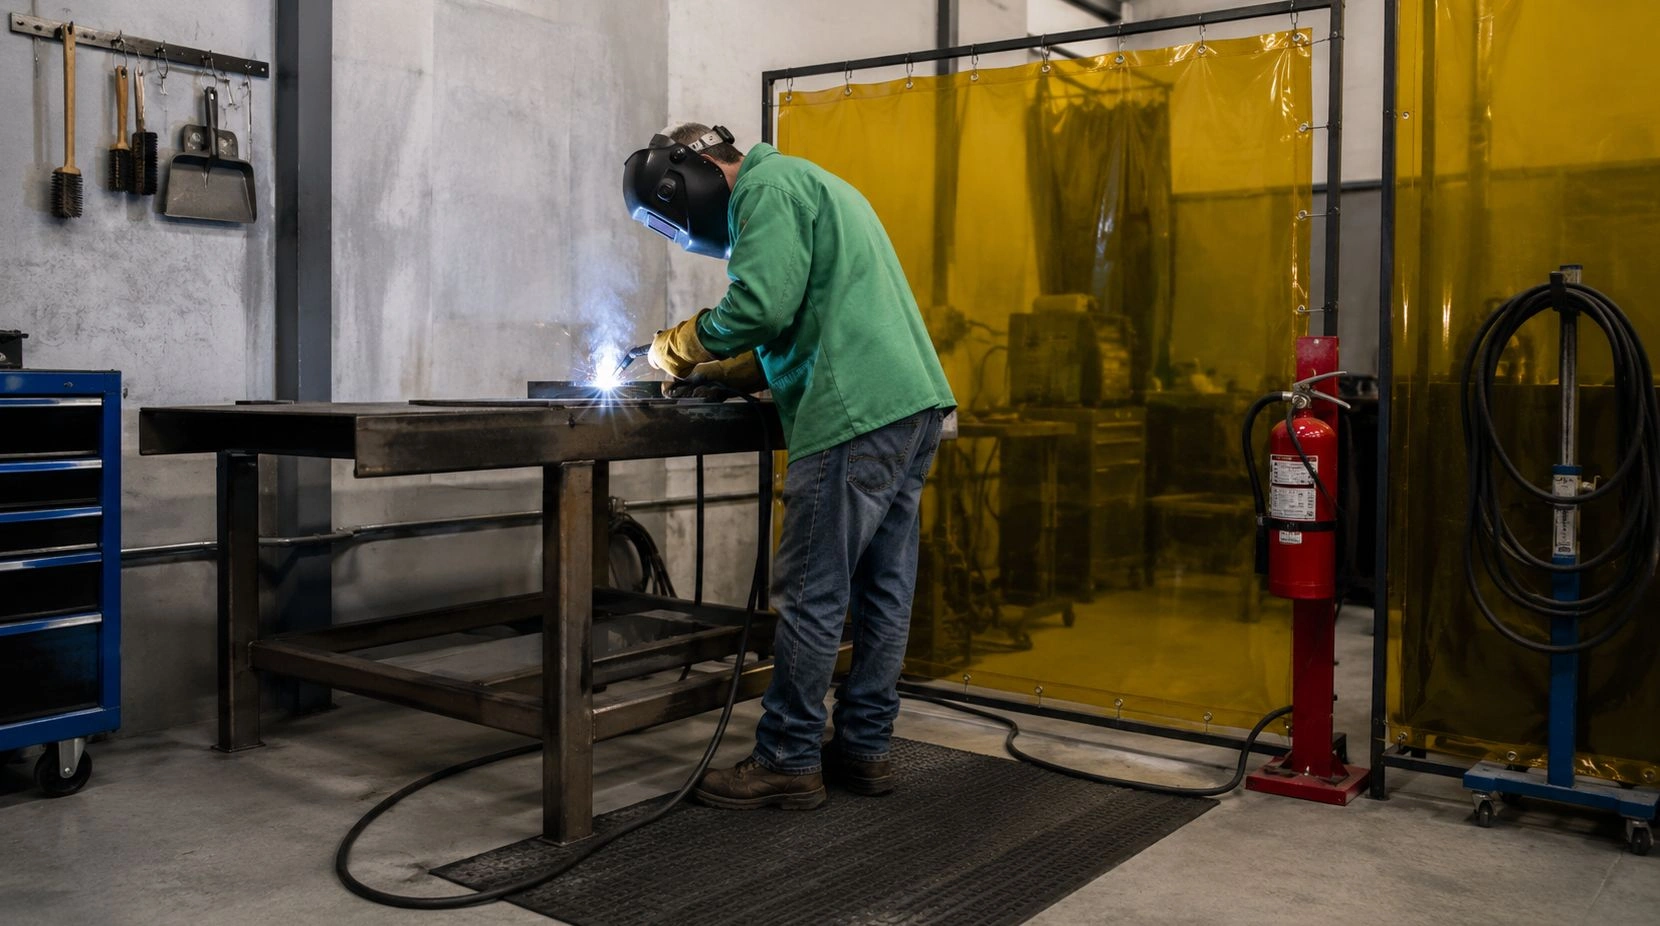
Housekeeping before starting
The welding area must be prepared before striking an arc or starting cutting. Clutter, waste, cardboard, plastic sheeting, dust and cables across walkways increase the risk of fire, trips and obstructed evacuation.
Combustible materials
Remove combustible materials from the work area or shield them with non-combustible protection. Also check below, behind walls, under tables and in gaps because sparks may reach these places unnoticed.
Organising the work area
Cables and hoses should be arranged so they do not create trip hazards or become damaged. Fire-fighting equipment and escape routes must remain accessible.
Remember
A properly prepared welding area is clean, tidy and protected against sparks. Do not begin welding among waste and combustible materials.
Practice questions
How should the workplace be prepared before welding?
Select an answer to continue.
Correct answer Remove or shield combustible materials and tidy the work area.
Explanation
Before welding, reduce the risk of ignition and tripping: remove waste and combustible materials and protect the surroundings from sparks.
This is the last available lesson in this category in the current MVP version. Return to the category list to choose another section of the course.
Category 6 / Lesson 15
Welding zone and access by third parties
You will learn why a safe welding zone is established.
Why define a zone
A welding zone separates hot work from other people and activities. It protects against accidental entry into an area with sparks, arc radiation, hot objects, cables and equipment.
How to secure the zone
Depending on the workplace, use signage, barriers, welding screens and information for people working nearby. The zone must not block escape routes or access to rescue equipment.
Example
If welding is carried out in a hall where other employees pass nearby, the welder wearing a helmet is not enough. People nearby must also be protected from the arc and sparks.
Remember
A welding zone is established so that unauthorised people do not enter an area with sparks, radiation or hot objects. Securing the zone must not create a new hazard.
Practice questions
Why is a welding area designated or secured?
Select an answer to continue.
Correct answer To prevent unauthorized persons from entering the area of sparks, radiation or hot components.
Explanation
The welding area should protect the employee and bystanders. Emergency escape routes and access to rescue equipment must not be blocked.
This is the last available lesson in this category in the current MVP version. Return to the category list to choose another section of the course.
Category 6 / Lesson 16
Workplace lighting
Why good visibility is a condition for starting and carrying out work safely.
Visibility is part of safety
The workplace should be lit well enough for the worker to clearly see the work area, obstacles, tools and other hazards.
Do not start work without safe visibility
If the lighting is too poor to carry out the task safely, do not start work. Report the problem and make sure adequate lighting is provided before starting.
Remember
A phone light or remembering the layout of the workplace is not a substitute for adequate workplace lighting.
Practice questions
Before starting work, you notice that the workplace is too poorly lit to clearly see obstacles and hazards. What should you do?
Select an answer to continue.
Correct answer Do not start work; report the problem and make sure adequate lighting is provided before continuing.
Explanation
If inadequate lighting makes it difficult to see obstacles or hazards, work should not begin. Report the problem and ensure safe visibility before starting the task.
This is the last available lesson in this category in the current MVP version. Return to the category list to choose another section of the course.
Category 6 / Lesson 17
Lighting failure during work
How to respond safely when lighting stops working while a task is in progress.
A lighting failure changes the working conditions
If the lighting goes out and you can no longer clearly see the workplace, obstacles or hazards, continuing the task may become unsafe.
Stop and secure the situation
First stop the work safely and secure the situation. Then report the problem and arrange for adequate lighting to be restored.
When can work continue?
Work may resume only when safe visibility has been restored and the task can again be carried out without additional risk.
Practice questions
While carrying out a task, the temporary lighting goes out and you can no longer see the work area safely. What should you do first?
Select an answer to continue.
Correct answer Stop work and secure the situation, then report the lighting problem.
Explanation
A lighting failure can immediately create a new hazard. If safe visibility is no longer available, stop work, secure the situation and restore adequate lighting before resuming the task.
This is the last available lesson in this category in the current MVP version. Return to the category list to choose another section of the course.
Category 6 / Lesson 18
Changes in workplace conditions
Why a workplace that was safe earlier must be reassessed when conditions change.
Conditions can change during a task
A new obstacle, a cable across a walkway, spilled liquid, changes in vehicle traffic, poorer visibility, weather, a removed safeguard or another team arriving can create new hazards.
An earlier assessment is not automatically enough
The fact that the workplace was safe at the start of the job does not mean it remains safe after conditions change. Stop and assess the current situation.
Practical response
Before continuing work, remove the hazard, secure it or report it to the appropriate person. Do not continue simply because the task was safe earlier.
Practice questions
During work, someone runs a new cable across a walkway and the nearby traffic arrangement changes. What should the worker do?
Select an answer to continue.
Correct answer Stop, reassess the safety of the current conditions, and remove, secure or report any new hazards before continuing.
Explanation
Safe conditions can change during work. A new cable, changed traffic or other changes in the surroundings require the situation to be reassessed and appropriate action taken before work continues.
This is the last available lesson in this category in the current MVP version. Return to the category list to choose another section of the course.
This is the last available lesson in this category in the current MVP version. Return to the category list to choose another section of the course.
Category 7 / Lesson 1
Basic rules for working at height
Risks related to falls, ladders, scaffolds and protective measures.
Lesson objective
You will learn the basic risks of working at height and the importance of fall protection.
Ladders and scaffolds
A ladder or scaffold must be stable, serviceable and used according to instructions. Do not improvise work platforms or use damaged equipment.
Protective measures
Where there is a risk of falling, use the appropriate collective or personal fall-protection measures and check working conditions before going to height.
Practice questions
What is the main hazard when working at height?
Select an answer to continue.
Correct answer A worker, tool or material falling from height.
Explanation
Working at height requires control of the risk of people falling and objects dropping. This is one of the most serious hazards in this category.
This is the last available lesson in this category in the current MVP version. Return to the category list to choose another section of the course.
Category 7 / Lesson 2
Protection during work at height
Basic decisions before using a ladder, platform or scaffold.
Checking the work area
Before work, assess ground stability, access, weather conditions, the risk of falling objects and the presence of people below.
Selecting equipment
The ladder, platform or scaffold must be suitable for the task, serviceable, set up according to instructions and used only by authorised persons where required.
Fall protection
Where there is a fall risk, use collective or personal fall-protection measures in accordance with the procedure and risk assessment.
Practice questions
Which solution is an example of collective protection when working at height?
Select an answer to continue.
Correct answer A guardrail or stable edge barrier.
Explanation
Collective safeguards such as guardrails, safety nets or barriers protect more people and normally take priority over individual protection.
This is the last available lesson in this category in the current MVP version. Return to the category list to choose another section of the course.
Category 7 / Lesson 3
Checking safeguards before going to height
What to check before using a ladder, platform, scaffold or fall-protection system.
Stable support
A ladder, platform or scaffold must be stable and used in accordance with instructions.
Fall protection
Where there is a risk of falling, use the required guardrails, fall-arrest systems or other safeguards.
Do not work in a hurry
Work at height requires concentration. Do not carry loads or make movements that could cause you to lose balance.
Practice questions
When should personal fall-protection equipment be used?
Select an answer to continue.
Correct answer When required by the work rules, risk assessment or work instruction.
Explanation
Harnesses, lanyards and anchor points are used according to the risk assessment and instructions. The equipment must be suitable and checked.
This is the last available lesson in this category in the current MVP version. Return to the category list to choose another section of the course.
Category 7 / Lesson 4
Identifying unsafe situations — working at height
How to notice risks in this section and respond before an incident occurs.
Observe working conditions
Before starting a task, pay attention to the surroundings, equipment, signage and the behaviour of other people.
Do not ignore changes
A change in working conditions, a new obstacle, damaged equipment or missing information may indicate a new hazard.
Respond early
The safest approach is to stop and report the problem before the situation becomes urgent or difficult to control.
Practice questions
What should be done before entering a scaffold?
Select an answer to continue.
Correct answer Check that the scaffold has been approved for use and has no visible damage.
Explanation
A scaffold must be stable, complete and approved for use. Visible defects or damage must be reported.
This is the last available lesson in this category in the current MVP version. Return to the category list to choose another section of the course.
Category 7 / Lesson 5
Making a safe decision before work — working at height
How to make a safe decision before starting work or changing how a task is performed.
Pause before starting
A short check before work begins helps identify missing instructions, safeguards or problems with the work area.
Use the correct protective measures
Protective measures should match the task, the hazard and the rules that apply at the workplace.
Do not start if you are unsure
If you do not know how to perform the work safely, ask the responsible person before starting the task.
Practice questions
How should a ladder be positioned before use?
Select an answer to continue.
Correct answer Stably, on level ground, according to the instructions and secured against movement.
Explanation
A ladder must stand securely and be used for its intended purpose. Unstable ground or makeshift raising increases the risk of falling.
This is the last available lesson in this category in the current MVP version. Return to the category list to choose another section of the course.
Category 7 / Lesson 6
Communication and hazard reporting — working at height
When to stop work, ask a supervisor or report a hazard.
Report clearly
A report should explain what happened, where the problem is and what risk may result.
Inform the right person
Hazards, damage and unclear instructions should be reported to the supervisor or person responsible for safety.
Do not assume someone already knows
If you see an unsafe situation, make sure it has been noticed and communicated to the appropriate person.
Practice questions
What is important when working from a work platform?
Select an answer to continue.
Correct answer Do not lean beyond the guardrails and do not exceed the permitted load.
Explanation
Work platforms have defined limitations. Leaning out and overloading the platform can lead to a fall or tip-over.
This is the last available lesson in this category in the current MVP version. Return to the category list to choose another section of the course.
Category 7 / Lesson 7
Pre-task check — working at height
What to check before performing a task to reduce the risk of mistakes or accidents.
Check the task
Make sure you understand the scope of work, sequence of actions and required safeguards.
Check the workplace
The work area should be accessible, tidy and free of obvious obstacles or uncontrolled hazards.
Check the equipment
Tools, protective equipment and materials should be complete, serviceable and used as intended.
Practice questions
What should be done if strong wind or a storm develops while working at height?
Select an answer to continue.
Correct answer Stop work and follow the safety procedure.
Explanation
Weather conditions can increase the risk of falling, losing balance and materials dropping. Work should be stopped when conditions are unsafe.
This is the last available lesson in this category in the current MVP version. Return to the category list to choose another section of the course.
Category 7 / Lesson 8
Common mistakes and how to avoid them — working at height
Common unsafe shortcuts and behaviours that should be avoided.
Do not take shortcuts
Skipping procedures, guards or checks may appear to save time, but it increases the risk of an accident.
Do not work on autopilot
Even routine tasks require attention, especially when conditions, equipment or surroundings have changed.
Do not hide problems
Defects, mistakes and unsafe situations should be reported so that the hazard does not recur.
Practice questions
Which actions help reduce the risk of tools and materials falling from height?
You can select more than one answer.
You can select more than one answer.
Correct answer Securing tools against falling., Keeping materials away from edges., Barricading the area below the workplace., Using containers or tool bags.
Explanation
Tools and materials must be secured, and the area below should be marked or barricaded. Throwing tools is not permitted.
This is the last available lesson in this category in the current MVP version. Return to the category list to choose another section of the course.
Category 7 / Lesson 9
Review of the key rules — working at height
A review of the rules to remember before moving on.
The key rule
Safe work begins with identifying the hazard and choosing the correct way to act.
Employee role
Employees should follow instructions, use protective measures and report situations that may lead to an accident.
Role of the organisation
Employers and supervisors should provide the instructions, protective measures and conditions needed for safe work.
Practice questions
Which situations require stopping work at height or reporting a hazard?
You can select more than one answer.
You can select more than one answer.
Correct answer A missing guardrail at an edge., A damaged scaffold component., Strong wind that makes stable work difficult., A slippery or unstable work surface.
Explanation
Work at height must not continue when safeguards are missing, equipment is damaged, weather is poor or the work surface is unstable.
This is the last available lesson in this category in the current MVP version. Return to the category list to choose another section of the course.
Category 7 / Lesson 10
Section summary and preparation for questions — working at height
A short summary of the section and preparation for later test questions.
What you should remember
From this section, remember above all how to identify risks, follow instructions and report problems.
Before the next section
The same principles will return in questions, examples and exercises later in the course.
MVP status
This is a working structural lesson. Detailed examples and test questions will be developed in later stages.
Practice questions
Which rules apply to safe work near edges?
You can select more than one answer.
You can select more than one answer.
Correct answer Use collective safeguards when required., Keep materials away from edges., Use fall-protection equipment when required by the procedure., Pay attention to people working below.
Explanation
Work near edges requires safeguards, control of materials and awareness of people below. The risk of falling must not be underestimated.
This is the last available lesson in this category in the current MVP version. Return to the category list to choose another section of the course.
Category 7 / Lesson 11
Scenario question — unstable ladder
A short scenario testing the safest behaviour before working at height.
How to approach the situation
A ladder standing on uneven ground does not provide a safe base for work, even if the task will only take a short time.
The safest decision
Do not start the work. Make the situation safe and use suitable, stable equipment.
Practice questions
Put the steps for preparing safe work at height in the correct order.
Arrange the steps from first to last.
-
1
Start work only after the safeguards have been checked and you are sure the conditions are safe.
-
2
Check whether work at height is necessary and whether the risk can be reduced.
-
3
Assess the workplace, ground, access and possible fall hazards.
-
4
Select the correct safeguards, such as scaffolding, a work platform or fall-protection equipment.
Put the steps in the correct order.
Correct order 1. Check whether work at height is necessary and whether the risk can be reduced. 2. Assess the workplace, ground, access and possible fall hazards. 3. Select the correct safeguards, such as scaffolding, a work platform or fall-protection equipment. 4. Start work only after the safeguards have been checked and you are sure the conditions are safe.
Explanation
Before working at height, first reduce the need to work at height, assess the hazards, select safeguards and begin only when the safeguards have been checked.
This is the last available lesson in this category in the current MVP version. Return to the category list to choose another section of the course.
Category 7 / Lesson 12
Scenario question — Which behaviour is safest?
This lesson prepares you for a scenario question: Which behaviour is safest?
Lesson objective
This lesson prepares you for a practice question from the Working at Height section.
The question you will practise
Which behaviour is safest?
What to pay attention to
Choose the best and safest course of action.
Remember
Work at height requires stable and suitable equipment. A short task does not justify using an unstable ladder.
Scenario question
Scenario
You are about to climb a ladder but notice that it is standing on uneven ground and is unstable.
What is the safest action?
Choose the best and safest action.
Select an answer to continue.
Correct answer Do not start work, make the situation safe and use suitable, stable equipment.
Explanation
Working at height requires stable and suitable equipment. A short task does not justify using an unstable ladder.
This is the last available lesson in this category in the current MVP version. Return to the category list to choose another section of the course.
Category 7 / Lesson 13
Click the hazard — unstable ladder
This lesson prepares you for a hotspot-image question about a hazard during work at height.
Lesson objective
This lesson prepares you to identify an unsafe ladder setup.
The question you will practise
Click the location that shows a hazard during work at height.
What to pay attention to
Look at the base of the ladder, its stability and the ground surface. Click directly on the unsafe ladder setup.
Remember
A ladder must stand securely on a suitable surface. An unstable setup increases the risk of a fall from height.
Image hotspot question
Click the area that shows a hazard during work at height.
Click directly on the unsafe ladder setup.
Your click
Correct area
Click a location in the image before checking your answer.
Correct area: Unstable ladder setup
Explanation
A ladder must stand securely and on suitable ground. An unstable setup increases the risk of falling from height.
This is the last available lesson in this category in the current MVP version. Return to the category list to choose another section of the course.
Category 7 / Lesson 14
Case study — ladder work on unstable ground
Practise making a decision about ladders, stable ground and preparing work at height.
Lesson objective
The objective is to recognise that even short work at height requires stable equipment, good housekeeping and proper safeguards.
The key principle
Do not use a ladder on unstable ground or in an area where loose materials increase the risk of tripping or falling.
Practical decision
Prepare the task again: tidy the area, select suitable equipment and carry out the work only after safe conditions have been confirmed.
Case study
Working from a ladder on unstable ground
Scenario
An employee has to carry out a short inspection at height. A ladder is available, but the ground is uneven and loose materials are nearby. The employee considers climbing up for only a moment to finish the task quickly.
Read the scenario and answer the questions.
Question 1
What is the safest decision?
Correct answer Do not climb the ladder until the ground and workplace are safe.
Explanation
Uneven ground and loose materials increase the risk of falling. The work should not start until the conditions have been prepared safely.
Question 2
Which conditions must be met before working at height?
Select all correct answers.
Correct answer Stable, level ground for the equipment., A tidy workplace without loose materials., Selection of suitable equipment and fall protection.
Explanation
Working at height requires stability, good housekeeping and appropriate safeguards. The duration of the task does not remove the fall risk.
Question 3
Put the steps for preparing work at height in the correct order.
Arrange the steps from first to last.
-
1
Start work only after the safety conditions have been met.
-
2
Stop the intention to climb the ladder under the current conditions.
-
3
Assess the risk, ground, surroundings and required scope of work.
-
4
Tidy the area and select stable, suitable equipment.
Correct answer 1. Stop the intention to climb the ladder under the current conditions. 2. Assess the risk, ground, surroundings and required scope of work. 3. Tidy the area and select stable, suitable equipment. 4. Start work only after the safety conditions have been met.
Explanation
First stop the unsafe plan, then assess the risk, prepare the area and equipment, and only then begin the work.
Answer all questions in the case study.
Case study result
Explanation
Working at height requires stable equipment, a tidy workplace and suitable fall protection. A short task does not justify using an unstable ladder.
This is the last available lesson in this category in the current MVP version. Return to the category list to choose another section of the course.
Category 7 / Lesson 15
Personnel work basket / man basket — safe lifting of people
Rules for checking a personnel basket, safeguards, communication and permitted load.
What is a personnel work basket / man basket
It is a basket or platform used to lift people under specified conditions. Lifting people requires particular care and equipment approved for that purpose.
Checks before use
Before starting, check the condition of the basket, floor, guardrails, gate, safeguards, attachment points and required markings. Damaged or unapproved equipment must not be used.
People, tools and materials
The permitted load includes the combined weight of people, tools and materials. The equipment limit must not be exceeded.
Communication and protection
Before movement begins, a clear method of communication with the operator must be agreed and the required protection against falling out must be used in accordance with the instructions and work rules.
Practice questions
What should be checked before using a personnel work basket / man basket to lift people?
You can select more than one answer.
You can select more than one answer.
Correct answer Whether the basket and its safeguards are in good condition and approved for use., Whether the number of people, tools and materials are within the permitted load., Whether safe communication with the operator has been agreed., Whether fall-out protection is used in accordance with the instructions and work rules.
Explanation
Before lifting people, check the condition and approval of the basket, the total load, communication and required safeguards. A short task does not allow the equipment limits to be exceeded.
This is the last available lesson in this category in the current MVP version. Return to the category list to choose another section of the course.
Category 7 / Lesson 16
Lifting people versus lifting materials
Learn to distinguish equipment intended for lifting people from equipment intended only for materials.
Not every lifting device is for people
Equipment designed to lift materials must not automatically be used to lift people. People may only be lifted using a solution approved for that purpose and in accordance with the applicable procedure.
Check the intended use
Before work starts, you must know the intended use of the equipment, the instructions, required safeguards and limitations. Operator experience does not replace equipment approval.
There are no short-term exceptions
A short lifting time or low height is not a reason to use unsuitable equipment.
Remember
If you are not sure whether the equipment is approved for lifting people, do not start the operation and report the issue.
Practice questions
Can any equipment designed for lifting materials be used to lift people?
Select an answer to continue.
Correct answer No. People may only be lifted using a solution approved for that purpose and in accordance with the applicable procedure.
Explanation
Equipment for transporting materials does not automatically become equipment for lifting people. Lifting people requires equipment and a working method approved for that purpose.
This is the last available lesson in this category in the current MVP version. Return to the category list to choose another section of the course.
Category 7 / Lesson 17
Communication with the operator while lifting people
Learn the STOP rule when communication is lost and the importance of clear, pre-agreed signals.
Agree communication before movement
The operator and the person in the basket must know how they will communicate before the operation begins. This may be an agreed signal, eye contact or radio communication.
Unambiguous signals
Instructions must be clear and understood. If a signaller is involved, responsibility for giving signals should be clearly defined.
Loss of communication means STOP
If contact is lost or a signal is unclear, movement must stop. The operation must not continue based on guesswork.
Restarting
Lifting may resume only after safe and agreed communication has been restored.
Practice questions
A person in the basket loses the agreed communication with the operator during lifting. What should be done?
Select an answer to continue.
Correct answer Stop movement and do not continue lifting until safe communication has been restored.
Explanation
Loss of agreed communication means STOP. Movement may resume only after a clear and safe method of communication has been restored.
This is the last available lesson in this category in the current MVP version. Return to the category list to choose another section of the course.
Category 7 / Lesson 18
Suspended working platform (hangbruginstallatie)
Key checks for a suspended platform: installation, attachment, load, weather and evacuation.
Check the installation
Before work, check the platform, suspension system, ropes, anchor points, guardrails, floor and controls in accordance with the instructions and rules of use.
Load
Do not exceed the permitted load. Include people, tools and materials on the platform.
Weather and wind
Strong wind, gusts, storms, icing or other dangerous conditions may require work to stop.
Failure and evacuation
Before starting, you must know how to leave the platform safely or what to do in the event of a failure. Work must not start without the required safeguards.
Practice questions
What should be checked before starting work on a hangbruginstallatie, a suspended working platform?
You can select more than one answer.
You can select more than one answer.
Correct answer The condition of the platform, suspension, safeguards and anchor points., The permitted load of the platform., Weather conditions, especially wind., The possibility of safe descent or evacuation in accordance with the procedure.
Explanation
A suspended platform requires checks of the installation and safeguards, load, weather and the possibility of safe descent. These factors directly affect work safety.
This is the last available lesson in this category in the current MVP version. Return to the category list to choose another section of the course.
Category 7 / Lesson 19
Equipment checks and permitted load
Check what must be inspected before using a platform or basket and how to calculate the total load.
Checks before use
Check for visible damage, safeguards, guardrails, the gate, floor, controls, attachment points and required markings. If equipment is damaged: do not use it, make the situation safe and report the problem.
Total load
Include all people, tools and materials in the total weight. Their combined weight must not exceed the value permitted for the equipment.
Do not bypass limits
Overloading cannot be compensated for by slower movement or a shorter working time. Manufacturer limits and operating rules still apply.
Conditions for stopping work
Work must stop if equipment is damaged, safeguards are missing, weather is unsafe, attachment is incorrect or other conditions cannot be controlled safely.
Practice questions
There are two people in a work basket together with tools and materials. What determines whether lifting may begin?
Select an answer to continue.
Correct answer The combined weight of people, tools and materials must not exceed the equipment’s permitted load.
Explanation
The load includes everything: people, tools and materials. Overloading may endanger the stability and safety of the equipment.
This is the last available lesson in this category in the current MVP version. Return to the category list to choose another section of the course.
Category 7 / Lesson 20
Safe access, descent and the area below work at height
Safe access to the work position and protection of people below from falling objects.
Designated access route
Use the intended route for access and descent, such as stairs, a ladder or platform access. Do not climb on random structural elements.
Safe movement
Maintain stable contact and do not carry objects in a way that prevents safe access or descent. Transport tools in a safe manner.
Protect people below
If there is a risk of tools or materials falling, cordon off and mark the area below and restrict access by unauthorised people.
Secure objects
Do not leave loose tools and materials near an edge. Use containers, bags or other suitable measures to prevent them from falling.
Practice questions
Which actions are part of safely organising access, descent and the area below work at height?
You can select more than one answer.
You can select more than one answer.
Correct answer Use the designated safe route for access and descent., Do not climb on random structural elements instead of using the intended access., Cordon off or secure the area below when there is a risk of falling objects., Secure tools and materials against falling.
Explanation
Safe work includes suitable access and protection of people below. A hard hat does not replace cordoning off the area and preventing objects from falling.
This is the last available lesson in this category in the current MVP version. Return to the category list to choose another section of the course.
This is the last available lesson in this category in the current MVP version. Return to the category list to choose another section of the course.
Category 8 / Lesson 1
Safe use of tools and machinery
Tools and machinery may only be used for their intended purpose and in accordance with instructions.
Lesson objective
You will learn why tools and machinery require checks, instructions and correct use.
Before use
Check the condition of the tool, guards, cables, handles and markings. Damaged equipment must not be used.
Safe operation
Machinery may only be operated for its intended purpose. Do not remove guards, bypass safeguards or use equipment without the required authorisation or instruction.
Practice questions
What should be done before using a hand tool or power tool?
Select an answer to continue.
Correct answer Check the condition of the tool and use it according to the instructions.
Explanation
Before use, check for visible damage, guards, cables and whether the tool is suitable for its intended use.
This is the last available lesson in this category in the current MVP version. Return to the category list to choose another section of the course.
Category 8 / Lesson 2
Tool checks and safe machine use
What to check before starting a tool or machine.
Technical condition
Do not use tools that are damaged, missing guards, have damaged cables, leaks or unreadable markings.
Intended use of the tool
A tool should only be used for the work it was designed for. Improvised solutions increase the risk of injury.
Safeguards and energy isolation
Before cleaning, adjustment or clearing a jam, the equipment should be safely stopped and protected against accidental start-up.
Practice questions
What should be done with a damaged tool?
Select an answer to continue.
Correct answer Mark it, remove it from service and report the defect.
Explanation
A damaged tool can cause electric shock, cuts or failure. It should be taken out of service and reported.
This is the last available lesson in this category in the current MVP version. Return to the category list to choose another section of the course.
Category 8 / Lesson 3
Safe response to a tool or machine fault
What to do when a tool, machine or device is not working properly.
Stop using it
If equipment behaves unusually, makes abnormal noise, sparks, leaks or has damaged guards, stop work.
Mark and report the problem
Damaged equipment should be secured against further use and reported to the responsible person.
Do not repair without authorisation
Repairs and adjustments may only be carried out by authorised persons in accordance with instructions and safety rules.
Practice questions
Why must machine guards not be removed?
Select an answer to continue.
Correct answer Because guards protect against contact with moving or dangerous parts.
Explanation
Guards are safety components. Removing them can lead to entanglement, cuts or other injuries.
This is the last available lesson in this category in the current MVP version. Return to the category list to choose another section of the course.
Category 8 / Lesson 4
Identifying unsafe situations — tools, machinery and equipment
How to notice risks in this section and respond before an incident occurs.
Observe working conditions
Before starting a task, pay attention to the surroundings, equipment, signage and the behaviour of other people.
Do not ignore changes
A change in working conditions, a new obstacle, damaged equipment or missing information may indicate a new hazard.
Respond early
The safest approach is to stop and report the problem before the situation becomes urgent or difficult to control.
Practice questions
When may a machine that requires special authorization be operated?
Select an answer to continue.
Correct answer Only after appropriate training and when the required authorization or permission is held.
Explanation
Some machines require authorization, instruction or approval. Lack of preparation increases the risk of an accident.
This is the last available lesson in this category in the current MVP version. Return to the category list to choose another section of the course.
Category 8 / Lesson 5
Making a safe decision before work — tools, machinery and equipment
How to make a safe decision before starting work or changing how a task is performed.
Pause before starting
A short check before work begins helps identify missing instructions, safeguards or problems with the work area.
Use the correct protective measures
Protective measures should match the task, the hazard and the rules that apply at the workplace.
Do not start if you are unsure
If you do not know how to perform the work safely, ask the responsible person before starting the task.
Practice questions
What should be done before maintenance or cleaning of a machine?
Select an answer to continue.
Correct answer Isolate and secure energy sources according to the procedure.
Explanation
Before maintenance, accidental start-up and release of energy must be prevented.
This is the last available lesson in this category in the current MVP version. Return to the category list to choose another section of the course.
Category 8 / Lesson 6
Communication and hazard reporting — tools, machinery and equipment
When to stop work, ask a supervisor or report a hazard.
Report clearly
A report should explain what happened, where the problem is and what risk may result.
Inform the right person
Hazards, damage and unclear instructions should be reported to the supervisor or person responsible for safety.
Do not assume someone already knows
If you see an unsafe situation, make sure it has been noticed and communicated to the appropriate person.
Practice questions
How should tools and equipment be used?
Select an answer to continue.
Correct answer For their intended purpose, according to the instructions and safety rules.
Explanation
A tool used for the wrong purpose may be damaged or create a new hazard.
This is the last available lesson in this category in the current MVP version. Return to the category list to choose another section of the course.
Category 8 / Lesson 7
Pre-task check — tools, machinery and equipment
What to check before performing a task to reduce the risk of mistakes or accidents.
Check the task
Make sure you understand the scope of work, sequence of actions and required safeguards.
Check the workplace
The work area should be accessible, tidy and free of obvious obstacles or uncontrolled hazards.
Check the equipment
Tools, protective equipment and materials should be complete, serviceable and used as intended.
Practice questions
What should you do if you notice unusual noise, vibration or smell from a machine?
Select an answer to continue.
Correct answer Stop work if it is safe to do so and report the defect.
Explanation
Unusual signs may indicate a fault. Reporting them can prevent injury and greater damage.
This is the last available lesson in this category in the current MVP version. Return to the category list to choose another section of the course.
Category 8 / Lesson 8
Common mistakes and how to avoid them — tools, machinery and equipment
Common unsafe shortcuts and behaviours that should be avoided.
Do not take shortcuts
Skipping procedures, guards or checks may appear to save time, but it increases the risk of an accident.
Do not work on autopilot
Even routine tasks require attention, especially when conditions, equipment or surroundings have changed.
Do not hide problems
Defects, mistakes and unsafe situations should be reported so that the hazard does not recur.
Practice questions
Which items should be checked before using a power tool?
You can select more than one answer.
You can select more than one answer.
Correct answer Condition of the cable and plug., Visible cracks or damage to the housing., Whether the tool has the required guards., Whether the tool is suitable for the task.
Explanation
Before use, check the technical condition, guards and suitability of the tool for the work. Safeguards must not be bypassed.
This is the last available lesson in this category in the current MVP version. Return to the category list to choose another section of the course.
Category 8 / Lesson 9
Review of the key rules — tools, machinery and equipment
A review of the rules to remember before moving on.
The key rule
Safe work begins with identifying the hazard and choosing the correct way to act.
Employee role
Employees should follow instructions, use protective measures and report situations that may lead to an accident.
Role of the organisation
Employers and supervisors should provide the instructions, protective measures and conditions needed for safe work.
Practice questions
Which behaviors are safe when working with machines?
You can select more than one answer.
You can select more than one answer.
Correct answer Keeping the area around the workplace tidy., Keeping hands away from moving-part zones., Following the operating instructions., Reporting missing guards or defects.
Explanation
Good housekeeping, following instructions, keeping a safe distance from moving parts and reporting defects reduce the risk of injury. Loose clothing can become entangled.
This is the last available lesson in this category in the current MVP version. Return to the category list to choose another section of the course.
Category 8 / Lesson 10
Section summary and preparation for questions — tools, machinery and equipment
A short summary of the section and preparation for later test questions.
What you should remember
From this section, remember above all how to identify risks, follow instructions and report problems.
Before the next section
The same principles will return in questions, examples and exercises later in the course.
MVP status
This is a working structural lesson. Detailed examples and test questions will be developed in later stages.
Practice questions
Which actions are inappropriate when equipment is damaged?
You can select more than one answer.
You can select more than one answer.
Correct answer Continuing to work despite a cracked guard., Hiding the defect to avoid downtime., Making a temporary repair without authorization., Using a tool with a damaged cable.
Explanation
Damaged equipment must be taken out of service and reported. Working despite defects or making makeshift repairs increases the risk of an accident.
This is the last available lesson in this category in the current MVP version. Return to the category list to choose another section of the course.
Category 8 / Lesson 11
Click the missing machine guard
This lesson prepares you for a hotspot-image question about a missing machine safeguard.
Lesson objective
This lesson prepares you to identify the location where a protective machine guard is missing.
The question you will practise
Click the location that shows a missing machine safeguard.
What to pay attention to
Look for an area with moving parts or a place that should be covered by a guard. Click that area.
Remember
Machine guards protect against contact with moving parts. A missing guard must be reported, and the machine must not be used until it is safe.
Image hotspot question
Click the area that shows a missing machine safeguard.
Click the area of the machine where the guard is missing.
Your click
Correct area
Click a location in the image before checking your answer.
Correct area: Missing machine guard
Explanation
Machine guards protect against contact with moving parts. A missing guard must be reported and the machine must not be used until it is safe.
This is the last available lesson in this category in the current MVP version. Return to the category list to choose another section of the course.
Category 8 / Lesson 12
Checking welding equipment before use
You will learn the basic checks for cables, holders and connections before welding.
Equipment can also be a source of risk
During welding, the arc and hot metal are not the only hazards. Damaged equipment can increase the risk of electric shock, fire, burns or equipment failure during work.
What to check
Before use, check the condition of cables, holders, connections, insulation, clamps, hoses and safeguards. Visible cracks, abrasion, loose connections or signs of overheating are warning signs.
Correct response
If equipment appears damaged, do not use it. Report the defect and use serviceable equipment that is approved for the work and used according to instructions.
Remember
Before using welding equipment, check the cables, holders, connections and safeguards. Visible damage means stop and report, not simply work more carefully.
Practice questions
What should be done before using welding equipment?
Select an answer to continue.
Correct answer Check the condition of cables, holders, connections and safeguards.
Explanation
Damaged cables, holders or connections can increase the risk of electric shock, fire and equipment failure. The equipment must be checked before use.
This is the last available lesson in this category in the current MVP version. Return to the category list to choose another section of the course.
Category 8 / Lesson 13
Gas cylinders for welding and cutting
You will learn how to handle gas cylinders safely.
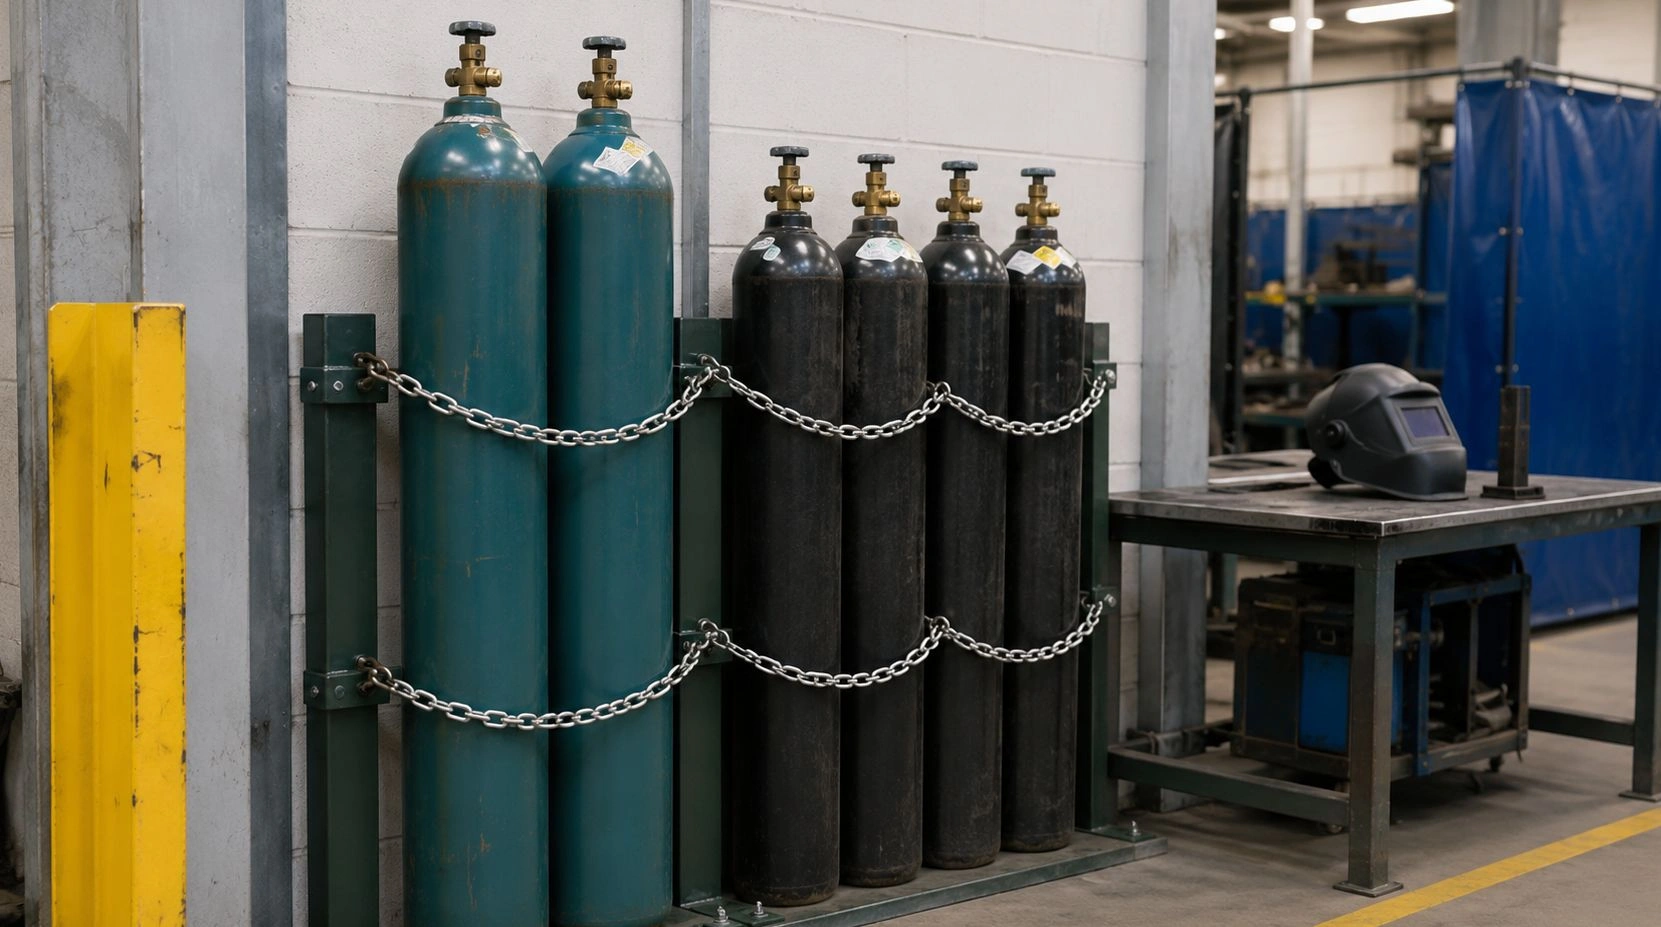
Why cylinders require care
Gas cylinders are heavy, pressurised and may be exposed to impact, falling or heat. During welding and cutting, improper handling of a cylinder can cause a serious accident.
Correct positioning
Cylinders must be secured against falling, protected from mechanical damage and heat sources, and positioned and used in accordance with workplace instructions and procedures.
What must not be done
Do not leave cylinders lying loose in a walkway, use them as supports, expose them to impact or position them so that they obstruct evacuation. A cylinder is not part of the work area's structure.
Remember
Gas cylinders used for welding or cutting must be secured against falling and protected from heat and damage. Good housekeeping around cylinders is part of safe work.
Practice questions
How should gas cylinders used for welding or cutting be handled?
Select an answer to continue.
Correct answer Secure them against falling and protect them from damage and heat sources.
Explanation
Cylinders must be stable, protected against impact and heat, and used according to the instructions. They must not be used as supports or left as obstacles in walkways.
This is the last available lesson in this category in the current MVP version. Return to the category list to choose another section of the course.
Category 8 / Lesson 14
Forklifts — visibility, loads and passengers
Learn the key rules for safe forklift driving and load transport.
Operator visibility
The operator must have a good view of the route. If the load blocks the view, use a safe driving method in accordance with the instructions or use a signaller.
Stable load
The load should be stable, correctly distributed on the forks and within the forklift’s permitted limits. Overloading or poor weight distribution increases the risk of tipping.
Carrying people
People must not be carried on the forks or in a place not intended for passengers. A passenger may ride only if the truck has a safe position specifically designed for carrying a person.
Remember
Good visibility, a stable load and using the forklift for its intended purpose are fundamental to safe transport.
Practice questions
A forklift operator is carrying a load that blocks the forward view. What should the operator do?
Select an answer to continue.
Correct answer Choose a safe driving method that provides good visibility, for example travel according to the instructions in the direction in which the route is visible, or use a signaller.
Explanation
The operator must have the best possible view of the route and take account of people nearby. When visibility is restricted, use a safe method suited to the instructions and working conditions.
This is the last available lesson in this category in the current MVP version. Return to the category list to choose another section of the course.
Practice questions
A colleague wants to ride on the forklift together with the operator. When is this allowed?
Select an answer to continue.
Correct answer Only when the forklift has a specially designed safe passenger position and the operating rules allow it.
Explanation
People must not be carried in a way the equipment is not designed for. A passenger may ride only in a position designed for carrying people and in accordance with the operating rules.
This is the last available lesson in this category in the current MVP version. Return to the category list to choose another section of the course.
Practice questions
How should a load be positioned on forklift forks?
Select an answer to continue.
Correct answer Stably, with the weight correctly distributed across both forks and within the forklift’s permitted load.
Explanation
An unstable or poorly distributed load can fall or cause the forklift to lose stability. The equipment must also not be overloaded.
This is the last available lesson in this category in the current MVP version. Return to the category list to choose another section of the course.
Practice questions
May ordinary forklift forks be used to suspend and carry a load like a crane?
Select an answer to continue.
Correct answer No. Lifting in this way requires equipment designed and correctly used for that purpose and suitable operator preparation.
Explanation
A forklift must not be used to suspend loads without suitable equipment and safe-use rules. Such work requires proper preparation.
This is the last available lesson in this category in the current MVP version. Return to the category list to choose another section of the course.
Practice questions
An internal-combustion forklift is to work inside a poorly ventilated enclosed hall. What hazard must be considered?
Select an answer to continue.
Correct answer Exposure to harmful exhaust gases and the need for suitable equipment and ventilation.
Explanation
Exhaust gases in enclosed or poorly ventilated spaces can create a health hazard. The equipment type and ventilation conditions must be suitable for the workplace.
This is the last available lesson in this category in the current MVP version. Return to the category list to choose another section of the course.
Category 8 / Lesson 15
Pallet trucks and internal transport
Learn how to move loads safely with a pallet truck and how to move through transport areas.
Safe use of a pallet truck
A manual pallet truck should be moved calmly, in accordance with the instructions and without excessive force. Keep control of the load and route.
Surface and space
Before moving, assess the surface, manoeuvring space and load stability. Uneven surfaces and narrow routes can increase the risk of losing control.
Pedestrians and trucks
Pedestrians should use designated routes, watch traffic and make sure the operator has seen them before entering a travel path.
Remember
Safe internal transport requires a suitable route, enough space and mutual visibility between operators and pedestrians.
Practice questions
What is the safest way to move a loaded manual pallet truck?
Select an answer to continue.
Correct answer Move it in accordance with the instructions, maintain good posture and avoid excessive force; with a manual pallet truck it is usually safer to pull than to push.
Explanation
Poor posture and excessive force increase the risk of back, shoulder and arm injuries. The route and load must remain under control.
This is the last available lesson in this category in the current MVP version. Return to the category list to choose another section of the course.
Practice questions
Before moving a pallet truck, you see an uneven floor and very little manoeuvring space. What should you do?
Select an answer to continue.
Correct answer Do not start transport until there is a safe route, enough space and a stable load.
Explanation
A pallet truck requires a stable load, suitable surface and enough space for safe manoeuvring.
This is the last available lesson in this category in the current MVP version. Return to the category list to choose another section of the course.
Practice questions
A pedestrian approaches an intersection of transport routes used by forklifts. How should the pedestrian behave?
Select an answer to continue.
Correct answer Use designated pedestrian routes, watch the traffic and make sure the operator has seen them before entering the travel area.
Explanation
Forklifts have limited visibility and a stopping distance. Pedestrians should use safe routes and make sure they do not enter the vehicle path unseen.
This is the last available lesson in this category in the current MVP version. Return to the category list to choose another section of the course.
Category 8 / Lesson 16
Lifting operations — danger zone and communication
Learn the basic rules for safe behaviour near lifted and suspended loads.
Never under the load
Do not walk or remain under a suspended load. Stay outside the area where the load or part of the equipment could fall, swing or strike someone.
Clear communication
The operator and signaller must understand the agreed signals. If a signal is unclear, movement must stop until unambiguous communication is restored.
Safe route
If the shortest route passes through the lifting zone, choose another route. A hard hat does not replace a safe distance from a suspended load.
Remember
During lifting operations, a safe zone, predictable movement and clear communication are essential.
Practice questions
During crane work you need to reach the other side of the work area. The shortest route passes under a suspended load. What do you do?
Select an answer to continue.
Correct answer Avoid the area below the load and use a safe route outside the danger zone.
Explanation
Do not remain under a suspended load. The priority is to stay outside the area where the load or part of the equipment could strike a worker.
This is the last available lesson in this category in the current MVP version. Return to the category list to choose another section of the course.
Practice questions
While a load is being moved, the lifting-equipment operator does not understand the signal from the signaller. What should be done?
Select an answer to continue.
Correct answer Stop movement until clear and agreed communication has been restored.
Explanation
Unclear communication during lifting operations can lead to uncontrolled load movement. Movement may resume only after unambiguous communication has been established.
This is the last available lesson in this category in the current MVP version. Return to the category list to choose another section of the course.
Category 8 / Lesson 17
Lifting loads — equipment, load limits and competence
Learn when work must stop and why specialist tasks require proper preparation.
Damaged equipment
A visibly damaged item used for lifting must not be used. The equipment must be secured against accidental use and the defect reported.
Permitted load
Do not lift a load if its weight may exceed the equipment’s permitted parameters. First confirm that the equipment and working method are suitable.
Competence and instructions
B-VCA is not an authorisation for every specialist task. Attaching loads and operating certain equipment may require additional training, instruction or authorisation.
Remember
If equipment is damaged, the load is uncertain or the required preparation is missing, work must not begin.
Practice questions
Your supervisor asks you to attach a load for lifting on your own, but you have no additional training or instruction for this work. What should you do?
Select an answer to continue.
Correct answer Do not perform the task independently and report that it requires suitable preparation and instruction.
Explanation
VCA alone does not qualify someone to perform specialist lifting work. Attaching and lifting loads may require additional training and instruction.
This is the last available lesson in this category in the current MVP version. Return to the category list to choose another section of the course.
Practice questions
Before lifting begins, you notice visible damage to an item used to lift the load. What do you do?
Select an answer to continue.
Correct answer Do not use it, secure it against accidental use and report the damage in accordance with the procedure.
Explanation
Visibly damaged equipment may fail during lifting. It must not be used until properly inspected or repaired.
This is the last available lesson in this category in the current MVP version. Return to the category list to choose another section of the course.
Practice questions
What should be done if the load weight may exceed the equipment’s permitted load?
Select an answer to continue.
Correct answer Do not lift the load until it has been confirmed that the equipment and working method are suitable for that load.
Explanation
Overloading can cause loss of stability, equipment damage or a falling load. The permitted equipment parameters must not be exceeded.
This is the last available lesson in this category in the current MVP version. Return to the category list to choose another section of the course.
Category 8 / Lesson 18
Forklift — ending work and operator requirements
Learn how to leave a forklift safely and what is required of the person operating it.
Safe parking
After work, leave the forklift in the designated place, secure it against unintended movement and lower the attachment in accordance with the instructions.
Do not block routes
The forklift should not be left on an escape route, pedestrian walkway or any other place where it creates a hazard.
Who may operate a forklift
A forklift should be operated by a properly prepared worker who knows the rules for using that equipment and uses its safeguards. A B-VCA certificate alone does not replace the required operator preparation.
Remember
Safe operation ends only when the equipment is correctly parked and secured.
Practice questions
How should a forklift be left after work?
Select an answer to continue.
Correct answer In the designated place, secured against unintended movement, with the attachment lowered and in accordance with the parking instructions.
Explanation
A parked forklift must not endanger pedestrians or move unintentionally. It should be left in accordance with the instructions and site rules.
This is the last available lesson in this category in the current MVP version. Return to the category list to choose another section of the course.
Practice questions
Who should operate a forklift at work?
Select an answer to continue.
Correct answer A person whose competence has been checked, who knows the rules for using that equipment and uses its safeguards.
Explanation
B-VCA provides basic safety knowledge; it is not an authorisation for every machine. The operator must have suitable preparation and use the specified safeguards.
This is the last available lesson in this category in the current MVP version. Return to the category list to choose another section of the course.
This is the last available lesson in this category in the current MVP version. Return to the category list to choose another section of the course.
Category 9 / Lesson 1
Hazards related to energy and electricity
Basic risks associated with electricity, mechanical energy, pressure and radiation.
Lesson objective
You will learn examples of hazardous energy sources and how to treat them as potential hazards.
Types of energy
Risk may come from electricity, moving parts, pressure, springs, hot surfaces, radiation or stored energy.
Principle of caution
Do not repair installations or open equipment without authorisation. Before work, make sure the energy has been safely isolated or controlled.
Practice questions
What hazard can occur when touching a live component?
Select an answer to continue.
Correct answer Electric shock, burns or cardiac arrest.
Explanation
Electrical energy can cause serious injury even when the hazard is not visible.
This is the last available lesson in this category in the current MVP version. Return to the category list to choose another section of the course.
Category 9 / Lesson 2
Energy sources and prevention of unexpected start-up
Why energy in machines and installations can remain hazardous even after switch-off.
Different types of energy
Hazards may include electricity, pressure, springs, moving parts, hot surfaces, pressurised substances or radiation.
Isolation and marking
Before working on equipment, make sure the energy has been isolated and the equipment cannot be started accidentally.
Do not work on unfamiliar installations
If you are not authorised or do not know the procedure, do not open the installation or attempt repairs yourself.
Practice questions
What should be done with an electrical cable that has damaged insulation?
Select an answer to continue.
Correct answer Do not use it, prevent its use and report the defect.
Explanation
Damaged insulation can cause electric shock or a short circuit. The cable must be removed from service and reported.
This is the last available lesson in this category in the current MVP version. Return to the category list to choose another section of the course.
Category 9 / Lesson 3
Safe approach to energy sources
How to avoid hazards related to electricity, pressure, movement and residual energy.
Energy may remain in the system
A machine or installation may still contain energy after it has been switched off, such as pressure, moving parts or electrical charge.
Do not touch uncertain installations
Damaged cables, open enclosures and wet electrical components should be treated as hazardous.
Use lockout and procedures
Work involving energy sources requires isolation, securing and verification procedures to prevent accidental start-up.
Practice questions
Who should carry out work on an electrical installation?
Select an answer to continue.
Correct answer A person who is authorized and trained for such work.
Explanation
Electrical work requires qualifications, procedures and appropriate safeguards.
This is the last available lesson in this category in the current MVP version. Return to the category list to choose another section of the course.
Category 9 / Lesson 4
Identifying unsafe situations — energy, electricity and radiation
How to notice risks in this section and respond before an incident occurs.
Observe working conditions
Before starting a task, pay attention to the surroundings, equipment, signage and the behaviour of other people.
Do not ignore changes
A change in working conditions, a new obstacle, damaged equipment or missing information may indicate a new hazard.
Respond early
The safest approach is to stop and report the problem before the situation becomes urgent or difficult to control.
Practice questions
Why is lockout/tagout used?
Select an answer to continue.
Correct answer To isolate and secure an energy source against accidental start-up.
Explanation
Lockout/tagout protects against uncontrolled release of energy during servicing, cleaning or repair.
This is the last available lesson in this category in the current MVP version. Return to the category list to choose another section of the course.
Category 9 / Lesson 5
Making a safe decision before work — energy, electricity and radiation
How to make a safe decision before starting work or changing how a task is performed.
Pause before starting
A short check before work begins helps identify missing instructions, safeguards or problems with the work area.
Use the correct protective measures
Protective measures should match the task, the hazard and the rules that apply at the workplace.
Do not start if you are unsure
If you do not know how to perform the work safely, ask the responsible person before starting the task.
Practice questions
What is an electrical arc?
Select an answer to continue.
Correct answer A dangerous discharge that can cause burns, a pressure wave and eye damage.
Explanation
An electrical arc is a sudden release of energy. It can have very serious consequences for people and equipment.
This is the last available lesson in this category in the current MVP version. Return to the category list to choose another section of the course.
Category 9 / Lesson 6
Communication and hazard reporting — energy, electricity and radiation
When to stop work, ask a supervisor or report a hazard.
Report clearly
A report should explain what happened, where the problem is and what risk may result.
Inform the right person
Hazards, damage and unclear instructions should be reported to the supervisor or person responsible for safety.
Do not assume someone already knows
If you see an unsafe situation, make sure it has been noticed and communicated to the appropriate person.
Practice questions
What should be done before entering an area marked with a radiation hazard?
Select an answer to continue.
Correct answer Check the access rules and enter only if authorized.
Explanation
Radiation areas require access control, signage and compliance with procedures.
This is the last available lesson in this category in the current MVP version. Return to the category list to choose another section of the course.
Category 9 / Lesson 7
Pre-task check — energy, electricity and radiation
What to check before performing a task to reduce the risk of mistakes or accidents.
Check the task
Make sure you understand the scope of work, sequence of actions and required safeguards.
Check the workplace
The work area should be accessible, tidy and free of obvious obstacles or uncontrolled hazards.
Check the equipment
Tools, protective equipment and materials should be complete, serviceable and used as intended.
Practice questions
How should you respond if damage to an installation or energy safeguard is suspected?
Select an answer to continue.
Correct answer Do not touch it, warn others and report the situation.
Explanation
Do not improvise around energy hazards. Secure the surroundings and report the hazard to the appropriate people.
This is the last available lesson in this category in the current MVP version. Return to the category list to choose another section of the course.
Category 9 / Lesson 8
Common mistakes and how to avoid them — energy, electricity and radiation
Common unsafe shortcuts and behaviours that should be avoided.
Do not take shortcuts
Skipping procedures, guards or checks may appear to save time, but it increases the risk of an accident.
Do not work on autopilot
Even routine tasks require attention, especially when conditions, equipment or surroundings have changed.
Do not hide problems
Defects, mistakes and unsafe situations should be reported so that the hazard does not recur.
Practice questions
Which situations may indicate an electrical hazard?
You can select more than one answer.
You can select more than one answer.
Correct answer Sparking or a burning smell., A cracked equipment housing., Damaged cable insulation., Moisture near electrical equipment.
Explanation
Sparking, damage, moisture and a burning smell may indicate a real hazard. A serviceable approved cable is not in itself a sign of a fault.
This is the last available lesson in this category in the current MVP version. Return to the category list to choose another section of the course.
Category 9 / Lesson 9
Review of the key rules — energy, electricity and radiation
A review of the rules to remember before moving on.
The key rule
Safe work begins with identifying the hazard and choosing the correct way to act.
Employee role
Employees should follow instructions, use protective measures and report situations that may lead to an accident.
Role of the organisation
Employers and supervisors should provide the instructions, protective measures and conditions needed for safe work.
Practice questions
Which actions help work safely with energy sources?
You can select more than one answer.
You can select more than one answer.
Correct answer Isolating the energy source according to procedure., Securing against accidental start-up., Verifying the absence of energy when required by the procedure., Applying marking or a lock according to site rules.
Explanation
Safe work requires actual isolation, securing and verification. Merely assuming that a machine is switched off is not enough.
This is the last available lesson in this category in the current MVP version. Return to the category list to choose another section of the course.
Category 9 / Lesson 10
Section summary and preparation for questions — energy, electricity and radiation
A short summary of the section and preparation for later test questions.
What you should remember
From this section, remember above all how to identify risks, follow instructions and report problems.
Before the next section
The same principles will return in questions, examples and exercises later in the course.
MVP status
This is a working structural lesson. Detailed examples and test questions will be developed in later stages.
Practice questions
Which rules apply when working near radiation or marked areas?
You can select more than one answer.
You can select more than one answer.
Correct answer Follow signage and access restrictions., Use required protective equipment and procedures., Do not enter without authorization., Report damaged signage or a suspicious situation.
Explanation
Marked areas require compliance with access, protection and reporting rules. A short job does not justify entering without following the rules.
This is the last available lesson in this category in the current MVP version. Return to the category list to choose another section of the course.
Category 9 / Lesson 11
Stored and residual energy
Why a switched-off machine may still contain dangerous energy.
Switching off does not remove all energy
After equipment is switched off, stored or residual energy may remain: a tensioned spring, raised component, rotating part, flywheel, pressure or charge in a capacitor.
Mechanical energy can still cause movement
A machine component may fall, rotate or move even when power is off. Before work, movement must be stopped and components that can move must be safely secured.
First establish a safe state
Do not start work just because the machine is switched off. Remaining energy must be removed, discharged or secured, and it must be confirmed that it no longer presents a hazard.
Practice questions
The machine has been switched off, but a raised component may fall and a spring is still under tension. Can work start immediately?
Select an answer to continue.
Correct answer No. Stored and residual energy must first be removed, discharged or safely secured.
Explanation
Switching equipment off does not automatically create a safe state. Energy may remain in a tensioned spring, raised component, rotating part, capacitor or pressurised system.
This is the last available lesson in this category in the current MVP version. Return to the category list to choose another section of the course.
Category 9 / Lesson 12
Multiple energy sources and hydraulics
Why disconnecting electrical power is not enough when a machine also contains hydraulic or mechanical energy.
One machine may have several energy sources
Equipment may use electrical, hydraulic, pneumatic and mechanical energy at the same time. Before work, all hazardous sources must be identified.
Hydraulics may remain pressurised
A hydraulic accumulator, hose or cylinder may remain under pressure after the machine is switched off. A raised component may also fall as pressure drops.
Isolate all sources
Disconnecting one source is not enough. Required energy sources must be isolated, secured, discharged and checked in accordance with the rules for the task.
Practice questions
The electrical power supply to a machine has been disconnected, but the hydraulic system is still under pressure. What should be done?
Select an answer to continue.
Correct answer Identify and safely isolate the remaining energy sources as well, release the pressure and secure against possible movement.
Explanation
A machine may have several hazardous energy sources. Disconnecting electrical power is not enough if hydraulic, pneumatic or mechanical energy remains.
This is the last available lesson in this category in the current MVP version. Return to the category list to choose another section of the course.
Category 9 / Lesson 13
Pneumatic energy and residual pressure
How to recognise the hazard from compressed air after the supply has been shut off.
A closed valve does not always mean zero pressure
Compressed air may remain downstream of a closed valve in a hose, vessel or cylinder. This energy can cause sudden movement or a release of pressure.
Isolate and discharge
Before work, the system must be isolated and remaining pressure safely released or secured in accordance with the procedure.
Check before starting
Do not assume that a quiet machine has no energy. Before work begins, confirm that the system cannot move unexpectedly or release pressure.
Practice questions
The valve supplying compressed air to a machine has been closed. Does this mean the pneumatic system is already safe?
Select an answer to continue.
Correct answer No. Pressure may remain in hoses, a vessel or a cylinder and must be safely discharged and checked.
Explanation
After the compressed-air supply is isolated, residual energy may remain in the system. Before work, it must be discharged or secured in accordance with the rules and the safe state confirmed.
This is the last available lesson in this category in the current MVP version. Return to the category list to choose another section of the course.
Category 9 / Lesson 14
Verifying the safe state
Why energy isolation must be verified before work starts.
OFF is not proof of zero energy
A switch in the OFF position is not automatically proof that an installation is de-energised. Likewise, a closed valve does not always mean zero pressure.
Isolation must be verified
After energy has been isolated and secured, verify the safe state using the method required for the task: absence of hazardous voltage or pressure, stopped moving parts and components secured against falling or movement.
Only then start work
The safety model is: isolate the energy, secure against restart, remove or secure residual energy, verify the safe state, and only then begin work.
Practice questions
The installation switch is in the OFF position and the equipment has been locked out. What else is required before work starts when the procedure requires a de-energised state?
Select an answer to continue.
Correct answer Confirm the safe state: use the required method to verify the absence of hazardous energy, including absence of voltage or pressure and that moving parts have stopped.
Explanation
Isolation and lockout must be verified. A switch in the OFF position is not automatically proof that voltage or other forms of hazardous energy are absent.
This is the last available lesson in this category in the current MVP version. Return to the category list to choose another section of the course.
This is the last available lesson in this category in the current MVP version. Return to the category list to choose another section of the course.
Category 10 / Lesson 1
Working with hazardous substances
Labels, safety data sheets and basic protective measures.
Lesson objective
You will learn to identify hazardous substances and use the basic information provided on labels and in safety data sheets.
Labels and pictograms
Pictograms warn about hazards such as toxicity, flammability, corrosivity and risks to health or the environment.
Safe work
Before using a substance, check the instructions, ventilation, required protective equipment and what to do in the event of a spill or skin contact.
Practice questions
What helps identify the hazards associated with a chemical substance?
Select an answer to continue.
Correct answer The label, pictograms and safety data sheet.
Explanation
The label and safety data sheet contain information about hazards, protective measures, storage and emergency response.
This is the last available lesson in this category in the current MVP version. Return to the category list to choose another section of the course.
Category 10 / Lesson 2
Labels, safety data sheets and safe storage
How to use information about hazardous substances.
Substance label
The label provides the substance name, hazards, pictograms and basic precautions.
Safety data sheet
A safety data sheet describes safe use, storage, protective equipment, first aid and what to do in the event of a release.
Storage and housekeeping
Substances should be stored in suitable containers with readable labels and kept away from materials with which they must not be mixed.
Practice questions
What should be done before using an unknown substance?
Select an answer to continue.
Correct answer Check the label, instructions or safety data sheet and ask the supervisor if in doubt.
Explanation
An unknown substance may be toxic, corrosive, flammable or reactive. First, the rules for safe use must be known.
This is the last available lesson in this category in the current MVP version. Return to the category list to choose another section of the course.
Category 10 / Lesson 3
What to do after contact with a hazardous substance
Basic decisions for a spill, exposure or uncertainty about a substance.
Check the labelling
The label and safety data sheet provide information about hazards, required protective equipment and first-aid measures.
Avoid unprotected contact
Do not touch, smell or mix a substance if you do not know what hazards it presents.
Report a leak or spill
A spill, leak or damaged container should be reported and secured in accordance with the procedure.
Practice questions
Why must an unlabeled container containing a substance not be used?
Select an answer to continue.
Correct answer Because it is not known what the substance is, what hazards it presents or how to respond in an incident.
Explanation
Without labeling, the risk cannot be identified and suitable protective measures cannot be selected. Unlabeled containers should be reported.
This is the last available lesson in this category in the current MVP version. Return to the category list to choose another section of the course.
Category 10 / Lesson 4
Identifying unsafe situations — hazardous substances
How to notice risks in this section and respond before an incident occurs.
Observe working conditions
Before starting a task, pay attention to the surroundings, equipment, signage and the behaviour of other people.
Do not ignore changes
A change in working conditions, a new obstacle, damaged equipment or missing information may indicate a new hazard.
Respond early
The safest approach is to stop and report the problem before the situation becomes urgent or difficult to control.
Practice questions
What is important when working with vapors or dusts from hazardous substances?
Select an answer to continue.
Correct answer Good ventilation or other measures that reduce exposure.
Explanation
Ventilation, local extraction and suitable protection reduce exposure to inhaled hazardous substances.
This is the last available lesson in this category in the current MVP version. Return to the category list to choose another section of the course.
Category 10 / Lesson 5
Making a safe decision before work — hazardous substances
How to make a safe decision before starting work or changing how a task is performed.
Pause before starting
A short check before work begins helps identify missing instructions, safeguards or problems with the work area.
Use the correct protective measures
Protective measures should match the task, the hazard and the rules that apply at the workplace.
Do not start if you are unsure
If you do not know how to perform the work safely, ask the responsible person before starting the task.
Practice questions
How should hazardous substances be stored?
Select an answer to continue.
Correct answer According to the label, safety data sheet and site rules.
Explanation
Substances must be stored in suitable, labeled containers and conditions, taking chemical incompatibilities into account.
This is the last available lesson in this category in the current MVP version. Return to the category list to choose another section of the course.
Category 10 / Lesson 6
Communication and hazard reporting — hazardous substances
When to stop work, ask a supervisor or report a hazard.
Report clearly
A report should explain what happened, where the problem is and what risk may result.
Inform the right person
Hazards, damage and unclear instructions should be reported to the supervisor or person responsible for safety.
Do not assume someone already knows
If you see an unsafe situation, make sure it has been noticed and communicated to the appropriate person.
Practice questions
What should be done after a hazardous substance contacts the skin or eyes?
Select an answer to continue.
Correct answer Immediately follow the instructions, use a safety shower or eyewash if required, and report the incident.
Explanation
Contact with a substance may require immediate flushing and medical assistance. Follow the instructions and report the incident.
This is the last available lesson in this category in the current MVP version. Return to the category list to choose another section of the course.
Category 10 / Lesson 7
Pre-task check — hazardous substances
What to check before performing a task to reduce the risk of mistakes or accidents.
Check the task
Make sure you understand the scope of work, sequence of actions and required safeguards.
Check the workplace
The work area should be accessible, tidy and free of obvious obstacles or uncontrolled hazards.
Check the equipment
Tools, protective equipment and materials should be complete, serviceable and used as intended.
Practice questions
Which information may be included in a substance safety data sheet?
You can select more than one answer.
You can select more than one answer.
Correct answer Health and environmental hazards., Required protective measures., Actions to take in the event of a spill or fire., Storage rules and first-aid information.
Explanation
A safety data sheet describes hazards, protection, storage, first aid and emergency measures. It is not a place for employees' private data.
This is the last available lesson in this category in the current MVP version. Return to the category list to choose another section of the course.
Category 10 / Lesson 8
Common mistakes and how to avoid them — hazardous substances
Common unsafe shortcuts and behaviours that should be avoided.
Do not take shortcuts
Skipping procedures, safeguards or checks may appear to save time, but it increases the risk of an accident.
Do not work on autopilot
Even routine tasks require attention, especially when conditions, equipment or surroundings have changed.
Do not hide problems
Defects, mistakes and unsafe situations should be reported so that the hazard does not recur.
Practice questions
Which actions are appropriate when a hazardous substance is spilled?
You can select more than one answer.
You can select more than one answer.
Correct answer Warn people nearby., Secure the area according to procedure., Report the spill to the appropriate person., Use suitable protective equipment if you are authorized to clean up the spill.
Explanation
In the event of a spill, warn others, secure the area, report the incident and act only according to procedure and with the correct protection.
This is the last available lesson in this category in the current MVP version. Return to the category list to choose another section of the course.
Category 10 / Lesson 9
Review of the key rules — hazardous substances
A review of the rules to remember before moving on.
The key rule
Safe work begins with identifying the hazard and choosing the correct way to act.
Employee role
Employees should follow instructions, use protective measures and report situations that may lead to an accident.
Role of the organisation
Employers and supervisors should provide the instructions, protective measures and conditions needed for safe work.
Practice questions
Which rules apply to hazardous waste?
You can select more than one answer.
You can select more than one answer.
Correct answer Collect it in labeled containers., Do not mix waste if the procedure prohibits it., Follow the site's rules., Report an overfilled or damaged container.
Explanation
Hazardous waste requires labeling, segregation and handling according to procedure. It must not be disposed of as ordinary waste.
This is the last available lesson in this category in the current MVP version. Return to the category list to choose another section of the course.
Category 10 / Lesson 10
Section summary and preparation for questions — hazardous substances
A short summary of the section and preparation for later test questions.
What you should remember
From this section, remember above all how to identify risks, follow instructions and report problems.
Before the next section
The same principles will return in questions, examples and exercises later in the course.
MVP status
This is a working structural lesson. Detailed examples and test questions will be developed in later stages.
Practice questions
Assess which statements about hazardous substances are correct.
Select YES or NO for each statement.
Before using a substance, the hazards and protective measures must be known.
The label and safety data sheet help identify the risk.
An unknown substance may be poured into any bottle without a label.
Answer YES or NO for each statement.
Correct answer Before using a substance, the hazards and protective measures must be known. — YES; The label and safety data sheet help identify the risk. — YES; An unknown substance may be poured into any bottle without a label. — NO
Explanation
Hazardous substances require identification of hazards, compliance with instructions, correct labeling and appropriate protective measures. Unlabeled containers must not be used.
This is the last available lesson in this category in the current MVP version. Return to the category list to choose another section of the course.
Category 10 / Lesson 11
Scenario question — unlabelled container
A short scenario testing the safe response to an unknown substance.
How to approach the situation
Do not use an unlabelled liquid, smell it or transfer it to another container until the substance has been identified.
The safest decision
Secure the container and report the situation in accordance with the procedure so that the correct protective measures can be selected.
Practice questions
Put the actions before starting work with a hazardous substance in the correct order.
Arrange the steps from first to last.
-
1
Start work only when the substance can be used according to the instructions.
-
2
Check the substance label and identify the hazard pictograms.
-
3
Read the safety data sheet and required precautions.
-
4
Prepare the appropriate personal protective equipment and ventilation or safeguards.
Put the steps in the correct order.
Correct order 1. Check the substance label and identify the hazard pictograms. 2. Read the safety data sheet and required precautions. 3. Prepare the appropriate personal protective equipment and ventilation or safeguards. 4. Start work only when the substance can be used according to the instructions.
Explanation
Before using a hazardous substance, identify hazards from the label, check the safety data sheet, prepare the required protective measures and only then start work.
This is the last available lesson in this category in the current MVP version. Return to the category list to choose another section of the course.
Category 10 / Lesson 12
Scenario question — What should you do?
This lesson prepares you for a scenario question: What should you do?
Lesson objective
This lesson prepares you for a practice question from the Hazardous Substances section.
The question you will practise
What should you do?
What to pay attention to
Choose the best and safest course of action.
Remember
Unlabelled substances must not be used or transferred. Secure and report them so their identity and the required protective measures can be established.
Scenario question
Scenario
There is an unlabeled container with liquid at the workplace. You do not know what the substance is.
What should you do after noticing a hazardous-substance leak?
Choose the best and safest action.
Select an answer to continue.
Correct answer Do not use the substance, secure the container and report the situation according to procedure.
Explanation
Unlabeled substances must not be used or transferred. They should be secured and reported so that the substance and required protective measures can be identified.
This is the last available lesson in this category in the current MVP version. Return to the category list to choose another section of the course.
Category 10 / Lesson 13
Classification question — assign the items to the correct groups
This lesson prepares you for a classification question: assign the items to the correct groups.
Lesson objective
This lesson prepares you for a practice question from the Hazardous Substances section.
The question you will practise
Assign the items to the correct groups.
What to pay attention to
Choose the correct group for each item.
Remember
The label and safety data sheet help identify the hazards of a substance. Do not use or transfer unknown substances into unlabelled containers. Ventilation can reduce exposure to vapours.
Classification question
Assign the items to the groups related to hazardous substances and protection.
Choose the correct group for each item.
Choose a group for each item.
Correct answer Label on the packaging — Source of information about a substance; Safety data sheet — Source of information about a substance; Pouring an unknown liquid into an unlabeled bottle — Unsafe behaviour; Using suitable ventilation — Risk-control measure
Explanation
The label and safety data sheet help identify hazards associated with a substance. Unknown substances must not be used or poured into unlabeled containers. Ventilation can reduce exposure to vapors.
This is the last available lesson in this category in the current MVP version. Return to the category list to choose another section of the course.
Category 10 / Lesson 14
Complete the sentence from a list — safety data sheet
This lesson prepares you for a dropdown-gap question about a substance safety data sheet.
Lesson objective
This lesson reminds you that information about substance hazards should be checked in a reliable source.
The question you will practise
You will complete a sentence by selecting the document that contains information about a substance's hazards.
What to pay attention to
A safety data sheet describes hazards, protective measures, first aid, storage and safe handling of the substance.
Remember
Information about substance hazards can be found, among other places, in the safety data sheet.
Dropdown gap-fill question
Complete the sentence about the substance safety data sheet.
Choose the correct completion of the sentence.
Choose an answer from the list.
Correct answer safety data sheet
Explanation
A safety data sheet contains information about hazards, protective measures, first aid, storage and handling of the substance.
This is the last available lesson in this category in the current MVP version. Return to the category list to choose another section of the course.
Category 10 / Lesson 15
Click the unlabelled container
This lesson prepares you for a hotspot-image question about an unlabelled substance container.
Lesson objective
This lesson prepares you to identify unsafe handling of an unlabelled substance.
The question you will practise
Click the item that shows unsafe handling of a substance.
What to pay attention to
Look for a container without a label or marking. Click directly on the unlabelled container.
Remember
Unlabelled substances must not be used or transferred. Every container should be labelled so hazards can be identified and the correct protective measures selected.
Image hotspot question
Click the item that shows unsafe handling of a substance.
Click the unlabeled container.
Your click
Correct area
Click a location in the image before checking your answer.
Correct area: Unlabeled container
Explanation
Unlabeled substances must not be used or transferred. Every container should be labeled so the hazards can be identified and suitable protective measures selected.
This is the last available lesson in this category in the current MVP version. Return to the category list to choose another section of the course.
Category 10 / Lesson 16
Case study — unlabelled container of liquid
Practise dealing with an unlabelled container and a missing safety data sheet.
Lesson objective
The objective is to recognise that a substance's appearance is not enough to use it safely.
The key principle
An unlabelled substance must not be used, smelled, mixed or transferred until its identity and safe-handling rules are established.
Practical decision
Secure the container, mark it as unknown, report it to the appropriate person and obtain information from the label or safety data sheet.
Case study
Unlabeled container with liquid
Scenario
There is an unlabeled container with liquid at the workplace. One employee wants to use the liquid because it looks similar to a product used before. There is no safety data sheet nearby and no person responsible for substances is available.
Read the scenario and answer the questions.
Question 1
What should be done with the unlabeled container?
Correct answer Do not use it, secure the container and report the situation.
Explanation
An unknown substance must not be identified by appearance or smell. The container must be secured and reported.
Question 2
What information helps a substance be used safely?
Select all correct answers.
Correct answer A label with the substance name and hazard pictograms., A safety data sheet with safe-use instructions., Instructions concerning the required protective equipment.
Explanation
Safe use requires information from the label, safety data sheet and instructions. The appearance of a liquid is not a reliable source of information.
Question 3
Put the steps for handling an unknown substance in the correct order.
Arrange the steps from first to last.
-
1
Establish information from the label or safety data sheet before taking further action.
-
2
Do not use, smell or transfer the unlabeled liquid.
-
3
Secure the container against accidental use.
-
4
Report the situation to the supervisor or responsible person.
Correct answer 1. Do not use, smell or transfer the unlabeled liquid. 2. Secure the container against accidental use. 3. Report the situation to the supervisor or responsible person. 4. Establish information from the label or safety data sheet before taking further action.
Explanation
First stop the intended use, secure the container, report the matter and only after identifying the substance make further decisions.
Answer all questions in the case study.
Case study result
Explanation
Unlabeled substances must not be used, smelled or transferred. Secure the container, report the situation and establish information from the label or safety data sheet.
This is the last available lesson in this category in the current MVP version. Return to the category list to choose another section of the course.
Category 10 / Lesson 17
Welding fumes as a health hazard
You will learn why welding fumes must not be underestimated.
What welding fumes contain
Welding can produce particulate matter, fumes and gases. Their composition depends on the material, electrode, wire, coating, paint, contamination and work method. The hazard cannot always be assessed by smell.
Health effects
Welding fumes can harm the respiratory system and lungs. The work should therefore be assessed for exposure and measures used to reduce inhalation of contaminants.
Controlling exposure
The primary measures are controlling fumes at source, ventilation, local exhaust extraction and proper work organisation. If these are not sufficient, suitable respiratory protection may be required.
Remember
Welding fumes are hazardous because they may contain harmful particles and gases. The absence of a strong smell does not mean the air is safe.
Practice questions
Why are welding fumes dangerous?
Select an answer to continue.
Correct answer They may contain harmful particles and gases that the employee can inhale.
Explanation
Welding fumes may contain harmful substances. Smell is not a reliable indicator of safety, so risk assessment and exposure control are required.
This is the last available lesson in this category in the current MVP version. Return to the category list to choose another section of the course.
Category 10 / Lesson 18
Ventilation and local exhaust extraction during welding
You will learn the purpose of ventilation and extraction that removes fumes at the source.
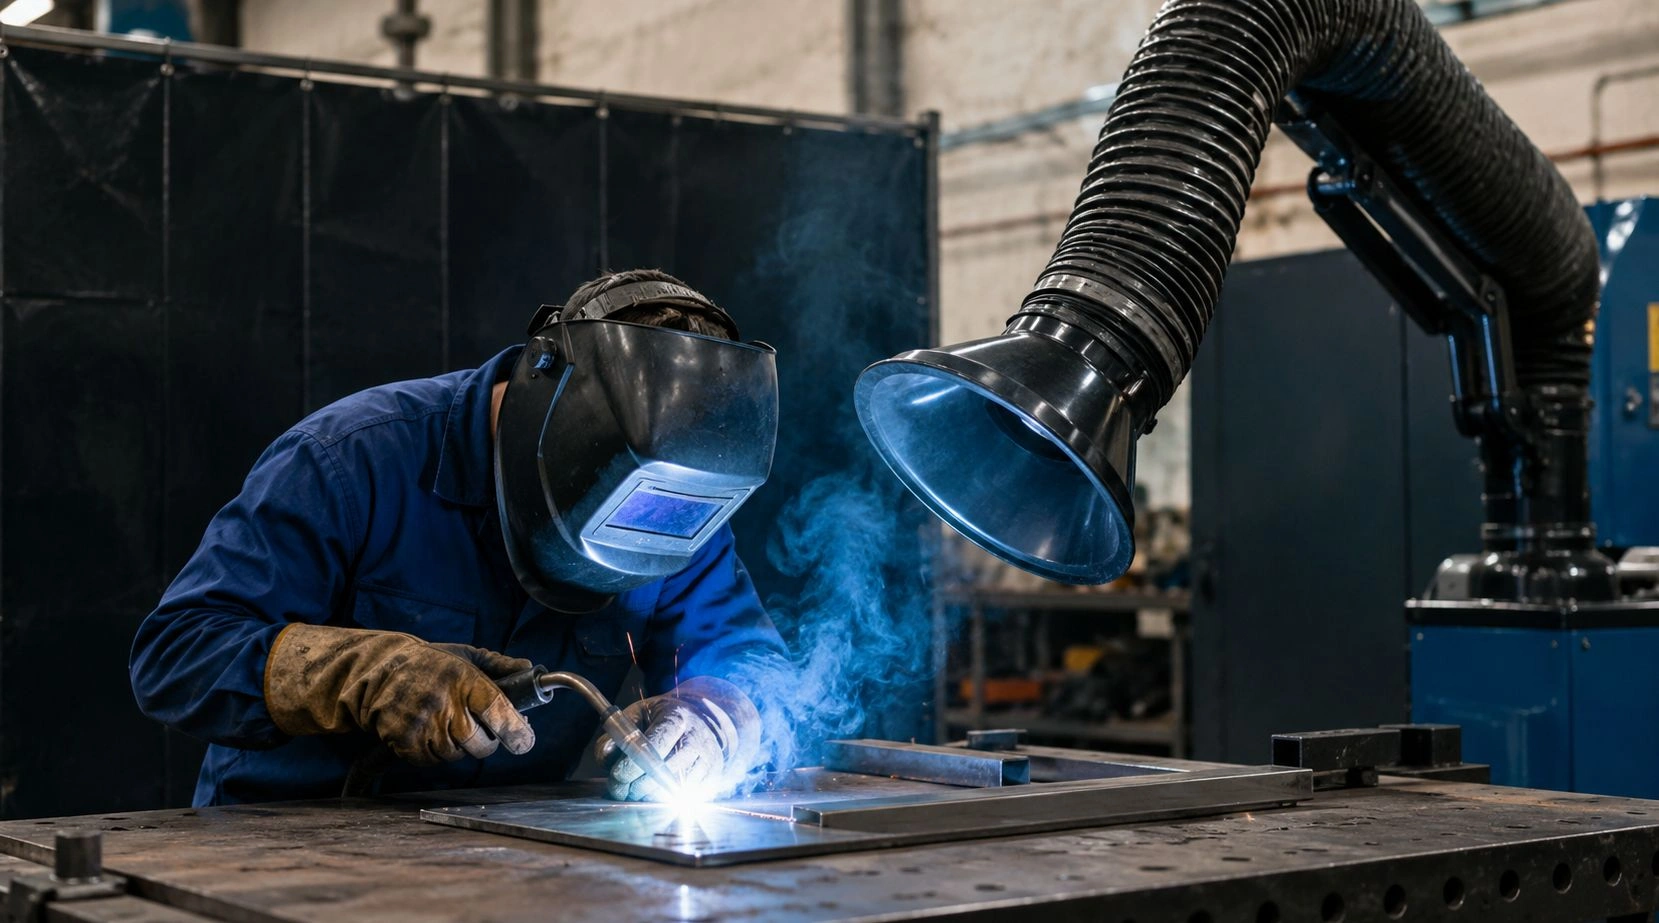
Purpose of ventilation
Ventilation and local exhaust extraction reduce inhalation of welding fumes and gases. Contaminants should be removed as close as possible to where they are generated, before they spread through the room.
Local exhaust extraction
Local extraction is effective when it is correctly positioned, operating and actually captures the fumes. Simply having the unit beside the work area is not enough if fumes bypass it and enter the worker's breathing zone.
It does not replace everything else
Ventilation does not remove the need for a welding helmet, gloves, protective clothing or fire-prevention measures. It is one part of the system for controlling exposure to hazardous substances.
Remember
The purpose of ventilation or extraction during welding is to remove fumes and gases as close as possible to their source. This reduces exposure for the welder and people nearby.
Practice questions
What is the purpose of ventilation or local extraction during welding?
Select an answer to continue.
Correct answer To remove fumes and gases as close as possible to the point where they are generated.
Explanation
Ventilation and local extraction reduce inhalation of welding fumes. However, they do not replace other safeguards such as PPE and proper organisation of the work.
This is the last available lesson in this category in the current MVP version. Return to the category list to choose another section of the course.
Category 10 / Lesson 19
Coatings, paint and contamination before welding
You will learn why the material must be checked before heating.
Hidden hazard
Material to be welded may be covered with paint, varnish, oil, grease, insulation, zinc or another coating. When heated, these substances may release harmful fumes or gases.
What to check
Before work, find out what material and coating are involved. If in doubt, check the instructions or safety data sheet, or ask the responsible person.
Correct control measures
It may be necessary to clean the material, use extraction, provide additional ventilation, use respiratory protection or change the work method. The decision should follow from the risk assessment.
Remember
Paints, coatings and contamination can create additional harmful fumes or gases during welding. Do not assume every metal component can be heated safely without checking it first.
Practice questions
Why must paints, coatings or contaminants on the material be considered before welding?
Select an answer to continue.
Correct answer Heating can produce additional harmful fumes or gases.
Explanation
Heated coatings, paints or substance residues may release hazardous vapors. A risk assessment and suitable control measures are required.
This is the last available lesson in this category in the current MVP version. Return to the category list to choose another section of the course.
This is the last available lesson in this category in the current MVP version. Return to the category list to choose another section of the course.
Category 11 / Lesson 1
What is a fire?
Fire as uncontrolled combustion and a real workplace hazard.
Lesson objective
You will learn what a fire is and why even a small fire at work requires a quick, calm response.
Key information
A fire is uncontrolled combustion. It can cause injuries, smoke exposure, damage and danger to life. At work, even a small fire can develop rapidly if combustible materials or ignition sources are nearby.
Safe attitude
Do not ignore smoke, a burning smell or a small flame. Employees should know the alarm procedure, warn others and never put their own safety at unnecessary risk.
Practice questions
What best describes a fire?
Select an answer to continue.
Correct answer Uncontrolled combustion that can endanger people and property.
Explanation
A fire is uncontrolled combustion. It can cause smoke, damage and a threat to health and life.
This is the last available lesson in this category in the current MVP version. Return to the category list to choose another section of the course.
Category 11 / Lesson 2
Conditions needed for a fire
The fire triangle: fuel, oxygen and an ignition source.
Lesson objective
You will learn the three basic elements needed for a fire to start.
Three elements
A fire needs fuel, oxygen and an ignition source. Removing one of these elements can stop a fire developing or reduce the risk of one starting.
Meaning at work
This principle helps explain preventive actions such as removing unnecessary combustible materials, controlling ignition sources and following procedures for hazardous work.
Practice questions
Which set of elements is needed for a fire to start?
Select an answer to continue.
Correct answer Combustible material, oxygen and an ignition source.
Explanation
Three basic elements are needed for a fire: combustible material, oxygen and an ignition source.
This is the last available lesson in this category in the current MVP version. Return to the category list to choose another section of the course.
Category 11 / Lesson 3
Ignition sources
Common ignition sources at work and why they must be controlled.
Lesson objective
You will learn to recognise typical ignition sources.
Examples
Ignition sources include open flames, sparks, hot surfaces, hot work, damaged electrical installations and careless smoking.
Safe behaviour
In areas with a fire or explosion risk, take particular care with sparks, smoking, open flames and equipment that may overheat.
Practice questions
What does the shown no-open-flame sign mean?
Select an answer to continue.
Correct answer No open flames.
Explanation
This sign prohibits open flames and ignition sources. It is especially important where flammable materials or an explosion risk may be present.
This is the last available lesson in this category in the current MVP version. Return to the category list to choose another section of the course.
Category 11 / Lesson 4
Combustible materials and housekeeping
How combustible materials and poor housekeeping increase fire risk.
Lesson objective
You will understand why good housekeeping reduces the risk of fire.
Combustible materials
Paper, wood, packaging, dust, fuels, solvents and gases can increase fire risk. The more unnecessary combustible material near the work, the easier it is for a fire to spread quickly.
Housekeeping
Removing waste, keeping walkways clear and storing combustible materials correctly support both safe work and evacuation.
Practice questions
What should be done after noticing a fire?
Select an answer to continue.
Correct answer Raise the alarm and warn others according to procedure.
Explanation
When a fire is noticed, respond quickly: raise the alarm, warn others and follow the rules in force at the workplace.
This is the last available lesson in this category in the current MVP version. Return to the category list to choose another section of the course.
Category 11 / Lesson 5
What to do when you discover a fire
The first safe actions after discovering a fire.
Lesson objective
You will learn the basic sequence of actions after discovering a fire.
First response
When you discover a fire, stay calm, raise the alarm, warn others and report the fire according to the workplace procedure.
Safety limit
Do not put your own safety at risk. Attempting to extinguish a fire is acceptable only when it is safe, you know what to do and the procedure allows it.
Practice questions
What does the displayed fire safety sign indicate?
Select an answer to continue.
Correct answer The location of a fire extinguisher or firefighting equipment.
Explanation
This sign indicates the location of a fire extinguisher or firefighting equipment. Equipment should be used only when it is safe and in accordance with procedure.
This is the last available lesson in this category in the current MVP version. Return to the category list to choose another section of the course.
Category 11 / Lesson 6
Raising the alarm and first response
How to report a fire or fire hazard quickly and correctly.
Lesson objective
You will learn what matters when raising the alarm.
Reporting
Employees should know how to report a fire, where fire alarms are located and the basic information to provide: where the hazard is, what is happening and whether anyone is at risk.
Speed and clarity
A quick response limits the consequences. Information should be brief, clear and consistent with the local procedure.
Practice questions
Why is good housekeeping important in relation to fire?
Select an answer to continue.
Correct answer Because it helps reduce unnecessary combustible materials and makes safe movement easier.
Explanation
Good housekeeping reduces fire risk and makes it easier to respond in an emergency, for example during evacuation.
This is the last available lesson in this category in the current MVP version. Return to the category list to choose another section of the course.
Category 11 / Lesson 7
Evacuation
Safely leaving a hazardous area.
Lesson objective
You will learn the basic rules for evacuation during a fire.
Evacuation rules
During evacuation, use the escape route, follow signs and instructions, keep passages clear and leave the hazardous area calmly without panicking.
What to avoid
Do not go back for personal belongings, stop in passageways or use a route that is smoke-filled or identified as dangerous.
Practice questions
Which actions are appropriate after noticing a fire?
You can select more than one answer.
You can select more than one answer.
Correct answer Warn other people., Raise the alarm according to procedure., Leave the hazardous area according to the rules.
Explanation
When a fire is noticed, warn others, activate the alarm procedure and make sure the hazardous area is left safely.
This is the last available lesson in this category in the current MVP version. Return to the category list to choose another section of the course.
Category 11 / Lesson 8
Fire signs and equipment
Signs for fire extinguishers, fire alarms and emergency exits.
Lesson objective
You will connect the knowledge from Category 4 with signs that are important in a fire.
Signs
Employees should recognise signs for fire extinguishers, fire alarms and emergency exits. These signs help locate equipment, raise the alarm and find a safe exit route quickly.
Access
Do not block access to extinguishers, alarms, hydrants, doors or escape routes. Signage must remain visible and readable.
Practice questions
Which situations can increase the risk of fire or explosion?
You can select more than one answer.
You can select more than one answer.
Correct answer Using an open flame in an unsuitable place., The presence of flammable gases, vapors or dusts., Sparking during work.
Explanation
Open ignition sources, flammable substances and sparking increase the risk of fire or explosion. Emergency-route signage improves safety.
This is the last available lesson in this category in the current MVP version. Return to the category list to choose another section of the course.
Category 11 / Lesson 9
Explosion risk
Basics of explosion risk involving gases, vapours and dusts.
Lesson objective
You will learn simple examples of situations where an explosion risk may occur.
Hazards
An explosion may involve flammable gases, vapours, dusts or other combustible substances. Open flames, sparks and unsafe behaviour increase the risk.
Caution
In areas or situations with an explosion risk, follow prohibitions, signage, procedures and instructions from responsible persons particularly carefully.
Practice questions
Which items can be an ignition source?
You can select more than one answer.
You can select more than one answer.
Correct answer An open flame., A hot surface., A spark.
Explanation
Ignition sources can include open flames, sparks and hot surfaces. A green emergency sign is not an ignition source.
This is the last available lesson in this category in the current MVP version. Return to the category list to choose another section of the course.
Category 11 / Lesson 10
Preventing fires and explosions
A summary of the key rules for preventing fires and explosions.
Lesson objective
You will review the key rules for safe behaviour.
Prevention
Fires and explosions are prevented by following prohibitions, maintaining good housekeeping, storing materials correctly, controlling ignition sources and following instructions.
Employee response
Employees should report irregularities, respond to warning signs and make sensible decisions. Safety is more important than finishing the task quickly.
Practice questions
Which actions help prevent fires and explosions?
You can select more than one answer.
You can select more than one answer.
Correct answer Maintaining good housekeeping., Following prohibitions and signage., Correct storage of combustible materials.
Explanation
Good housekeeping, following signage and rules, and correct handling of combustible materials help prevent fires.
This is the last available lesson in this category in the current MVP version. Return to the category list to choose another section of the course.
Category 11 / Lesson 11
Image question — What does this sign indicate?
This lesson prepares you for an image-based single-choice question: What does this sign indicate?
Lesson objective
This lesson prepares you for a practice question from the Fire and Explosion section.
The question you will practise
What does this sign indicate?
What to pay attention to
Read the question, consider all the answers and check which decision is the safest.
Remember
This sign indicates the location of a fire extinguisher or other fire-fighting equipment that may be needed in a fire.
Practice questions
What does the shown fire-extinguisher sign indicate?
Select an answer to continue.
Correct answer The location of a fire extinguisher or firefighting equipment.
Explanation
This sign indicates the location of a fire extinguisher or other firefighting equipment that may be needed in the event of a fire.
This is the last available lesson in this category in the current MVP version. Return to the category list to choose another section of the course.
Category 11 / Lesson 12
Image question — What does this sign mean?
This lesson prepares you for an image-based single-choice question: What does this sign mean?
Lesson objective
This lesson prepares you for a practice question from the Fire and Explosion section.
The question you will practise
What does this sign mean?
What to pay attention to
Read the question, consider all the answers and check which decision is the safest.
Remember
This sign prohibits open flames in an area where they could cause a fire or explosion.
Practice questions
What does the shown prohibition sign mean in the context of fire risk?
Select an answer to continue.
Correct answer No open flames.
Explanation
This sign prohibits open flames in an area where they could lead to fire or explosion.
This is the last available lesson in this category in the current MVP version. Return to the category list to choose another section of the course.
Category 11 / Lesson 13
Multiple-choice image question — Which statements are correct for this sign?
This lesson prepares you for an image-based multiple-choice question: Which statements are correct for this sign?
Lesson objective
This lesson prepares you for a practice question from the Fire and Explosion section.
The question you will practise
Which statements are correct for this sign?
What to pay attention to
You may select more than one answer.
Remember
This sign prohibits open flames. It is especially important where a spark, flame or hot surface could cause a fire or explosion.
Practice questions
Which statements are correct for the no-open-flame sign?
You may select more than one answer.
You can select more than one answer.
Correct answer Open flames are not permitted., The sign helps reduce the risk of fire or explosion., The sign is important in areas containing flammable materials.
Explanation
This sign prohibits open flames. It is particularly important where a spark, flame or hot surface could cause a fire or explosion.
This is the last available lesson in this category in the current MVP version. Return to the category list to choose another section of the course.
Category 11 / Lesson 14
Matching question — Match the sign to the action or meaning in a fire situation
This lesson prepares you for a matching question: Match the sign to the action or meaning in a fire situation.
Lesson objective
This lesson prepares you for a practice question from the Fire and Explosion section.
The question you will practise
Match the sign to the action or meaning in a fire situation.
What to pay attention to
Match each answer to one sign. Each answer may be used only once.
Remember
In a fire, you need to recognise fire-fighting equipment, alarms, prohibitions on ignition sources and escape routes quickly.
Practice questions
Match the sign to the action or meaning in a fire situation.
Match each answer to one sign. Each answer may be used only once.
Match all items before checking.
Correct answer Fire extinguisher or firefighting equipment location; Fire alarm activation point; No open flames; Emergency escape route or exit
Explanation
In a fire situation, people must quickly recognise firefighting equipment, the alarm, ignition-source prohibitions and the emergency escape route.
This is the last available lesson in this category in the current MVP version. Return to the category list to choose another section of the course.
Category 11 / Lesson 15
Click the obstruction near the fire extinguisher
This lesson prepares you for a hotspot-image question about blocked access to fire-fighting equipment.
Lesson objective
This lesson prepares you to identify a situation where access to a fire extinguisher is obstructed.
The question you will practise
Click the location that obstructs access to the fire-fighting equipment.
What to pay attention to
Look for an object, material or obstruction blocking the route to the extinguisher. Click the obstruction, not the extinguisher itself.
Remember
Access to fire-fighting equipment must always remain clear. A blocked extinguisher can delay the response to a fire.
Image hotspot question
Click the area that obstructs access to firefighting equipment.
Click the obstacle blocking access to the fire extinguisher.
Your click
Correct area
Click a location in the image before checking your answer.
Correct area: Obstacle near the fire extinguisher
Explanation
Access to firefighting equipment must always be kept clear. A blocked fire extinguisher can delay response to a fire.
This is the last available lesson in this category in the current MVP version. Return to the category list to choose another section of the course.
Category 11 / Lesson 16
Fire-fighting equipment for welding
You will learn how to prepare fire protection for hot work.
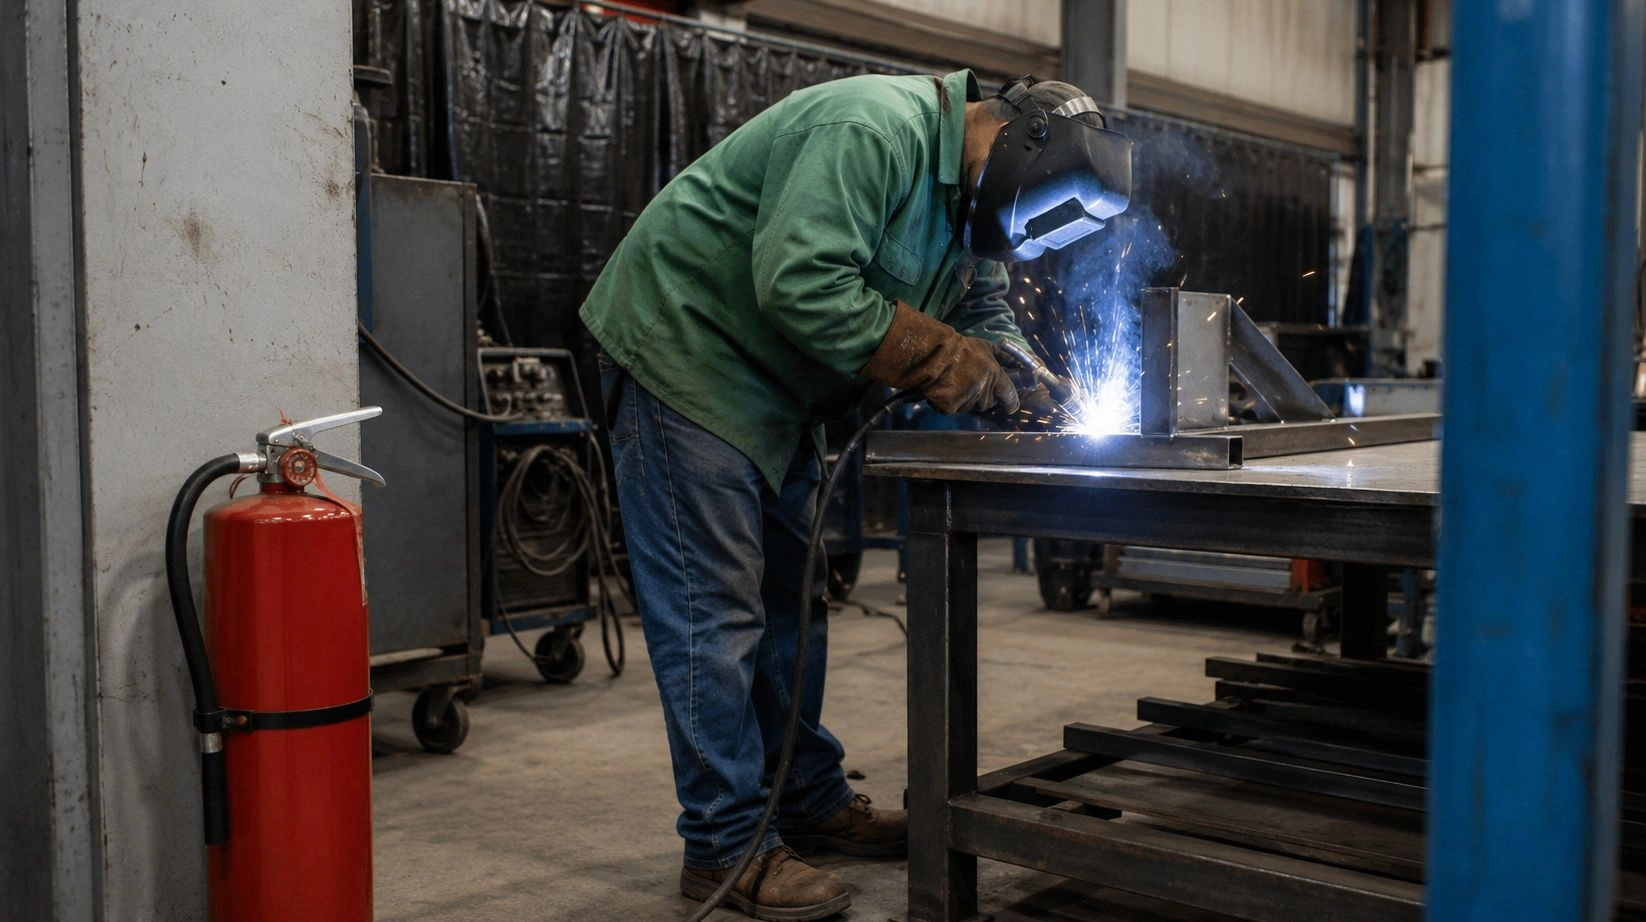
Fire risk
Welding can produce sparks, hot spatter and heated components. In an area with combustible materials, even a small ignition source can start a fire.
What should be provided
For hot work, suitable and accessible fire-fighting equipment must be provided and the alarm procedure known. The type of equipment should match the hazards in the workplace.
Supervision and response
Some situations require additional fire watch, meaning a person observes the work area and is ready to respond. An experienced welder does not replace fire-prevention safeguards.
Remember
Where welding presents a fire risk, suitable fire-fighting equipment and a means of quickly raising the alarm must be available. A bucket of water is not always the correct solution.
Practice questions
What should be provided when welding in an area with a fire risk?
Select an answer to continue.
Correct answer Suitable firefighting equipment that is accessible, and the ability to raise the alarm quickly.
Explanation
For hot work, suitable firefighting equipment must be provided and the alarm procedure must be known. The equipment is selected according to the hazards at the workplace.
This is the last available lesson in this category in the current MVP version. Return to the category list to choose another section of the course.
Category 11 / Lesson 17
Checking the area after welding
You will learn why the work area may need to be monitored after hot work.
A fire may start later
After welding ends, the hazard may not be immediately visible. A spark can fall into a gap, under insulation, into waste or behind a structural element and begin smouldering later.
What to check
After hot work, check for smoke, smouldering, hot spatter, heated components and materials that could ignite. Pay particular attention to hidden and hard-to-reach areas.
When monitoring is required
If the procedure requires it or the fire risk is higher, the area may need to be monitored for a period after work ends to detect delayed ignition.
Remember
The post-welding check is not about assessing the appearance of the weld. It is to detect smouldering, hot components and hidden ignition sources.
Practice questions
Why is the workplace sometimes monitored for a period after welding has finished?
Select an answer to continue.
Correct answer Because sparks or hot components can cause a fire even after the work has ended.
Explanation
After hot work, delayed ignition can occur. Monitoring the area helps detect smoldering, hot components or hidden ignition sources.
This is the last available lesson in this category in the current MVP version. Return to the category list to choose another section of the course.
Category 11 / Lesson 18
Fire watch — additional supervision during hot work
You will learn the role of the person who supervises fire safety during welding, cutting and other hot work.
What fire watch means
A fire watch is additional fire-safety supervision during hot work. In practice, you may also encounter the terms brandwacht or heetwerkwacht. The function of this person is more important than the job title itself.
Required preparation
A person assigned to the fire watch role (brandwacht / heetwerkwacht) should be properly trained and prepared for that role in accordance with workplace requirements and the applicable procedure. Experience in welding alone does not replace preparation for fire-safety supervision.
What the fire watch observes
The person providing supervision observes the work area and its surroundings: sparks, hot parts, combustible materials, possible ignition and the first signs of fire.
How to respond to a hazard
If a danger develops, the fire watch should warn workers, ensure that unsafe work is stopped and take the appropriate action or raise the alarm in accordance with the workplace procedure.
Remember
A fire watch is not a passive observer. The task is to identify a hazard early enough and respond in accordance with the applicable procedure.
Practice questions
Who should perform the fire watch (brandwacht / heetwerkwacht) role during hot work?
Select an answer to continue.
Correct answer A designated person who is properly trained and prepared for the role in accordance with workplace requirements and the procedure.
Explanation
A fire watch (brandwacht / heetwerkwacht) should be properly trained and prepared to provide fire-safety supervision in accordance with workplace requirements. Welding experience alone does not replace preparation for this role.
This is the last available lesson in this category in the current MVP version. Return to the category list to choose another section of the course.
Category 11 / Lesson 19
Fire watch does not replace safety controls
You will learn why additional supervision is only one layer of protection during hot work.
Reduce the risk first
Before hot work begins, combustible materials must be removed or properly protected, and the surroundings, possible ignition sources and other conditions that affect safety must be checked.
Supervision is an additional layer
Assigning a fire watch does not permit a leak, unprotected combustible materials or work in a hazardous atmosphere to remain. Supervision does not replace the required safety controls.
When supervision may be required
Additional supervision may be required because of the risk assessment, work permit, site procedure, type of work or conditions at the specific location.
Remember
First remove or reduce the hazard. Only then does a fire watch provide an additional layer of safety when required.
Practice questions
A fire watch has been assigned during hot work. Does this mean combustible materials may remain unprotected near the work area?
Select an answer to continue.
Correct answer No. The risk must first be reduced and the required safeguards applied; the fire watch is an additional layer of safety.
Explanation
Additional supervision does not replace securing the work area. Combustible materials must be removed or protected, and the need for a fire watch may follow from the risk assessment, work permit, site procedure, location conditions or type of work.
This is the last available lesson in this category in the current MVP version. Return to the category list to choose another section of the course.
Category 11 / Lesson 20
Preparing the area before hot work
You will review what must be done before welding, cutting, grinding or other work that produces sparks and high temperatures.
Combustible materials
Combustible materials must be removed from the hazardous area. If they cannot be removed, they must be properly protected in accordance with workplace conditions and procedures.
Check the surroundings
Before work begins, check the surroundings, ignition risk and any places that sparks or hot particles may reach, including openings and adjacent spaces where relevant.
Equipment and requirements
Suitable fire-fighting equipment must be available, the required permit or procedure must be checked, and additional supervision must be provided where required.
After the work
The end of welding or cutting does not always mean the end of the risk. The area must be checked in accordance with the procedure because smouldering or hidden ignition can occur later.
Practice questions
What must be checked or provided before hot work begins?
You can select more than one answer.
You can select more than one answer.
Correct answer Removal or proper protection of combustible materials., Checking the surroundings and ignition risk, and the required procedures or permit., Availability of suitable fire-fighting equipment and any required supervision.
Explanation
Before hot work, the workplace and ignition sources must be assessed, combustible materials removed or protected, procedure or permit requirements checked, and suitable fire-fighting equipment and supervision provided where required.
This is the last available lesson in this category in the current MVP version. Return to the category list to choose another section of the course.
This is the last available lesson in this category in the current MVP version. Return to the category list to choose another section of the course.
Category 12 / Lesson 1
Risks of working in confined spaces
Why confined spaces are particularly hazardous and require specific procedures.
Lesson objective
You will understand why entry into a confined space requires special care, supervision and procedures.
Typical hazards
Confined spaces may have insufficient oxygen, toxic or explosive gases, poor visibility and difficult evacuation.
Entry rules
Do not enter without the required permit, atmospheric testing, rescue plan, contact with an attendant and suitable protective equipment.
Practice questions
What best describes a confined space?
Select an answer to continue.
Correct answer A place with restricted entry or exit where specific hazards may occur.
Explanation
A confined space may have restricted access, poor ventilation and atmospheric or other hazards, so special working rules are required.
This is the last available lesson in this category in the current MVP version. Return to the category list to choose another section of the course.
Category 12 / Lesson 2
Rules for entering a confined space
Why entering a tank, duct or manhole requires a procedure.
Typical hazards
A confined space may contain insufficient oxygen, toxic gases, an explosive atmosphere, limited visibility or difficult evacuation.
Permit and checks
Entry should only take place in accordance with the procedure, after assessing the atmosphere, securing the area and arranging communication.
Supervision and rescue
An attendant should remain outside. Do not enter alone to carry out a rescue without the correct safeguards.
Practice questions
Why is the atmosphere tested before entering a confined space?
Select an answer to continue.
Correct answer To check oxygen, gases and other possible atmospheric hazards.
Explanation
Atmospheric testing helps detect oxygen deficiency, flammable gases, toxic vapors or other hazards that may be invisible to the employee.
This is the last available lesson in this category in the current MVP version. Return to the category list to choose another section of the course.
Category 12 / Lesson 3
Checks before entering a confined space
Why confined-space entry requires preparation and supervision.
Do not enter without authorisation
A confined space may contain insufficient oxygen, gases, hazardous substances or an entrapment risk.
Check the conditions and procedure
Before entry, a risk assessment, atmospheric testing, safeguards and a rescue plan are required.
Supervision is required
A person working in a confined space should remain in contact with an attendant and be able to summon help quickly.
Practice questions
What should be done if dizziness or shortness of breath occurs while working in a confined space?
Select an answer to continue.
Correct answer Stop work, leave the area if this can be done safely, and report the situation.
Explanation
Symptoms such as shortness of breath, dizziness or weakness may indicate a dangerous atmosphere. Work should be stopped and the procedure followed.
This is the last available lesson in this category in the current MVP version. Return to the category list to choose another section of the course.
Category 12 / Lesson 4
Identifying unsafe situations — confined spaces
How to notice risks in this section and respond before an incident occurs.
Observe working conditions
Before starting a task, pay attention to the surroundings, equipment, signage and the behaviour of other people.
Do not ignore changes
A change in working conditions, a new obstacle, damaged equipment or missing information may indicate a new hazard.
Respond early
The safest approach is to stop and report the problem before the situation becomes urgent or difficult to control.
Practice questions
Why is a work permit used for entry into a confined space?
Select an answer to continue.
Correct answer To confirm the conditions, safety measures, supervision and scope of work.
Explanation
A work permit organizes the requirements, entry conditions, measurements, protective measures, standby arrangements and emergency procedures.
This is the last available lesson in this category in the current MVP version. Return to the category list to choose another section of the course.
Category 12 / Lesson 5
Making a safe decision before work — confined spaces
How to make a safe decision before starting work or changing how a task is performed.
Pause before starting
A short check before work begins helps identify missing instructions, safeguards or problems with the work area.
Use the correct protective measures
Protective measures should match the task, the hazard and the rules that apply at the workplace.
Do not start if you are unsure
If you do not know how to perform the work safely, ask the responsible person before starting the task.
Practice questions
What is the role of a standby person during confined-space work?
Select an answer to continue.
Correct answer To supervise, maintain contact and call for help if a hazard occurs.
Explanation
The standby person monitors the situation, maintains communication and responds according to procedure if a hazard occurs.
This is the last available lesson in this category in the current MVP version. Return to the category list to choose another section of the course.
Category 12 / Lesson 6
Communication and hazard reporting — confined spaces
When to stop work, ask a supervisor or report a hazard.
Report clearly
A report should explain what happened, where the problem is and what risk may result.
Inform the right person
Hazards, damage and unclear instructions should be reported to the supervisor or person responsible for safety.
Do not assume someone already knows
If you see an unsafe situation, make sure it has been noticed and communicated to the appropriate person.
Practice questions
Why does ventilation alone not remove the need to follow entry procedures?
Select an answer to continue.
Correct answer Because the atmosphere can change and testing, supervision and emergency rules are still required.
Explanation
Ventilation can reduce hazards, but it does not replace testing, the work permit, supervision and emergency preparedness.
This is the last available lesson in this category in the current MVP version. Return to the category list to choose another section of the course.
Category 12 / Lesson 7
Pre-task check — confined spaces
What to check before performing a task to reduce the risk of mistakes or accidents.
Check the task
Make sure you understand the scope of work, sequence of actions and required safeguards.
Check the workplace
The work area should be accessible, tidy and free of obvious obstacles or uncontrolled hazards.
Check the equipment
Tools, protective equipment and materials should be complete, serviceable and used as intended.
Practice questions
Which hazards can occur in a confined space?
You can select more than one answer.
You can select more than one answer.
Correct answer Oxygen deficiency., Toxic or asphyxiating gases., A flammable or explosive atmosphere., Difficult evacuation.
Explanation
Confined spaces can contain atmospheric hazards and may be difficult to leave. It must not be assumed that the air is safe.
This is the last available lesson in this category in the current MVP version. Return to the category list to choose another section of the course.
Category 12 / Lesson 8
Common mistakes and how to avoid them — confined spaces
Common unsafe shortcuts and behaviours that should be avoided.
Do not take shortcuts
Skipping procedures, safeguards or checks may appear to save time, but it increases the risk of an accident.
Do not work on autopilot
Even routine tasks require attention, especially when conditions, equipment or surroundings have changed.
Do not hide problems
Defects, mistakes and unsafe situations should be reported so that the hazard does not recur.
Practice questions
What should be in place before work starts in a confined space?
You can select more than one answer.
You can select more than one answer.
Correct answer A risk assessment and work permit if required., Atmospheric testing., Established communication with the standby person., An emergency plan or rescue procedure.
Explanation
Before entry, the working conditions, measurements, communication, standby arrangements and emergency procedures must be confirmed. A short task does not remove the hazards.
This is the last available lesson in this category in the current MVP version. Return to the category list to choose another section of the course.
Category 12 / Lesson 9
Review of the key rules — confined spaces
A review of the rules to remember before moving on.
The key rule
Safe work begins with identifying the hazard and choosing the correct way to act.
Employee role
Employees should follow instructions, use protective measures and report situations that may lead to an accident.
Role of the organisation
Employers and supervisors should provide the instructions, protective measures and conditions needed for safe work.
Practice questions
Which actions are appropriate if conditions in a confined space become unsafe?
You can select more than one answer.
You can select more than one answer.
Correct answer Stop the work., Warn other people., Report the situation according to procedure., Follow the emergency plan.
Explanation
When a hazard occurs, stop work, warn others, report the situation and follow the plan. An unprepared rescue attempt must not be made.
This is the last available lesson in this category in the current MVP version. Return to the category list to choose another section of the course.
Category 12 / Lesson 10
Section summary and preparation for questions — confined spaces
A short summary of the section and preparation for later test questions.
What you should remember
From this section, remember above all how to identify risks, follow instructions and report problems.
Before the next section
The same principles will return in questions, examples and exercises later in the course.
MVP status
This is a working structural lesson. Detailed examples and test questions will be developed in later stages.
Practice questions
Assess which statements about work in confined spaces are correct.
Select YES or NO for each statement.
The atmosphere must be tested before entering a confined space.
If the atmosphere was tested in the morning, it always remains safe throughout the day.
A standby person should be provided for confined-space work.
Answer YES or NO for each statement.
Correct answer The atmosphere must be tested before entering a confined space. — YES; If the atmosphere was tested in the morning, it always remains safe throughout the day. — NO; A standby person should be provided for confined-space work. — YES
Explanation
Confined spaces may contain oxygen deficiency, gases or other dangerous substances. The atmosphere can change, so procedures, supervision and a rapid response to warning signs are necessary.
This is the last available lesson in this category in the current MVP version. Return to the category list to choose another section of the course.
Category 12 / Lesson 11
Scenario question — entry without atmospheric testing
A short scenario testing the correct response before entering a confined space.
How to approach the situation
A confined space may contain a dangerous atmosphere even when there is no detectable smell.
The safest decision
Entry is only permitted after the required atmospheric tests have been completed and the procedures have been met.
Practice questions
Put the steps before entering a confined space in the correct order.
Arrange the steps from first to last.
-
1
Enter the confined space only after approval and confirmation of safe conditions.
-
2
Check whether entry into the confined space is necessary and permitted.
-
3
Make sure the risk assessment, atmospheric testing and required preparations have been completed.
-
4
Provide supervision, communication, a rescue plan and required protective equipment.
Put the steps in the correct order.
Correct order 1. Check whether entry into the confined space is necessary and permitted. 2. Make sure the risk assessment, atmospheric testing and required preparations have been completed. 3. Provide supervision, communication, a rescue plan and required protective equipment. 4. Enter the confined space only after approval and confirmation of safe conditions.
Explanation
A confined space must not be entered without preparation. First confirm the need and authorization, assess the risk and atmosphere, provide supervision and a rescue plan, and only then enter.
This is the last available lesson in this category in the current MVP version. Return to the category list to choose another section of the course.
Category 12 / Lesson 12
Scenario question — What should you do?
This lesson prepares you for a scenario question: What should you do?
Lesson objective
This lesson prepares you for a practice question from the Confined Spaces section.
The question you will practise
What should you do?
What to pay attention to
Choose the best and safest course of action.
Remember
Before entering a confined space, the required procedures, including atmospheric testing, must be completed. No smell does not mean the atmosphere is safe.
Scenario question
Scenario
You are about to enter a confined space. Atmospheric testing has not yet been carried out, but the work is urgent.
What should you do before entering the confined space?
Choose the best and safest action.
Select an answer to continue.
Correct answer Wait to enter until the required tests have been completed and the procedures have been satisfied.
Explanation
The required procedures, including atmospheric testing, must be completed before entering a confined space. The absence of an odor does not mean the atmosphere is safe.
This is the last available lesson in this category in the current MVP version. Return to the category list to choose another section of the course.
Category 12 / Lesson 13
Complete the sentence from a list — atmospheric testing
This lesson prepares you for a dropdown-gap question about atmospheric testing before confined-space entry.
Lesson objective
This lesson reinforces that the atmosphere must be confirmed safe before entering a confined space.
The question you will practise
You will complete a sentence by selecting the correct term from a dropdown list.
What to pay attention to
Atmospheric hazards in a confined space may be invisible and odourless. The absence of smell therefore does not confirm that the atmosphere is safe.
Remember
Before entering a confined space, atmospheric testing must be carried out because there may be oxygen deficiency, toxic gas or a flammable atmosphere.
Dropdown gap-fill question
Complete the sentence about entering a confined space.
Choose the correct completion of the sentence.
Choose an answer from the list.
Correct answer atmospheric test
Explanation
Before entering a confined space, the atmosphere must be checked because oxygen deficiency, toxic gases or flammable substances may be present. The absence of an odor does not mean the atmosphere is safe.
This is the last available lesson in this category in the current MVP version. Return to the category list to choose another section of the course.
Category 12 / Lesson 14
Case study — confined-space entry
Practise decisions before confined-space entry using one scenario with several questions.
Lesson objective
The objective is to recognise that urgent work does not remove the need for atmospheric testing, an entry procedure, an attendant and emergency preparation.
The key principle
Do not enter a confined space until a safe atmosphere has been confirmed and all required procedures have been completed.
Practical decision
If atmospheric testing, an emergency plan or entry safeguards are missing, stop the preparations and put the missing safety measures in place.
Case study
Entering a confined space
Scenario
An employee is to enter a tank to carry out a short inspection. The work is urgent. Atmospheric testing has not yet been completed. A second employee is at the entrance, but rescue equipment and an emergency plan have not been prepared.
Read the scenario and answer the questions.
Question 1
What is the most important problem before entering the tank?
Correct answer The lack of atmospheric testing before entry.
Explanation
Atmospheric testing is required before entering a confined space. A short task does not remove the hazard.
Question 2
Which actions are required before safe entry?
Select all correct answers.
Correct answer Carry out atmospheric testing., Provide a standby person and a means of calling for help., Check that the procedure and work-permit requirements are met.
Explanation
Before entry, testing, procedures, standby arrangements and emergency preparation are required. The urgency of the work does not remove these requirements.
Question 3
Put the actions in the correct order.
Arrange the steps from first to last.
-
1
Enter only when all safety conditions have been met.
-
2
Stop preparations for entry and do not enter the tank.
-
3
Carry out the required atmospheric test and check the procedures.
-
4
Provide a standby person, communication and emergency-response readiness.
Correct answer 1. Stop preparations for entry and do not enter the tank. 2. Carry out the required atmospheric test and check the procedures. 3. Provide a standby person, communication and emergency-response readiness. 4. Enter only when all safety conditions have been met.
Explanation
First, do not enter an unprepared confined space. Work may begin only after testing, procedures and emergency safeguards are in place.
Answer all questions in the case study.
Case study result
Explanation
A confined space may contain an atmosphere that is dangerous to life or health. Before entry, testing, procedures, standby arrangements and emergency preparation are required.
This is the last available lesson in this category in the current MVP version. Return to the category list to choose another section of the course.
Category 12 / Lesson 15
Welding in a confined space
You will learn about the additional risks of welding in tanks, ducts and other confined spaces.
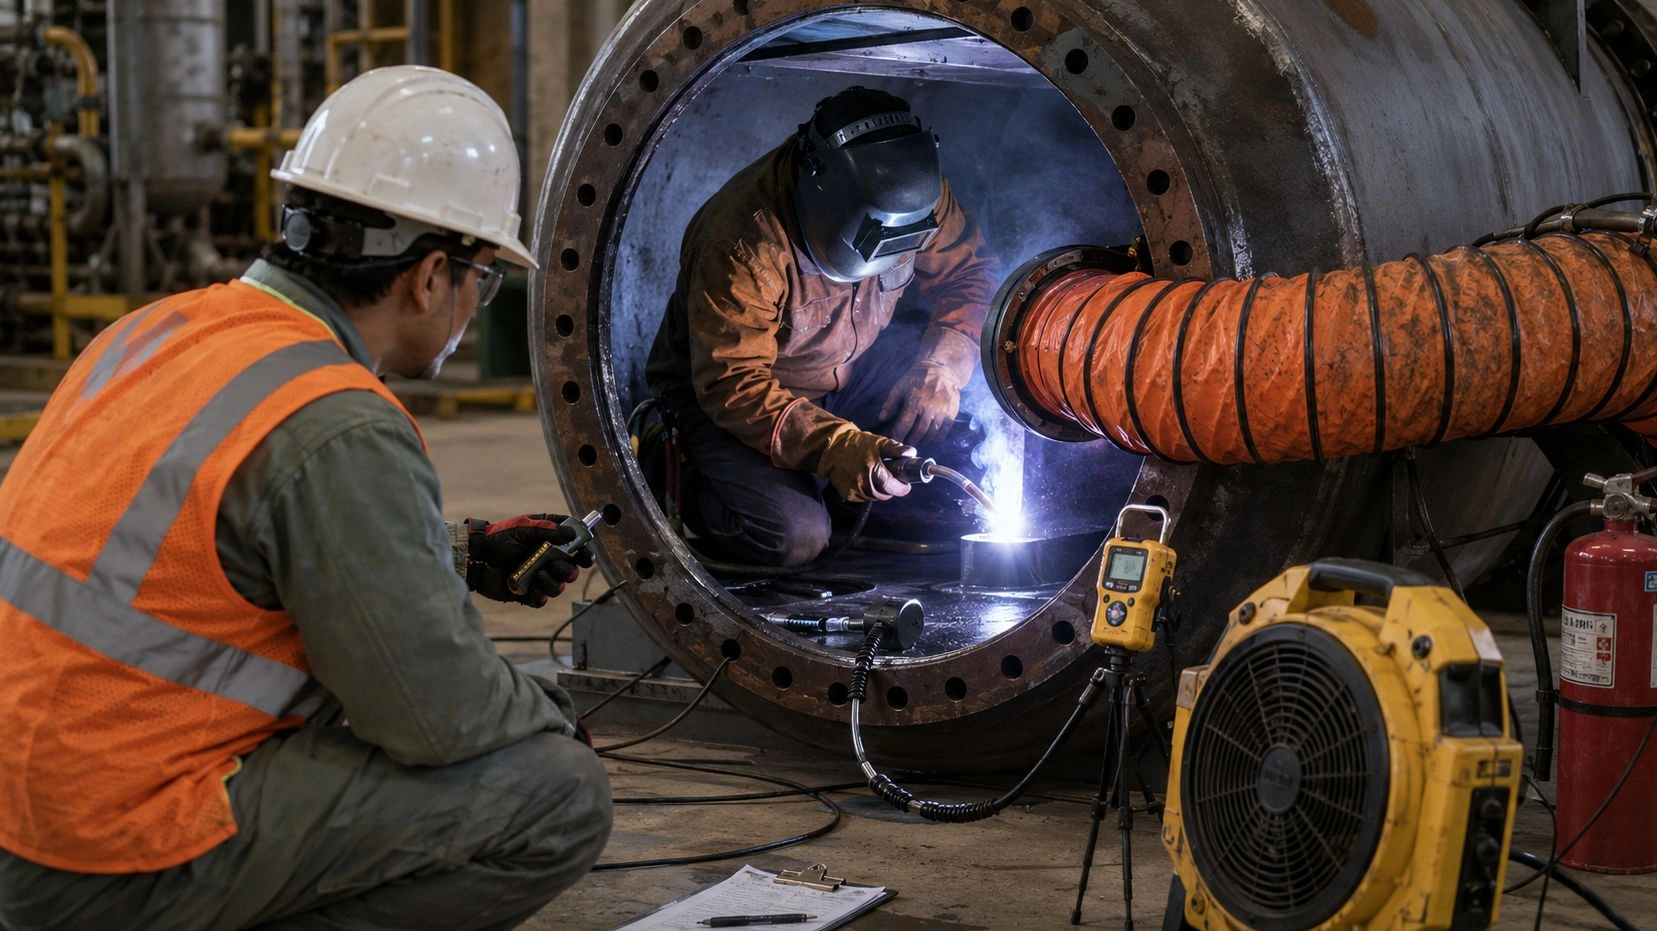
A combination of hazards
Welding in a confined space is particularly hazardous because it combines hot work, welding fumes, possible oxygen deficiency, gases, limited ventilation and more difficult evacuation.
What must be checked
Before work starts, a procedure and usually a permit, atmospheric testing, ventilation, external supervision, a rescue plan and hazard-appropriate protective equipment are required. Do not enter and weld without checking the atmosphere.
A particular example
A tank, drum or pipe may previously have contained a flammable or toxic substance. Even after emptying, vapours or residues may remain. Heating them during welding can cause poisoning, fire or explosion.
Remember
Before welding in a confined space, the key requirements are a permit, atmospheric testing, ventilation, supervision and a rescue plan. A welding helmet alone does not address the hazards of a confined space.
Practice questions
What is especially important before welding in a confined space?
Select an answer to continue.
Correct answer A permit, atmospheric testing, ventilation, supervision and a rescue plan.
Explanation
Welding in a confined space combines the risks of hot work, fumes, gases, oxygen deficiency and difficult evacuation. It requires a permit, testing, ventilation, supervision and a rescue plan.
This is the last available lesson in this category in the current MVP version. Return to the category list to choose another section of the course.
Category 12 / Lesson 16
Buitenwacht, mangatwacht and veiligheidswacht
The role of the standby person at the entrance to a confined space and terms used in the Netherlands and Belgium.
Terms used in practice
When working in a confined space, you may encounter the terms buitenwacht, mangatwacht or veiligheidswacht. In this course, they refer to the standby or safety person at the entrance. The exact duties depend on the work organisation and the procedure at the site.
An active role at the entrance
The standby person is not a passive observer. They maintain the agreed communication with the person inside, monitor the situation, check entry conditions, may prevent unauthorised entry and know how to raise the alarm or activate the emergency procedure.
Competence
VCA does not replace specialist training required for a specific role, atmospheric testing, the use of specialist equipment or rescue work.
Remember
The standby person at the entrance (NL: buitenwacht / mangatwacht / veiligheidswacht) must know how communication and calling for help will work before the job begins.
Practice questions
Who is the buitenwacht / mangatwacht / veiligheidswacht when work is carried out in a confined space?
Select an answer to continue.
Correct answer The standby person at the entrance who maintains contact, monitors the situation and can activate the emergency procedure.
Explanation
In NL/BE practice you may encounter the terms buitenwacht, mangatwacht and veiligheidswacht. They refer to the standby person at the entrance who remains at the post, maintains communication, monitors conditions and raises the alarm if necessary.
This is the last available lesson in this category in the current MVP version. Return to the category list to choose another section of the course.
Category 12 / Lesson 17
Continuous presence of the standby person
Why a worker in a confined space must not be left without the required supervision.
Position at the entrance
If the procedure requires a standby person, that person must remain at the assigned position for the required time and be ready to respond.
Do not leave without a replacement
The standby person should not leave the position while a worker is still inside unless a proper replacement and continuity of supervision have been arranged in accordance with the work organisation.
Why this matters
Conditions in a confined space can change quickly. Loss of supervision can delay the response to an alarm, atmospheric problems or loss of contact.
Remember
A worker inside should not be left without the required supervision simply because the work will be brief or an earlier atmospheric test was satisfactory.
Practice questions
May the standby person leave the entrance for a few minutes while the worker is still inside the confined space?
Select an answer to continue.
Correct answer No. The standby person should not leave the post without arranging a proper replacement in accordance with the work organisation.
Explanation
The standby person must remain available for the entire period required by the procedure. A worker inside must not be left without the agreed supervision and the ability to raise the alarm quickly.
This is the last available lesson in this category in the current MVP version. Return to the category list to choose another section of the course.
Category 12 / Lesson 18
Communication and loss of contact
Agreed communication and the correct response when contact with the person inside is lost.
Method of communication
Before entry, a working method of communication suitable for the workplace must be agreed, such as voice contact, radio or agreed signals.
Loss of contact requires a response
If the standby person loses contact with the worker inside, this must not be ignored. They must respond in accordance with the procedure, try to re-establish contact and, if necessary, raise the alarm or activate the emergency procedure.
Do not enter impulsively
Loss of contact does not mean that the standby person should automatically enter the space. Rescue entry requires the proper equipment, procedure and competence.
Remember
LOSS OF CONTACT means ACTION. The required response must be known before work begins.
Practice questions
The buitenwacht loses the agreed contact with the worker inside the confined space. What should the outside attendant do?
Select an answer to continue.
Correct answer Respond according to the agreed procedure: stop the normal work process, try to re-establish contact and, if necessary, raise the alarm or activate the emergency procedure.
Explanation
Loss of contact must not be ignored. The communication method and the response to a communication failure should be agreed before entry, and the standby person must know how to call for help.
This is the last available lesson in this category in the current MVP version. Return to the category list to choose another section of the course.
Category 12 / Lesson 19
Rescue plan and safe emergency response
What to do when a person in a confined space needs help.
Plan before entry
The method for raising the alarm, evacuation and rescue should be prepared before entry. If there is no established method for rescuing a worker safely, the work should not begin.
If someone loses consciousness
Do not automatically enter after a person who has lost consciousness. A hazardous atmosphere or another danger may still be present and could cause another casualty.
Activate the procedure
The standby person calls for help and activates the agreed plan. Rescue is carried out by people with the required competence and equipment in accordance with the procedure.
Remember
First the ALARM and the RESCUE PLAN. An unprepared rescue entry can increase the number of casualties.
Practice questions
A worker in a confined space loses consciousness. What should the standby person do?
Select an answer to continue.
Correct answer Activate the agreed rescue procedure and call for help; do not enter impulsively without the proper protection, equipment and competence.
Explanation
An unprepared rescue entry can create another casualty. The rescue plan, method of raising the alarm, required equipment and people with the appropriate competence should be arranged before work begins.
This is the last available lesson in this category in the current MVP version. Return to the category list to choose another section of the course.
Category 12 / Lesson 20
Changing conditions during the work
Why one satisfactory measurement is not enough when conditions may change.
The atmosphere can change
A satisfactory result before entry does not mean that the atmosphere will remain safe throughout the work. Gases or vapours may appear, the oxygen level may change or ventilation may stop working.
When to stop work
An atmospheric monitor alarm, failure of required ventilation, the appearance of gas or vapours, a worker feeling unwell or another significant change in conditions requires a response in accordance with the procedure.
Safe sequence
Stop work, evacuate in accordance with the procedure, report the situation and reassess or remeasure the conditions. Return is possible only after safety has been confirmed again.
Oxygen
Both oxygen deficiency and an elevated oxygen concentration can be dangerous. Safety is assessed using the appropriate measurements, not by smell or how someone feels.
Practice questions
Which situations during work in a confined space require the work to be stopped and the conditions to be reassessed?
You can select more than one answer.
You can select more than one answer.
Correct answer An atmospheric monitor alarm., Failure or shutdown of required ventilation., The appearance of gas or vapours, or a worker feeling unwell., A change in conditions that may affect safety.
Explanation
A satisfactory measurement before entry does not guarantee that the atmosphere will remain safe. When conditions change, work must be stopped, the space evacuated in accordance with the procedure and the situation reassessed before re-entry.
This is the last available lesson in this category in the current MVP version. Return to the category list to choose another section of the course.
Category 12 / Lesson 21
Isolation of energy and inflows, and evacuation preparation
Additional confined-space hazards beyond the atmosphere itself.
Energy sources and inflows
Before entry, moving parts, electrical energy, pressure and the possible inflow of liquids or gases must be considered. Hazards must be safely isolated in accordance with the applicable procedure.
Residual substances
Tanks, ducts and similar spaces may contain product residues, deposits, gases or vapours. Their effects must be included in the risk assessment, preparation and atmospheric testing.
Evacuation before work begins
Before entry, the escape route, obstacles, access for rescuers and required rescue equipment must be considered. Difficult evacuation is one of the key hazards of a confined space.
Remember
Safe entry requires control of the whole working environment: atmosphere, energy, inflows, communication and the possibility of evacuation.
Practice questions
What must be checked before entering a confined space if additional energy sources or inflows may be present?
You can select more than one answer.
You can select more than one answer.
Correct answer Whether moving parts, electrical energy, pressure and inflows of liquids or gases are safely isolated in accordance with the procedure., Whether hazardous product residues, gases or vapours have been included in the risk assessment and atmospheric testing., Whether evacuation arrangements and the emergency plan are in place.
Explanation
Before entry, not only the atmosphere but also energy, pressure and possible inflows must be controlled. A short duration of work does not remove the need to isolate hazards or prepare for evacuation.
This is the last available lesson in this category in the current MVP version. Return to the category list to choose another section of the course.
This is the last available lesson in this category in the current MVP version. Return to the category list to choose another section of the course.
Category 13 / Lesson 1
Ergonomics, health and safe physical workload
The importance of correct lifting, working posture, rest and reporting symptoms.
Lesson objective
You will learn basic principles for reducing physical strain during work.
Lifting and posture
Loads should be lifted using the legs, kept close to the body and without twisting the torso. For prolonged work, a stable posture and breaks are important.
Employee health
Pain, dizziness, fatigue or other symptoms should be reported. Ignoring symptoms can lead to a more serious accident or illness.
Practice questions
What is important when manually handling a load?
Select an answer to continue.
Correct answer Assess the weight, plan the movement and use a safe lifting technique.
Explanation
Before lifting, assess the weight, the carrying route and your capabilities. For heavy or awkward loads, assistance should be used.
This is the last available lesson in this category in the current MVP version. Return to the category list to choose another section of the course.
Category 13 / Lesson 2
Physical workload and preventing overstrain
How to reduce the risk of back pain, overexertion and fatigue.
Planning a lift
Before lifting a load, assess its weight, grip, carrying route and whether mechanical assistance can be used.
Working posture
Prolonged awkward postures, repetitive movements and excessive force increase the risk of injury.
Reporting symptoms
Pain, numbness, dizziness or fatigue may be warning signs. Report them and respond early.
Practice questions
A worker holds a light tool with raised arms for a long time. Does the low weight mean there is no risk?
Select an answer to continue.
Correct answer No. A small load maintained for a long time can also lead to overloading or strain.
Explanation
Duration of exposure matters. Working overhead, standing for long periods, bending, kneeling or holding a tool can increase physical strain even when the individual effort is small.
This is the last available lesson in this category in the current MVP version. Return to the category list to choose another section of the course.
Practice questions
A worker performs the same light hand movement for a long time. What is the best way to reduce the risk of overuse?
Select an answer to continue.
Correct answer Organise the work properly, change posture or task and take the planned breaks.
Explanation
Repetition increases physical strain even with light movements. The risk can be reduced by organising the work properly, changing posture or activity and taking the required breaks.
This is the last available lesson in this category in the current MVP version. Return to the category list to choose another section of the course.
Practice questions
Which body position usually reduces strain on the back when lifting?
Select an answer to continue.
Correct answer A stable position, keeping the load close to the body and avoiding twisting the torso.
Explanation
Keeping the load close to the body and maintaining a stable position reduces strain. Twisting the torso with a load increases the risk of injury.
This is the last available lesson in this category in the current MVP version. Return to the category list to choose another section of the course.
Category 13 / Lesson 3
Reducing overstrain and fatigue
How to work in a way that reduces the risk of injury, overstrain and fatigue-related mistakes.
Lift safely
Loads should be lifted using the legs, kept close to the body and without twisting the torso while under load.
Use mechanical assistance
Trolleys, lifting devices, handles and help from another person can reduce physical strain.
Respond to fatigue
Fatigue increases the risk of mistakes. Symptoms, dizziness or weakness should be reported.
Practice questions
What can result from prolonged repetitive movements without breaks?
Select an answer to continue.
Correct answer Overloading muscles, tendons or joints.
Explanation
Repetitive movements can lead to overuse injuries. Breaks, changing position and proper organisation of work help reduce the risk.
This is the last available lesson in this category in the current MVP version. Return to the category list to choose another section of the course.
Category 13 / Lesson 4
Identifying unsafe situations — ergonomics and health
How to notice risks in this section and respond before an incident occurs.
Observe working conditions
Before starting a task, pay attention to the surroundings, equipment, signage and the behaviour of other people.
Do not ignore changes
A change in working conditions, a new obstacle, damaged equipment or missing information may indicate a new hazard.
Respond early
The safest approach is to stop and report the problem before the situation becomes urgent or difficult to control.
Practice questions
Why are short breaks or changes of position used during physically demanding work?
Select an answer to continue.
Correct answer To reduce fatigue and physical strain.
Explanation
Breaks and changing position help reduce overloading, fatigue and loss of concentration.
This is the last available lesson in this category in the current MVP version. Return to the category list to choose another section of the course.
Category 13 / Lesson 5
Making a safe decision before work — ergonomics and health
How to make a safe decision before starting work or changing how a task is performed.
Pause before starting
A short check before work begins helps identify missing instructions, safeguards or problems with the work area.
Use the correct protective measures
Protective measures should match the task, the hazard and the rules that apply at the workplace.
Do not start if you are unsure
If you do not know how to perform the work safely, ask the responsible person before starting the task.
Practice questions
How should noise that exceeds permitted workplace limits be handled?
Select an answer to continue.
Correct answer Use the required hearing protection and report the problem if conditions are not correct.
Explanation
Noise can damage hearing. Hearing protection and reporting irregularities are part of safe working.
This is the last available lesson in this category in the current MVP version. Return to the category list to choose another section of the course.
Category 13 / Lesson 6
Communication and hazard reporting — ergonomics and health
When to stop work, ask a supervisor or report a hazard.
Report clearly
A report should explain what happened, where the problem is and what risk may result.
Inform the right person
Hazards, damage and unclear instructions should be reported to the supervisor or person responsible for safety.
Do not assume someone already knows
If you see an unsafe situation, make sure it has been noticed and communicated to the appropriate person.
Practice questions
What is important when working in dusty conditions?
Select an answer to continue.
Correct answer Reduce dust, use ventilation or respiratory protection according to the rules.
Explanation
Dust can damage the respiratory system or eyes. Exposure should be reduced and the required protective measures used.
This is the last available lesson in this category in the current MVP version. Return to the category list to choose another section of the course.
Category 13 / Lesson 7
Pre-task check — ergonomics and health
What to check before performing a task to reduce the risk of mistakes or accidents.
Check the task
Make sure you understand the scope of work, sequence of actions and required safeguards.
Check the workplace
The work area should be accessible, tidy and free of obvious obstacles or uncontrolled hazards.
Check the equipment
Tools, protective equipment and materials should be complete, serviceable and used as intended.
Practice questions
What should an employee do if they experience work-related symptoms such as back pain, numb hands or severe fatigue?
Select an answer to continue.
Correct answer Report the symptoms according to the rules and do not ignore them.
Explanation
Early reporting of symptoms makes it possible to improve the organisation of work and prevent more serious health problems.
This is the last available lesson in this category in the current MVP version. Return to the category list to choose another section of the course.
Category 13 / Lesson 8
Common mistakes and how to avoid them — ergonomics and health
Common unsafe shortcuts and behaviours that should be avoided.
Do not take shortcuts
Skipping procedures, safeguards or checks may appear to save time, but it increases the risk of an accident.
Do not work on autopilot
Even routine tasks require attention, especially when conditions, equipment or surroundings have changed.
Do not hide problems
Defects, mistakes and unsafe situations should be reported so that the hazard does not recur.
Practice questions
Which actions help reduce physical strain during manual work?
You can select more than one answer.
You can select more than one answer.
Correct answer Using mechanical assistance when available., Working in a stable position., Dividing a heavy load or working as a team when required., Planning the carrying route.
Explanation
Strain can be reduced through planning, a stable position, technical assistance and teamwork. Holding a load far from the body increases strain.
This is the last available lesson in this category in the current MVP version. Return to the category list to choose another section of the course.
Category 13 / Lesson 9
Review of the key rules — ergonomics and health
A review of the rules to remember before moving on.
The key rule
Safe work begins with identifying the hazard and choosing the correct way to act.
Employee role
Employees should follow instructions, use protective measures and report situations that may lead to an accident.
Role of the organisation
Employers and supervisors should provide the instructions, protective measures and conditions needed for safe work.
Practice questions
Which factors can negatively affect an employee's health?
You can select more than one answer.
You can select more than one answer.
Correct answer Noise without protection., Vibration transmitted to the hands or body., Dust without proper control., Long-term stress and fatigue.
Explanation
Noise, vibration, dust, stress and fatigue can harm health. A properly designed workplace is a measure that reduces physical strain.
This is the last available lesson in this category in the current MVP version. Return to the category list to choose another section of the course.
Category 13 / Lesson 10
Section summary and preparation for questions — ergonomics and health
A short summary of the section and preparation for later test questions.
What you should remember
From this section, remember above all how to identify risks, follow instructions and report problems.
Before the next section
The same principles will return in questions, examples and exercises later in the course.
MVP status
This is a working structural lesson. Detailed examples and test questions will be developed in later stages.
Practice questions
Which behaviors help when stress and fatigue affect work safety?
You can select more than one answer.
You can select more than one answer.
Correct answer Report the problem to the supervisor or according to procedure., Take breaks according to the work organisation., Avoid working when fatigue threatens concentration and safety., Respond to signs of physical or mental overload.
Explanation
Fatigue and stress can reduce concentration. Employees should respond to the signs, report the problem and use organizational measures that reduce risk.
This is the last available lesson in this category in the current MVP version. Return to the category list to choose another section of the course.
Category 13 / Lesson 11
Temperature, microclimate and a safe response
How high and low temperatures, humidity, air movement and ventilation affect safe work performance.
High temperature
Heat strain can increase because of high ambient temperature, direct sunlight, hot industrial processes, protective clothing, physical effort and long working periods. Conditions must be monitored and action taken before the work becomes unsafe.
Low temperature
Cold, wind, damp conditions, cold stores and contact with cold surfaces can reduce mobility, grip, concentration and reaction time. Prolonged exposure can therefore affect the safe performance of a task.
Workplace microclimate
Working conditions are influenced by factors such as temperature, humidity, air movement and ventilation. You do not need to memorise definitions: what matters is recognising that changes in these conditions can increase worker strain and the risk of mistakes.
What to do when conditions get worse
If the temperature or other environmental conditions become unsafe, work should not simply continue automatically. Safety must be reassessed, the required breaks and exposure-reduction measures must be used, hydration must follow workplace rules, and the problem must be reported or work stopped when necessary.
Remember
A safe response means noticing that conditions have worsened, reducing exposure and reporting the problem. Additional controls and work organisation should make it possible to continue the task safely.
Practice questions
A worker is doing heavy physical work in a high temperature and the conditions are becoming unsafe. What should the worker do?
Select an answer to continue.
Correct answer Reduce exposure, take the required breaks and follow workplace rules, and report the problem or stop work if necessary.
Explanation
High temperature, physical effort, direct sun, hot processes, protective clothing and long working periods can increase heat strain. When conditions become unsafe, exposure must be reduced and action taken in accordance with workplace rules.
This is the last available lesson in this category in the current MVP version. Return to the category list to choose another section of the course.
Practice questions
Outdoor work becomes much colder, the conditions are damp and there is a strong wind. What is the correct response?
Select an answer to continue.
Correct answer Reassess whether the task can be continued safely, apply the required measures to reduce exposure and report the worsening conditions.
Explanation
Cold, wind and damp conditions can reduce grip, mobility, concentration and reaction time. A change in conditions requires a new safety assessment and an appropriate response.
This is the last available lesson in this category in the current MVP version. Return to the category list to choose another section of the course.
Practice questions
Which conditions are part of the workplace microclimate and can affect worker safety and physical strain?
You can select more than one answer.
You can select more than one answer.
Correct answer Temperature., Humidity., Air movement and ventilation.
Explanation
Temperature, humidity, air movement and ventilation together form the workplace environmental conditions. If they worsen, worker strain may increase and safe performance of the task may be affected.
This is the last available lesson in this category in the current MVP version. Return to the category list to choose another section of the course.
This is the last available lesson in this category in the current MVP version. Return to the category list to choose another section of the course.
Category 14 / Lesson 1
What to do in an accident or emergency
Basic responses: raising the alarm, first aid, evacuation and incident reporting.
Lesson objective
You will learn how to respond to an accident, breakdown or other emergency.
First actions
First protect your own safety, warn others, alert the appropriate people and follow the workplace procedure.
Incident reporting
Accidents, near misses and hazardous situations must be reported. This helps remove the cause and prevent future incidents.
Practice questions
What is the first step when you notice an accident?
Select an answer to continue.
Correct answer Protect your own safety and assess whether there is any further danger.
Explanation
A rescuer must not put themselves or others at risk. First assess the safety of the area and then act according to procedure.
This is the last available lesson in this category in the current MVP version. Return to the category list to choose another section of the course.
Category 14 / Lesson 2
Reporting accidents and the first emergency response
What to do after an incident, accident or when you notice an emergency.
Protect yourself and others
First protect your own safety, warn people nearby and do not expose yourself to additional risk.
Raising the alarm and first aid
Call for help according to the procedure, give first aid only within your capabilities and do not obstruct rescue operations.
Reporting the incident
Accidents, near misses and hazardous conditions should be reported so that the event can be prevented from happening again.
Practice questions
When should an accident be reported to the supervisor or according to procedure?
Select an answer to continue.
Correct answer Always according to the site's procedure.
Explanation
Accidents must be reported according to procedure so that help can be provided, the area can be secured and similar events can be prevented.
This is the last available lesson in this category in the current MVP version. Return to the category list to choose another section of the course.
Category 14 / Lesson 3
First actions after noticing an emergency
How to begin responding safely to an accident, breakdown or hazard.
Protect your own safety
Do not put yourself at risk by trying to help without first assessing the hazard or without the correct protective measures.
Raise the alarm and inform others
Notify the supervisor, emergency services or people nearby in accordance with the applicable procedure.
Provide help within your capabilities
First aid and emergency actions should be carried out according to your training and without increasing the risk.
Practice questions
Why should an injured person not be moved unnecessarily?
Select an answer to continue.
Correct answer Because unnecessary movement may worsen an injury if there is no immediate danger.
Explanation
An injured person should be moved only when necessary for safety. Unnecessary movement can worsen injuries.
This is the last available lesson in this category in the current MVP version. Return to the category list to choose another section of the course.
Category 14 / Lesson 4
Identifying unsafe situations — accidents and emergencies
How to notice risks in this section and respond before an incident occurs.
Observe working conditions
Before starting a task, pay attention to the surroundings, equipment, signage and the behaviour of other people.
Do not ignore changes
A change in working conditions, a new obstacle, damaged equipment or missing information may indicate a new hazard.
Respond early
The safest approach is to stop and report the problem before the situation becomes urgent or difficult to control.
Practice questions
What should be done after an evacuation alarm is activated?
Select an answer to continue.
Correct answer Follow the evacuation instructions and use the designated route to the assembly point.
Explanation
An evacuation alarm requires action according to procedure. Use the designated route and go to the assembly point.
This is the last available lesson in this category in the current MVP version. Return to the category list to choose another section of the course.
Category 14 / Lesson 5
Making a safe decision before work — accidents and emergencies
How to make a safe decision before starting work or changing how a task is performed.
Pause before starting
A short check before work begins helps identify missing instructions, safeguards or problems with the work area.
Use the correct protective measures
Protective measures should match the task, the hazard and the rules that apply at the workplace.
Do not start if you are unsure
If you do not know how to perform the work safely, ask the responsible person before starting the task.
Practice questions
What is a near miss?
Select an answer to continue.
Correct answer An event that could have led to an accident but did not cause injury this time.
Explanation
Near misses are important warning signs. Reporting them helps prevent actual accidents.
This is the last available lesson in this category in the current MVP version. Return to the category list to choose another section of the course.
Category 14 / Lesson 6
Communication and hazard reporting — accidents and emergencies
When to stop work, ask a supervisor or report a hazard.
Report clearly
A report should explain what happened, where the problem is and what risk may result.
Inform the right person
Hazards, damage and unclear instructions should be reported to the supervisor or person responsible for safety.
Do not assume someone already knows
If you see an unsafe situation, make sure it has been noticed and communicated to the appropriate person.
Practice questions
What should be done with the incident scene after an accident if there is no immediate threat to life?
Select an answer to continue.
Correct answer Secure it against further danger and do not remove evidence unnecessarily.
Explanation
The incident scene must be secured, access restricted and the procedure followed. Important information must not be hidden or unnecessarily removed.
This is the last available lesson in this category in the current MVP version. Return to the category list to choose another section of the course.
Category 14 / Lesson 7
Pre-task check — accidents and emergencies
What to check before performing a task to reduce the risk of mistakes or accidents.
Check the task
Make sure you understand the scope of work, sequence of actions and required safeguards.
Check the workplace
The work area should be accessible, tidy and free of obvious obstacles or uncontrolled hazards.
Check the equipment
Tools, protective equipment and materials should be complete, serviceable and used as intended.
Practice questions
Which actions are appropriate after noticing an accident?
You can select more than one answer.
You can select more than one answer.
Correct answer Assess your own safety., Call for help according to procedure., Warn people nearby if a hazard exists., Provide first aid within the limits of your abilities and authorization.
Explanation
In an accident, protect safety, call for help, warn others and provide assistance safely. The event must not be ignored.
This is the last available lesson in this category in the current MVP version. Return to the category list to choose another section of the course.
Category 14 / Lesson 8
Common mistakes and how to avoid them — accidents and emergencies
Common unsafe shortcuts and behaviours that should be avoided.
Do not take shortcuts
Skipping procedures, safeguards or checks may appear to save time, but it increases the risk of an accident.
Do not work on autopilot
Even routine tasks require attention, especially when conditions, equipment or surroundings have changed.
Do not hide problems
Defects, mistakes and unsafe situations should be reported so that the hazard does not recur.
Practice questions
What may be included in a workplace emergency procedure?
You can select more than one answer.
You can select more than one answer.
Correct answer Alerting the appropriate people or emergency services., Evacuation by the designated route., Using the assembly point., Securing the incident scene.
Explanation
Emergency procedures define alerting, evacuation, assembly points and securing the area. Hiding an accident is unsafe and contrary to the rules.
This is the last available lesson in this category in the current MVP version. Return to the category list to choose another section of the course.
Category 14 / Lesson 9
Review of the key rules — accidents and emergencies
A review of the rules to remember before moving on.
The key rule
Safe work begins with identifying the hazard and choosing the correct way to act.
Employee role
Employees should follow instructions, use protective measures and report situations that may lead to an accident.
Role of the organisation
Employers and supervisors should provide the instructions, protective measures and conditions needed for safe work.
Practice questions
Which information is important when reporting an accident or emergency?
You can select more than one answer.
You can select more than one answer.
Correct answer The location of the event., The type of hazard or event., The number of injured people, if known., Whether urgent assistance is required.
Explanation
A report should enable a rapid response. The location, type of event, number of injured people and need for assistance are important.
This is the last available lesson in this category in the current MVP version. Return to the category list to choose another section of the course.
Category 14 / Lesson 10
Section summary and preparation for questions — accidents and emergencies
A short summary of the section and preparation for later test questions.
What you should remember
From this section, remember above all how to identify risks, follow instructions and report problems.
Before the next section
The same principles will return in questions, examples and exercises later in the course.
MVP status
This is a working structural lesson. Detailed examples and test questions will be developed in later stages.
Practice questions
Assess which statements about responding to an accident are correct.
Select YES or NO for each statement.
First, protect your own safety and do not expose yourself to another hazard.
An accident must be reported according to procedure.
An injured person must always be moved immediately, regardless of the situation.
Answer YES or NO for each statement.
Correct answer First, protect your own safety and do not expose yourself to another hazard. — YES; An accident must be reported according to procedure. — YES; An injured person must always be moved immediately, regardless of the situation. — NO
Explanation
In an accident, the safety of the rescuer, injured person and people nearby is most important. Do not take actions that could make the situation worse. The accident must be reported and the procedure followed.
This is the last available lesson in this category in the current MVP version. Return to the category list to choose another section of the course.
Category 14 / Lesson 11
Scenario question — injured person and an active hazard
A short scenario testing the first response to an accident where an active hazard remains.
How to approach the situation
Helping an injured person must not cause another accident. First assess whether the scene is safe.
The safest decision
First protect your own safety, warn others and call for help according to the procedure.
Practice questions
Put the basic actions after noticing an accident or emergency in the correct order.
Arrange the steps from first to last.
-
1
Help the injured person only to the extent that it is safe and within your skills.
-
2
First protect your own safety and do not expose yourself to additional danger.
-
3
Warn people nearby and, if it can be done safely, secure the incident scene.
-
4
Call for help according to the procedure in force at the workplace.
Put the steps in the correct order.
Correct order 1. First protect your own safety and do not expose yourself to additional danger. 2. Warn people nearby and, if it can be done safely, secure the incident scene. 3. Call for help according to the procedure in force at the workplace. 4. Help the injured person only to the extent that it is safe and within your skills.
Explanation
In an emergency, first protect your own safety, warn others and secure the area, call for help, and then provide assistance within safe limits.
This is the last available lesson in this category in the current MVP version. Return to the category list to choose another section of the course.
Category 14 / Lesson 12
Scenario question — What should you do first?
This lesson prepares you for a scenario question: What should you do first?
Lesson objective
This lesson prepares you for a practice question from the Accidents and Emergencies section.
The question you will practise
What should you do first?
What to pay attention to
Choose the best and safest course of action.
Remember
When helping after an accident, do not expose yourself or others to another hazard. First assess the safety of the scene, warn others and call for help.
Scenario question
Scenario
You see an injured person after a fall. An active hazard is still present nearby.
What should you do first after noticing the accident?
Choose the best and safest action.
Select an answer to continue.
Correct answer First protect your own safety, warn others and call for help according to procedure.
Explanation
When helping in an accident, do not expose yourself or others to another hazard. First assess the safety of the area, warn others and call for help.
This is the last available lesson in this category in the current MVP version. Return to the category list to choose another section of the course.
Category 14 / Lesson 13
Complete the sentence from a list — first response to an accident
This lesson prepares you for a dropdown-gap question about the first response in an accident.
Lesson objective
This lesson reinforces the safe sequence of actions during an accident or emergency.
The question you will practise
You will complete a sentence by selecting the correct first action after an accident.
What to pay attention to
A person providing help must not expose themselves to another hazard. The safety of the scene must be assessed first.
Remember
In an accident, first protect your own safety, then warn others, call for help and follow the procedure.
Dropdown gap-fill question
Complete the sentence about the first action after an accident.
Choose the correct completion of the sentence.
Choose an answer from the list.
Correct answer safety
Explanation
In an accident, first protect your own safety and do not expose yourself to another hazard. Only then warn others, call for help and act according to procedure.
This is the last available lesson in this category in the current MVP version. Return to the category list to choose another section of the course.
Category 14 / Lesson 14
Click the item securing the incident scene
This lesson prepares you for a hotspot-image question about securing an incident scene.
Lesson objective
This lesson prepares you to identify an item that helps secure an incident scene.
The question you will practise
Click the item that helps secure the incident scene.
What to pay attention to
Look for tape, a cone, a barrier or another item used to cordon off the area. Click the securing item.
Remember
Secure the incident scene if this can be done safely. Cordon or marking helps protect others from another hazard.
Image hotspot question
Click the item that helps secure the incident scene.
Click the barrier or cordon securing the incident scene.
Your click
Correct area
Click a location in the image before checking your answer.
Correct area: Barrier around the incident scene
Explanation
The incident scene should be secured if this can be done safely. A barrier or marking around the area helps protect others from further danger.
This is the last available lesson in this category in the current MVP version. Return to the category list to choose another section of the course.
Category 14 / Lesson 15
Case study — responding to an accident with an active hazard
Practise responding to an accident when the incident scene is still dangerous.
Lesson objective
The objective is to recognise that after an accident, the first priority is to prevent further injuries and secure the scene.
The key principle
Helping the injured person is important, but do not enter an active hazard without making the situation safe.
Practical decision
Warn others, prevent access to the hazard zone, call for help and provide assistance in accordance with the procedure and your capabilities.
Case study
Response to an accident with an active hazard
Scenario
An employee notices a person injured after a fall. An active hazard is still present nearby: a spilled substance and moving transport vehicles. Several people want to approach the injured person immediately.
Read the scenario and answer the questions.
Question 1
What should be done first?
Correct answer Warn others and protect the safety of the incident scene.
Explanation
The first step is to protect your own safety and that of others. Entering an active hazard can cause another accident.
Question 2
Which actions are correct in this situation?
Select all correct answers.
Correct answer Warn people nearby not to enter the hazard area., Secure the incident scene according to procedure., Call for help and provide information about the active hazard.
Explanation
Correct actions reduce the number of people exposed to the hazard, initiate assistance and communicate information about the situation.
Question 3
Put the response actions in the correct order.
Arrange the steps from first to last.
-
1
Provide assistance according to procedure when it can be done safely.
-
2
Assess the situation from a safe distance and warn others.
-
3
Secure or cordon off the active hazard area.
-
4
Call for help and provide information about the injured person and the hazards.
Correct answer 1. Assess the situation from a safe distance and warn others. 2. Secure or cordon off the active hazard area. 3. Call for help and provide information about the injured person and the hazards. 4. Provide assistance according to procedure when it can be done safely.
Explanation
First assess the situation and warn others, then secure the area, call for help and only then provide assistance safely.
Answer all questions in the case study.
Case study result
Explanation
During an accident, first protect your own safety and that of other people. Do not create additional casualties. Warn others, secure the area, call for help and act according to procedure.
This is the last available lesson in this category in the current MVP version. Return to the category list to choose another section of the course.
This is the last available lesson in this category in the current MVP version. Return to the category list to choose another section of the course.